11
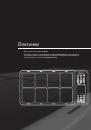
O
ver
view
Basic Oper
ation
Adv
. 1 (K
it)
Adv
. 2 (P
hr
ase)
Adv
. 3 (
O
ther)
A
ppendix
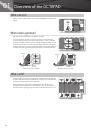
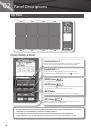
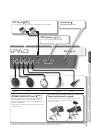
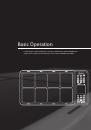
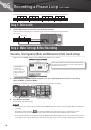
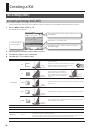
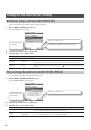
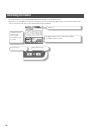
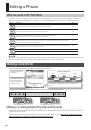
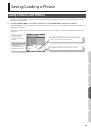
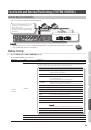
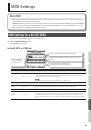
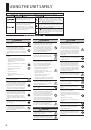
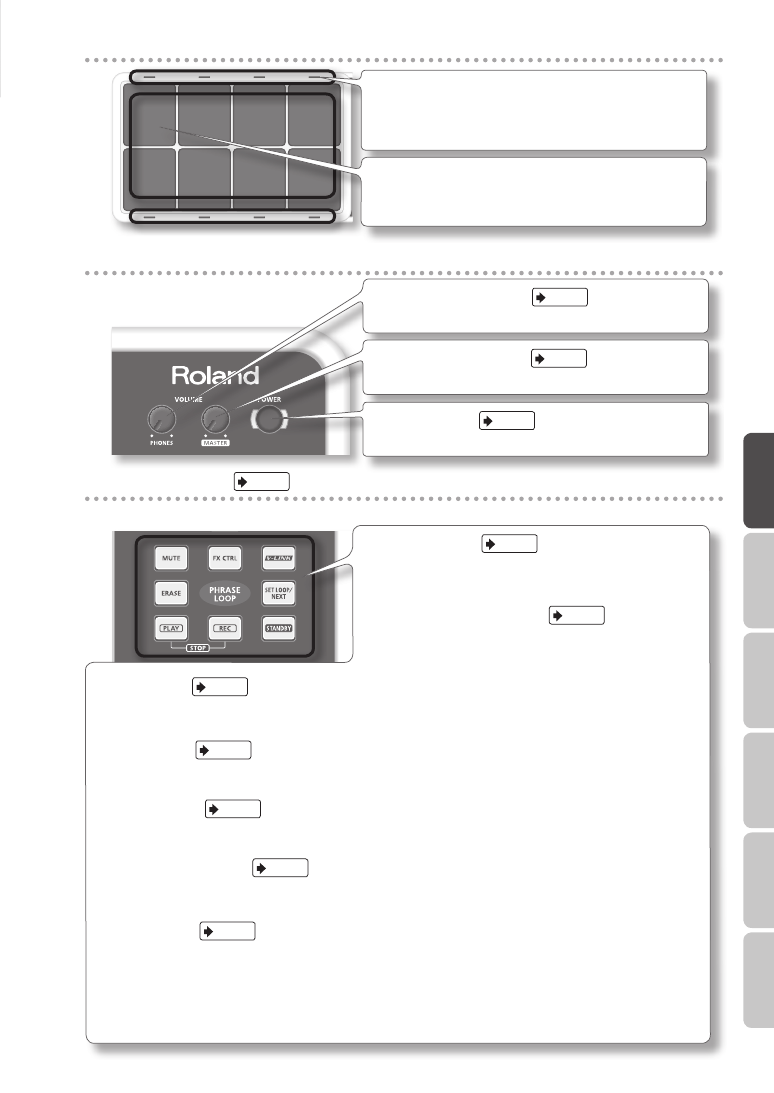
Playing area
Pad Status Illumination
The LED indicators can be helpful when playing on a dark stage. See
“Illumination” (p. 52).
When using a Phrase Loop, they will show pad status (muted, erase, etc.)
Pad
Play them with sticks.
*
Playing anything other than the pads can cause malfunctions.
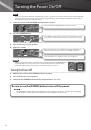
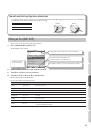
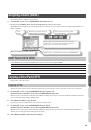
Volume & Power
[VOLUME/PHONES] knob
Adjusts the headphone volume.
[VOLUME/MASTER] knob
Adjusts the volume of the OUTPUT jacks.
[POWER] button
For turning the power on/off.
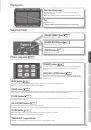
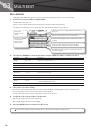
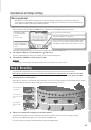
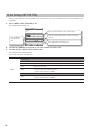
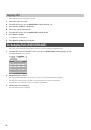
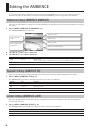
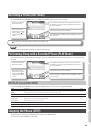
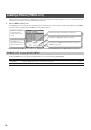
Phrase Loop area
[STANDBY] button
For entering Phrase Loop mode. The Setup screen appears while holding
down this button, and you can use the pads to select the number of
measures.
[PLAY]/[REC] ([STOP]) button
These buttons switch between recording (overdubbing) and playing the
Phrase Loop. You can stop the phrase by pressing the [PLAY]/[REC] buttons
simultaneously.
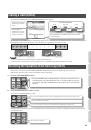
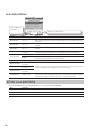
[MUTE] button
While holding down this button and hitting a pad, you can mute or un-mute the corresponding track.
Mute status is shown in the display and by the pad’s illumination.
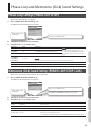
[ERASE] button
While holding down this button and hitting a pad, you can erase a specific portion of a track. Hit the pad at the moment you want to start
erasing, and once again when you want to stop. Erase status is shown in the display and by the pad’s illumination.
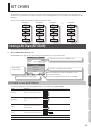
[FX CTRL] button
Press this button to access a screen allowing you to use the knobs to control effects. While in Phrase Loop record mode, these knob
movements will be recorded.
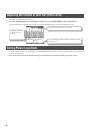
[SET LOOP/NEXT] button
When this button is blinking, you can set the loop point (p. 43).
When this button is lit, it is for reserving the operation (MUTE/PLAY/REC/STOP) that will occur at the beginning of the next loop (p. 47).
[V-LINK] button
Pushing this button selects V-LINK mode, allowing you to control video devices in real time.
This button will function even when not in Phrase Loop Mode.
“PHRASE LOOP” tempo Indicator
This blinks in time with tempo. To turn this function off, see “Tempo Indicator” (p. 52).