45
O
ver
view
Basic Oper
ation
Adv
. 1 (K
it)
Adv
. 2 (P
hr
ase)
Adv
. 3 (
O
ther)
A
ppendix
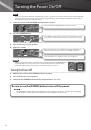
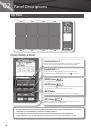
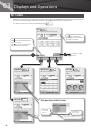
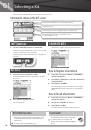
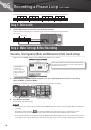
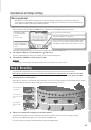
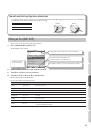
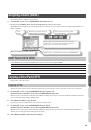
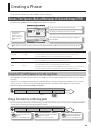
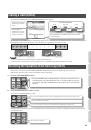
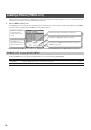
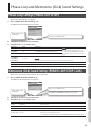
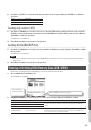
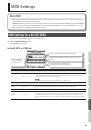
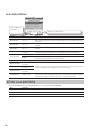
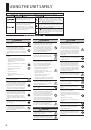
Recording a Phrase (REC Mode)
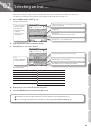
From the PHRASE LOOP STANDBY screen, press [Button 2] (START) or hit a pad to start recording.
This indicates each part’s kit. If not even one note has been
recorded in a part, a check mark is displayed and you won’t
be able to switch kits.
Indicates the current measure and beat.
Shows each pad’s track
data and Inst name.
The bar indicates the
data of all parts, and the
position pointer and
remaining measures are
shown.
You can use [Button 1] (PART 1)–[Button 3] (PART 3) to switch
the current part.
For details on operation, refer to “Step 3: Recording” (p. 27).
MEMO
You can cancel (Undo) the recording you just performed (p. 28).
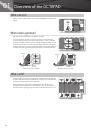
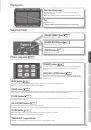
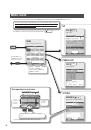
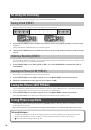
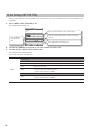
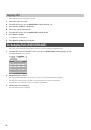
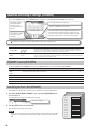
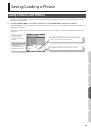
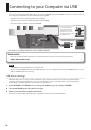
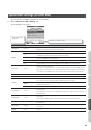
Performing Along with a Recorded Phrase (PLAY Mode)
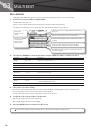
Press the [PLAY] button; the [PLAY] button will light, and you’ll switch to Play mode. Recording will not occur even if you play
the pads.
This indicates each part’s kit. If not even one note has been
recorded in a part, a check mark is displayed and you won’t
be able to switch kits.
Indicates the current measure and beat.
Shows each pad’s track
data and Inst name.
The bar indicates the
data of all parts, and the
position pointer and
remaining measures are
shown.
You can use [Button 1] (PART 1)–[Button 3] (PART 3) to switch
the current part.
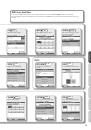
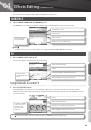
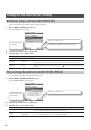
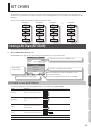
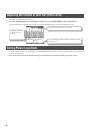
REC/PLAY Screen QUICK MENU
From the PHRASE LOOP STANDBY screen, press the [QUICK] button to access the following QUICK MENU.
Menu
Explanation
Page
Undo REC (or Undo
ERASE)
You can undo a recording or erase operation that you just performed. Immediately after recording or erasing, perform the
following operation. Once you stop the phrase, it will no longer be possible to Undo.
Part Level
Adjusts the level of parts 1–3.
Favorite ON
When ON, you can choose kits from favorite kits only.
Kit Chain ON
When ON, you can choose kits from the Kit Chain only.
Fav/Chain OFF
This turns either of the 2 above choices OFF.
—
Click ON/OFF
Turns the click sound on/off.
Clear Part Data
Erases the data of the currently selected part. A confirmation screen will appear; press [Button 3] (OK) to confirm.
—
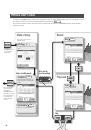
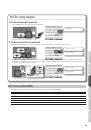
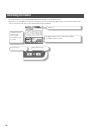
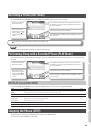
Stopping the Phrase (STOP)
To stop the phrase, hold down the [PLAY] button and press the [REC] button.
You will return to the STANDBY screen (p. 44).