27
O
ver
view
Basic Oper
ation
Adv
. 1 (K
it)
Adv
. 2 (P
hr
ase)
Adv
. 3 (
O
ther)
A
ppendix
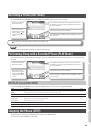
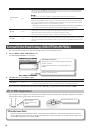
Quantization and tempo settings
What is quantization?
Quantization is a function that automatically corrects the timing of your playing. It only functions during the
recording process. By making the appropriate quantization setting, you choose between resolution intervals of 8th
notes, 12th note triplets, 16th notes, or 24th note triplets.
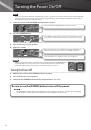
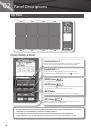
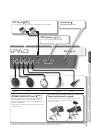
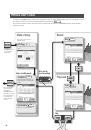
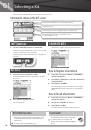
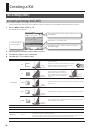
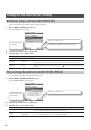
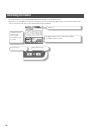
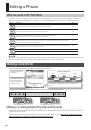
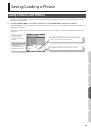
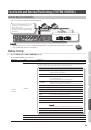
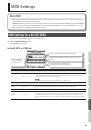
When you take your finger off the [STANDBY] button, it will light and the PHRASE LOOP screen appears.
The currently selected kit is shown.
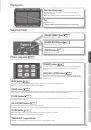
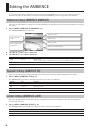
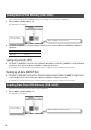
Turn [Knob 3] (TEMPO) to set the tempo.
You can set the tempo manually by tapping [Button 3] (TAP)
four times or more. You can also set the tempo by holding
down [Button 3] (TAP) and playing a pad four times or more.
Turn [Knob 1] (QTZ)
to select the quantize
interval.
Or select “OFF.”
To start recording, press
[Button 2] (START) or hit
a pad.
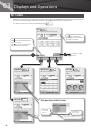
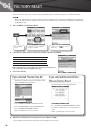
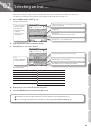
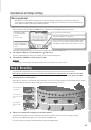
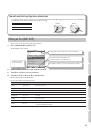
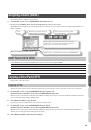
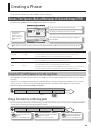
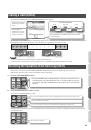
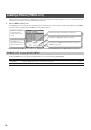
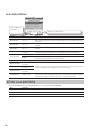
Now make settings for the phrase that you will record (quantize to 8th notes, tempo 100).
3.
Turn [Knob 1] (QTZ) to set quantization to “ 8” (8th notes) .
If you’re confident that you have precise timing, you can leave this setting “OFF.”
4.
Turn [Knob 3] (TEMPO) to set the tempo at “100 .”
MEMO
You can also set the tempo of the phrase before entering standby mode, in the kit screen.
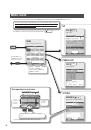
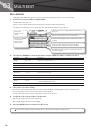
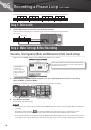
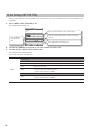
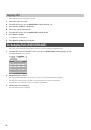
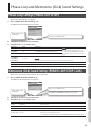
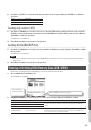
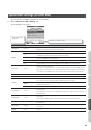
Step 3: Recording
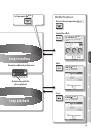
Play the pads in rhythm with the click. Recording automatically begins the moment you hit the first pad.
*
Recording or playback will not start even if you press the [REC] button or [PLAY] button . These buttons only switch
between Record and Play modes . In order to start the phrase, you must either hit a pad or press [Button 2] (START) .
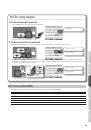
1.
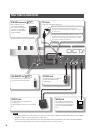
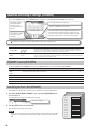
Hit the pads to record the phrase .
Although you are free to record all pads at the same time, you can also record (overdub) each pad individually, for example
by starting with the bass drum, then recording the snare drum, and then the hi-hat etc.
Record the hi-hat on
the third pass
Start recording!
Record the bass
drum on the first
pass
Record the snare
drum on the second
pass
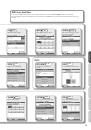
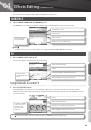
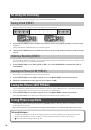
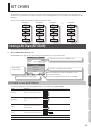
2.
When you’re finished recording, press the [PLAY] button .
The [PLAY] button lights, and you’re switched to Play mode. The phrase will play only. No recording is possible.
•
If you press the [REC] button again, you return to the Record (REC) mode.
•
To stop the phrase, hold down the [PLAY] button and press the [REC] button.