Chapter 12
Camera
90
Capture an experience with time-lapse.
Choose Time-Lapse, set up iPad where you want, then
tap the Record Time-Lapse Video button to start capturing a sunset, a flower opening, or other
experiences over a period of time. Tap the Record Time-Lapse Video button again to stop. The
time-lapse photos are compiled into a short video that you can watch and share.
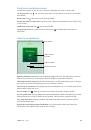
Shoot some video.
Choose Video, then tap the Record Video button or press either volume
button to start and stop recording. Video records at 30 fps (frames per second).
Take it slow.
(iPad Air 2) Choose Slo-Mo to shoot slow motion video at 120 fps. You can set which
section to play back in slow-motion when you edit the video.
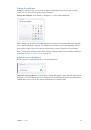
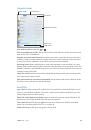
Set the slow-motion section of a video.
Tap the thumbnail, then use the vertical bars beneath
the frame viewer to set the section you want to play back in slow motion.
Zoom in or out.
(iSight camera) Pinch the image on the screen. With iPad Air (all models) and
iPad mini 2 and later, zooming works in video mode as well as photo mode.
If Location Services is turned on, photos and videos are tagged with location data that can be
used by apps and photo-sharing websites. See
on page 41.
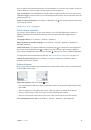
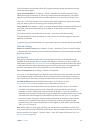
Use the capture timer to put yourself in the shot.
Avoid “camera shake” or add yourself to a
picture by using the capture timer. To include yourself, first stabilize iPad and frame your shot.
Tap , tap 3s (seconds) or 10s, then tap the Take Picture button.
Want to capture what’s displayed on your screen?
Simultaneously press and release the Sleep/
Wake and Home buttons. The screenshot is added to the Photos tab in Photos and can also be
viewed in the Camera Roll album or All Photos album (if you’re using iCloud Photo Library).
Make it better.
You can edit photos and trim videos, right on iPad. See
on page 85.
Use Siri.
Say something like:
•
“Open Camera”
•
“Take a picture”
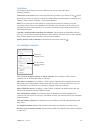
HDR
HDR
(High Dynamic Range) helps you get great shots in high-contrast situations. iPad takes
multiple photos in rapid succession, at different exposure settings—and blends them together.
The resulting photo has better detail in the bright and midtone areas.
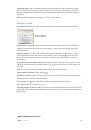
Use HDR.
(iSight camera on iPad 3rd generation or later) Tap HDR. For best results, keep iPad
steady and avoid subject motion.
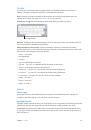
Keep the normal photo and the HDR version.
Go to Settings > Photos & Camera > Keep Normal
Photo. Both the normal and HDR versions of the photo appear in Photos. HDR versions of photos
in your albums are marked with “HDR” in the corner.
 1
1
 2
2
 3
3
 4
4
 5
5
 6
6
 7
7
 8
8
 9
9
 10
10
 11
11
 12
12
 13
13
 14
14
 15
15
 16
16
 17
17
 18
18
 19
19
 20
20
 21
21
 22
22
 23
23
 24
24
 25
25
 26
26
 27
27
 28
28
 29
29
 30
30
 31
31
 32
32
 33
33
 34
34
 35
35
 36
36
 37
37
 38
38
 39
39
 40
40
 41
41
 42
42
 43
43
 44
44
 45
45
 46
46
 47
47
 48
48
 49
49
 50
50
 51
51
 52
52
 53
53
 54
54
 55
55
 56
56
 57
57
 58
58
 59
59
 60
60
 61
61
 62
62
 63
63
 64
64
 65
65
 66
66
 67
67
 68
68
 69
69
 70
70
 71
71
 72
72
 73
73
 74
74
 75
75
 76
76
 77
77
 78
78
 79
79
 80
80
 81
81
 82
82
 83
83
 84
84
 85
85
 86
86
 87
87
 88
88
 89
89
 90
90
 91
91
 92
92
 93
93
 94
94
 95
95
 96
96
 97
97
 98
98
 99
99
 100
100
 101
101
 102
102
 103
103
 104
104
 105
105
 106
106
 107
107
 108
108
 109
109
 110
110
 111
111
 112
112
 113
113
 114
114
 115
115
 116
116
 117
117
 118
118
 119
119
 120
120
 121
121
 122
122
 123
123
 124
124
 125
125
 126
126
 127
127
 128
128
 129
129
 130
130
 131
131
 132
132
 133
133
 134
134
 135
135
 136
136
 137
137
 138
138
 139
139
 140
140
 141
141
 142
142
 143
143
 144
144
 145
145
 146
146
 147
147
 148
148
 149
149
 150
150
 151
151
 152
152
 153
153
 154
154
 155
155
 156
156
 157
157
 158
158
 159
159
 160
160
 161
161
 162
162
 163
163
 164
164
 165
165
 166
166
 167
167
 168
168
 169
169