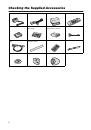
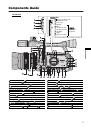
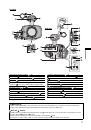
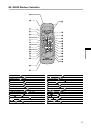
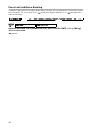
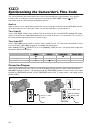
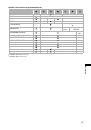
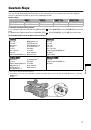
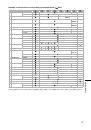
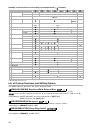
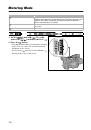
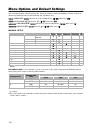
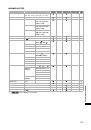
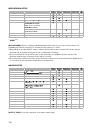
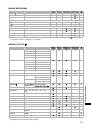
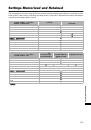
84
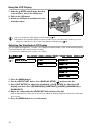
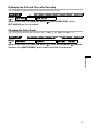
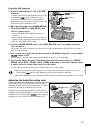
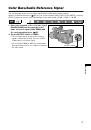
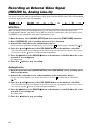
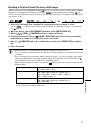
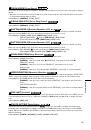
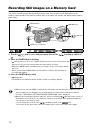
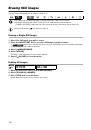
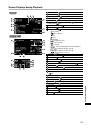
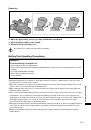
Recording an External Video Signal
(HDV/DV In, Analog Line-In)
You can record on the tape an external video signal, either from the HDV/DV input (SD or HD standard)
or from the analog video input (SD standard).
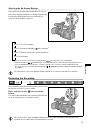
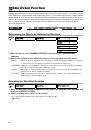
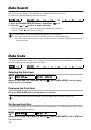
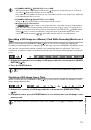
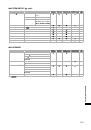
HDV/DV In
When recording from an external digital device you can select the time code to be used for the
recording made with this camcorder. Select [COPY] to keep the original time code of the video source,
or [REGEN.] to use instead this camcorder’s internal time code.
1. Open the menu, select [SIGNAL SETUP] and then select the [TIME CODE] submenu.
2. Select [HDV/DV IN], select a setting option and close the menu.
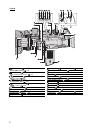
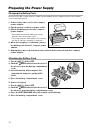
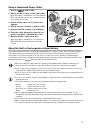
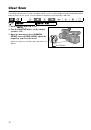
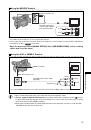
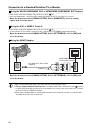
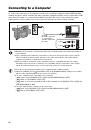
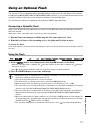
3. Connect the camcorder to the external video device.
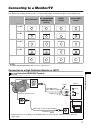
For the connection diagram to a digital device refer to Section
of
Connecting to a Monitor/TV
(
79).
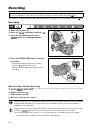
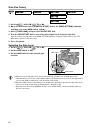
4. Press the
and
buttons (or the REC PAUSE button on the wireless controller).
• The camcorder enters the record pause mode. In this mode you can monitor the picture on the screen.
• If you press only the
button, recording will start immediately.
5. Press the
button (or the PAUSE
button on the wireless controller) when the scene
you wish to record appears.
Recording starts.
6. Press the
button to stop recording.
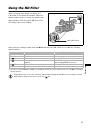
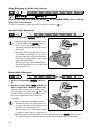
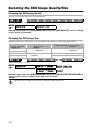
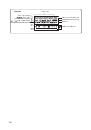
Analog Line-In
1. Open the menu and select [AUDIO SETUP]. Select [DV AUDIO], select a setting option
and close the menu.
2. Connect the camcorder to the output terminals of the analog video device.
For the connection diagram to an analog device refer to Section
of
Connecting to a Monitor/TV
(
79).
3. Press the
and
buttons (or the REC PAUSE button on the wireless controller).
• The camcorder enters the record pause mode. In this mode you can monitor the picture on the screen.
• If you press only the
button, recording will start immediately.
4. Press the
button (or the PAUSE
button on the wireless controller) when the scene
you wish to record appears.
Recording starts.
5. Press the
button to stop recording.
3
4
 1
1
 2
2
 3
3
 4
4
 5
5
 6
6
 7
7
 8
8
 9
9
 10
10
 11
11
 12
12
 13
13
 14
14
 15
15
 16
16
 17
17
 18
18
 19
19
 20
20
 21
21
 22
22
 23
23
 24
24
 25
25
 26
26
 27
27
 28
28
 29
29
 30
30
 31
31
 32
32
 33
33
 34
34
 35
35
 36
36
 37
37
 38
38
 39
39
 40
40
 41
41
 42
42
 43
43
 44
44
 45
45
 46
46
 47
47
 48
48
 49
49
 50
50
 51
51
 52
52
 53
53
 54
54
 55
55
 56
56
 57
57
 58
58
 59
59
 60
60
 61
61
 62
62
 63
63
 64
64
 65
65
 66
66
 67
67
 68
68
 69
69
 70
70
 71
71
 72
72
 73
73
 74
74
 75
75
 76
76
 77
77
 78
78
 79
79
 80
80
 81
81
 82
82
 83
83
 84
84
 85
85
 86
86
 87
87
 88
88
 89
89
 90
90
 91
91
 92
92
 93
93
 94
94
 95
95
 96
96
 97
97
 98
98
 99
99
 100
100
 101
101
 102
102
 103
103
 104
104
 105
105
 106
106
 107
107
 108
108
 109
109
 110
110
 111
111
 112
112
 113
113
 114
114
 115
115
 116
116
 117
117
 118
118
 119
119
 120
120
 121
121
 122
122
 123
123
 124
124
 125
125
 126
126
 127
127
 128
128
 129
129
 130
130
 131
131
 132
132
 133
133
 134
134
 135
135
 136
136
 137
137
 138
138
 139
139
 140
140
 141
141
 142
142
 143
143
 144
144
 145
145
 146
146
 147
147
 148
148
 149
149
 150
150
 151
151
 152
152