49
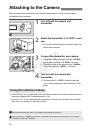
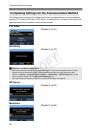
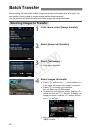
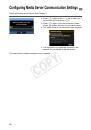
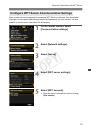
Configuring EOS Utility Communication Settings
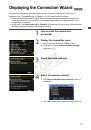
3
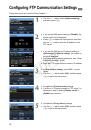
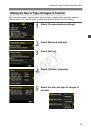
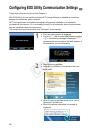
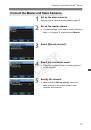
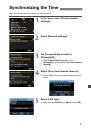
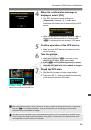
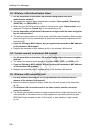
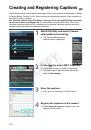
Double-click the pairing software icon.
X
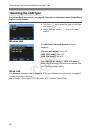
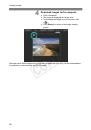
Detected cameras are listed. If a camera is
already connected, it is not displayed in the list.
Click [
Connect
].
If multiple cameras are displayed, identify the
camera to connect to by its [
MAC address
] or [
IP
address
].
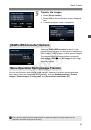
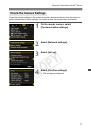
You can check the [
MAC address
] and [
IP
address
] by accessing [
Confirm settings
] in the
menu (p.84).
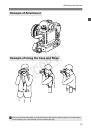
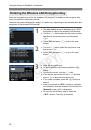
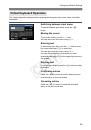
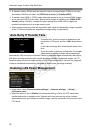
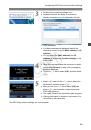
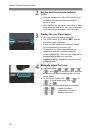
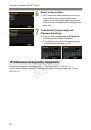
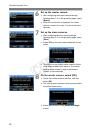
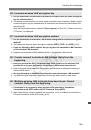
4
When the camera detects the computer on which
you clicked [
Connect
] in step 3, the message on
the left is displayed.
Turn the <
5
> dial to select [
OK
], and then press
<
0
>.
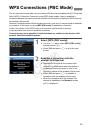
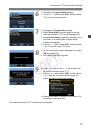
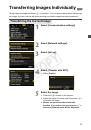
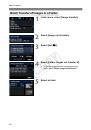
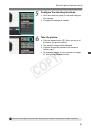
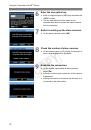
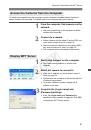
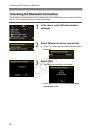
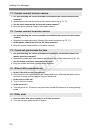
5
Press <
0
> and turn the <
5
> dial to select the
set number, and then press <
0
>.
After you turn the <
5
> dial to select [
OK
] and
press <
0
>, the connection wizard closes and
EOS Utility starts up.
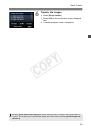
X
The <
LAN
> lamp on the transmitter lights up green.
Settings information is stored on the camera. It is
not stored on the transmitter.
The EOS Utility network settings are now complete.
COP
Y
 1
1
 2
2
 3
3
 4
4
 5
5
 6
6
 7
7
 8
8
 9
9
 10
10
 11
11
 12
12
 13
13
 14
14
 15
15
 16
16
 17
17
 18
18
 19
19
 20
20
 21
21
 22
22
 23
23
 24
24
 25
25
 26
26
 27
27
 28
28
 29
29
 30
30
 31
31
 32
32
 33
33
 34
34
 35
35
 36
36
 37
37
 38
38
 39
39
 40
40
 41
41
 42
42
 43
43
 44
44
 45
45
 46
46
 47
47
 48
48
 49
49
 50
50
 51
51
 52
52
 53
53
 54
54
 55
55
 56
56
 57
57
 58
58
 59
59
 60
60
 61
61
 62
62
 63
63
 64
64
 65
65
 66
66
 67
67
 68
68
 69
69
 70
70
 71
71
 72
72
 73
73
 74
74
 75
75
 76
76
 77
77
 78
78
 79
79
 80
80
 81
81
 82
82
 83
83
 84
84
 85
85
 86
86
 87
87
 88
88
 89
89
 90
90
 91
91
 92
92
 93
93
 94
94
 95
95
 96
96
 97
97
 98
98
 99
99
 100
100
 101
101
 102
102
 103
103
 104
104
 105
105
 106
106
 107
107
 108
108
 109
109
 110
110
 111
111
 112
112
 113
113
 114
114
 115
115
 116
116
 117
117
 118
118
 119
119
 120
120
 121
121
 122
122
 123
123
 124
124
 125
125
 126
126