Replacing consumable items > 46
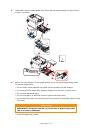
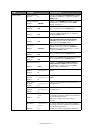
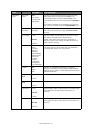
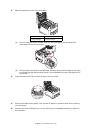
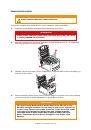
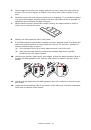
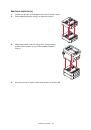
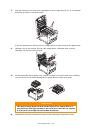
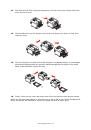
5.
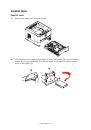
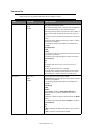
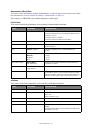
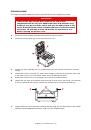
With the coloured toner release lever (1) to the right, pull the lever towards you.
This will release the bond between the toner cartridge and the image drum unit.
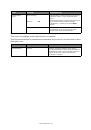
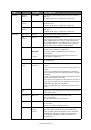
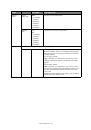
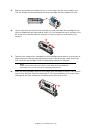
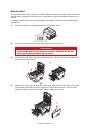
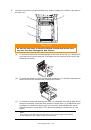
6.
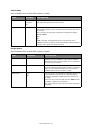
Lift the right-ha
nd end of the toner cartridge (1) and then draw the cartridge to the
right to release the left-hand end as shown (2), and
withdraw the toner cartridge out of
the image drum cartridge. Place the cartridge on a piece of paper to avoid marking your
furniture.
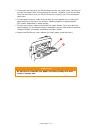
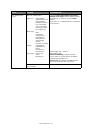
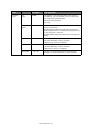
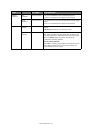
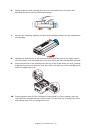
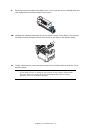
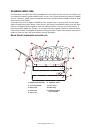
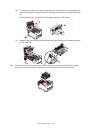
7.
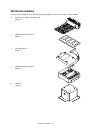
Take the new image drum cartridge out of its packaging and place it on the piece of
paper where the old cartridge was placed. Keep it the same way round as the old
unit. Pack the old cartridge inside the packaging material for disposal.
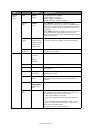
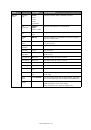
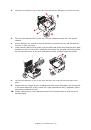
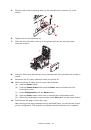
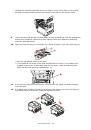
8.
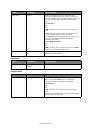
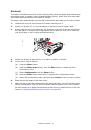
Place the toner cartridge onto the new image drum cartridge as shown. Push the left
end in first, and then lower the right end in. (It is not necessary to fit a new toner
cartridge at this time unless the remaining toner level is very low.)
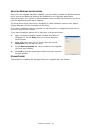
NOTE:
Follow instructions that come with the new image drum for additional
information such as the removal of packaging material etc.
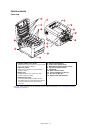
1
2
1
2
1