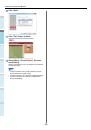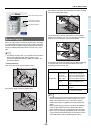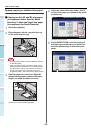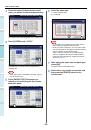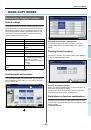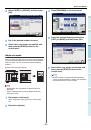
BASIC COPY MODES
- 56 -
1
2
3
4
5
6
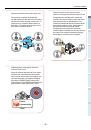
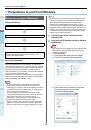
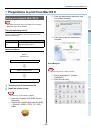
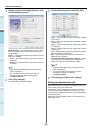
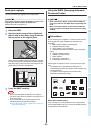
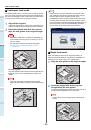
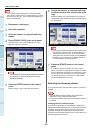
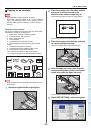
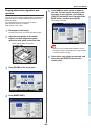
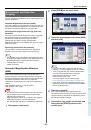
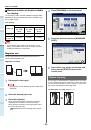
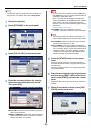
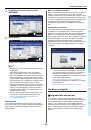
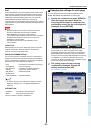
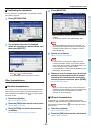
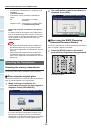
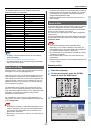
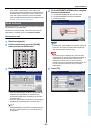
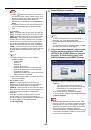
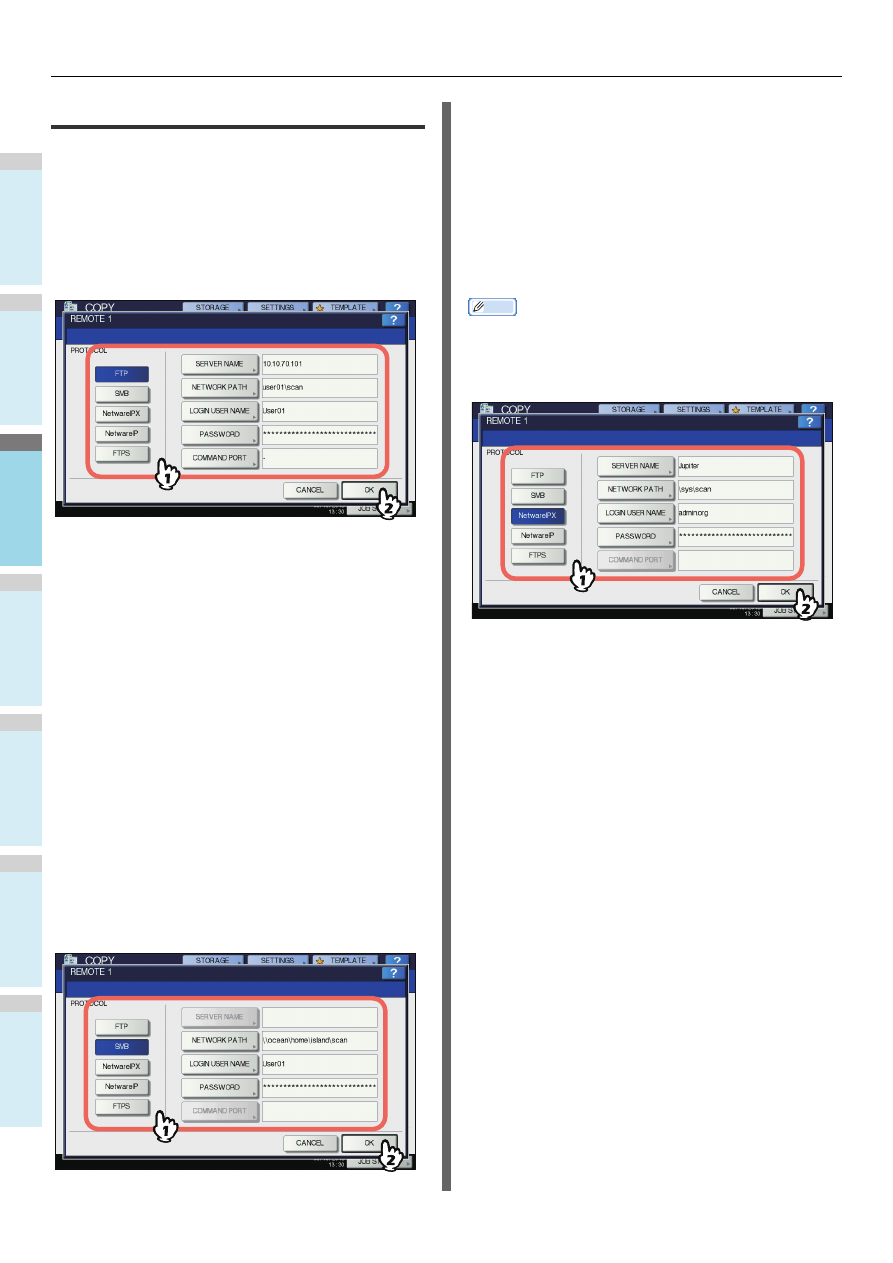
Setting share folder
When a user who has the privilege of setting a share folder has
pressed [REMOTE 1] or [REMOTE 2], the menu for specifying
a directory appears.
The setting items differ depending on the file transfer protocol
to be used. FTP, SMB, NetWare IPX/SPX, NetWare TCP/IP
and FTPS are selectable for a file transfer protocol.
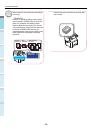
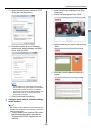
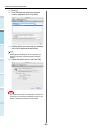
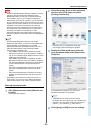
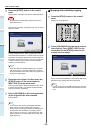
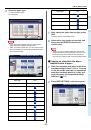
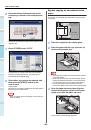
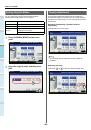
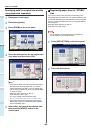
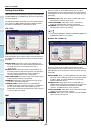
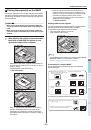
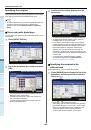
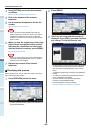
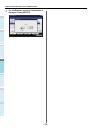
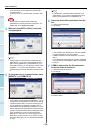
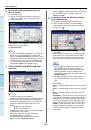
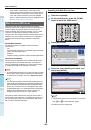
FTP / FTPS
When you press any of the buttons below, the on-screen
keyboard appears. Enter with the buttons on the touch panel or
the digital keys on the control panel. When you finish the entry,
press [OK].
SERVER NAME:
Press this to enter the IP address of FTP
server. For example, if the data should be transferred to an
FTP folder ftp://10.10.70.101/user01/scan/, key in
“10.10.70.101”.
NETWORK PATH:
Press this to enter a network path to an
FTP folder where the data are to be stored. For example, if
the data should be transferred to an FTP folder ftp://
10.10.70.101/user01/scan/, enter “user01\scan”.
LOGIN USER NAME:
Press this to enter a user name to login
to the FTP server. Enter this as required.
PASSWORD:
Press this to enter a password to login to the
FTP server. Enter this as required.
COMMAND PORT:
Press this to key in a command port
number for executing commands. Normally “-” is entered in
this field, which means that a port number set by the
administrator will be used. Change this only when you want
to use any other port number.
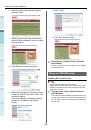
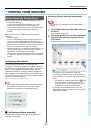
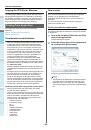
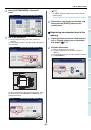
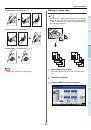
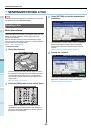
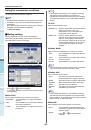
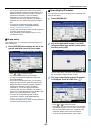
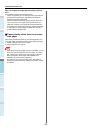
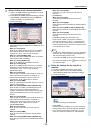
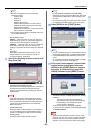
SMB
When you press any of the buttons below, the on-screen
keyboard appears. Enter with the buttons on the touch panel or
the digital keys on the control panel. When you finish the entry,
press [OK].
NETWORK PATH:
Press this to enter a network path to the
folder where the data are to be stored.
LOGIN USER NAME:
Press this to enter a user name to
access the network folder. Enter this as required.
PASSWORD:
Press this to enter a password to access the
network folder. Enter this as required.
Memo
• If you selected [SMB], the settings for [SERVER NAME] and
[COMMAND PORT] are not required.
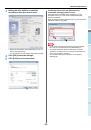
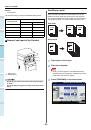
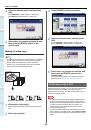
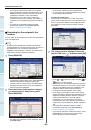
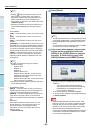
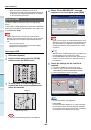
NetWare IPX / NetWare IP
When you press any of the buttons below, the on-screen
keyboard appears. Enter with the buttons on the touch panel or
the digital keys on the control panel. When you finish the entry,
press [OK].
SERVER NAME:
When you select [NetWare IPX], enter either
the server name of NetWare server or Tree/Context (if NDS
is usable). When you select [NetWare IP], enter the IP
address of NetWare server.
NETWORK PATH:
Press this to enter a network path to a
NetWare server folder where the data are to be stored. For
example, if the data should be transferred to a folder
“sys\scan” of NetWare server, enter “\sys\scan”.
LOGIN USER NAME:
Press this to enter a user name to login
NetWare server. Enter this as required.
PASSWORD:
Press this to enter a password to login NetWare
server. Enter this as required.