19 -
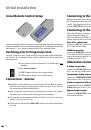
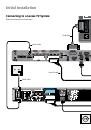
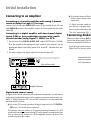
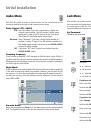
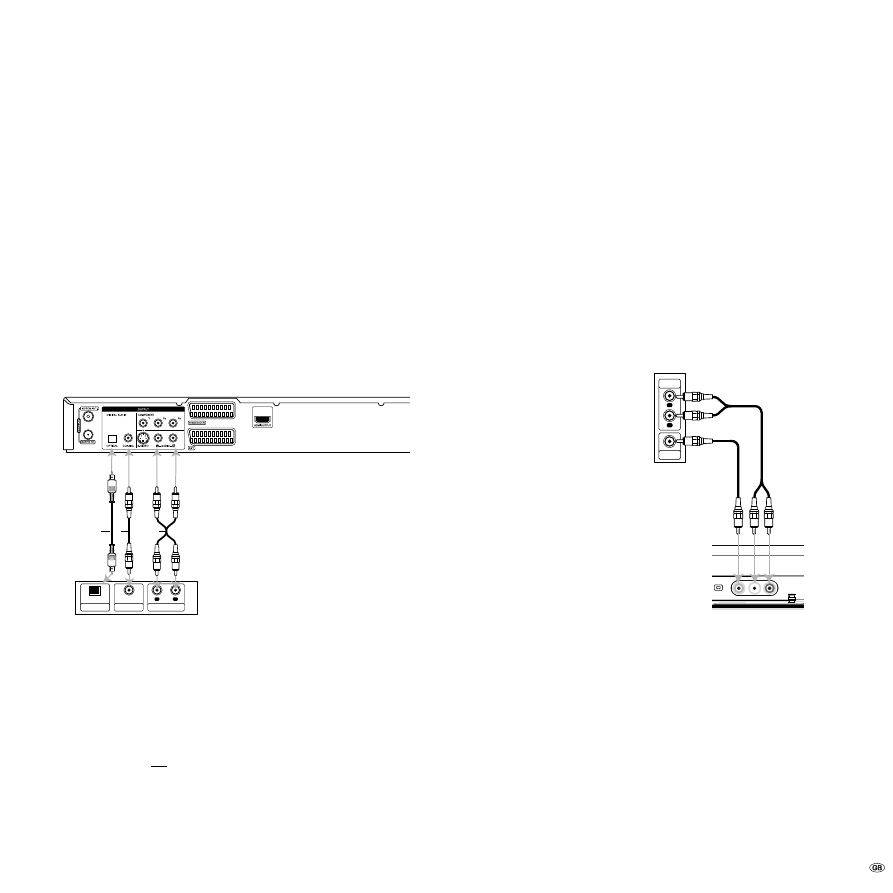
Connecting to an Amplifier
Connecting to an analog amplifier with analog 2-channel
stereo or Dolby Pro Logic II / Pro Logic
Connect the left and right AUDIO OUT socket of the recorder to the left and
right AUDIO IN sockets of the amplifier, receiver or stereo system with the audio
cables (A).
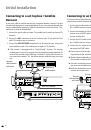
Connecting to a digital amplifier with two-channel digital
stereo (PCM) or to an audio/video receiver with a multi-
channel decoder (Dolby Digital™, MPEG 2 or DTS)
Connect one of the DIGITAL AUDIO OUT sockets (OPTICAL O or COAXIAL
X) of the recorder to the appropriate input socket on your amplifier. Use an
appropriate digital audio cable (optical O or coaxial X - available from your
dealer).
You must configure the digital output of the recorder (page 9).
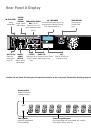
Back of the recorder
Amplifier (Receiver)
A
X
O
R
L
AUDIO INPUT
DIGITAL INPUT
COAXIAL
DIGITAL INPUT
OPTICAL
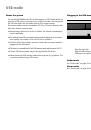
Digital multi-channel sound
A digital multi-channel connection offers the best sound quality. You will need a
multi-channel audio/video receiver which supports one or more audio formats, e.g.
MPEG , Dolby Digital and DTS. You will find information in the documentation
enclosed with the receiver.
➠
Due to the DTS licensing agreement the digital output will be to DTS DIGITAL-
OUT when a DTS audio stream is selected.
This recorder does not perform a (-channel) decoding (downmix) of a DTS
sound track internally. In order to enjoy DTS multi-channel surround sound, you
have to connect this recorder to a DTS-compatible receiver via one of the
recorder’s digital audio outputs.
1.
.
➠
If the audio format of the digital output does not correspond to the capa-
bilities of your receiver, the receiver will emit a strong distorted sound or no
sound at all.
5.1 Digital surround sound via the digital connection can only be obtained if
your receiver is equipped with a digital multi-channel decoder.
You can obtain information about the audio format of the current DVD via the
“Disc Info“ menu (page 35).
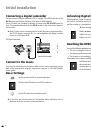
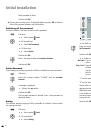
Connecting Audio/Video (A/V) Accessories
Connect the input sockets (AV2 on the back of the device or AV3 = input on the
front of the device (page 6)) of the recorder to the audio/video out sockets of the
accessory components with the audio/video cables.
If you have connected a device to AV2 and switched off its power supply, the
Digital Link Plus function to the recorder is not possible.
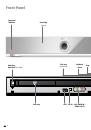
Front of the recorder
Connector block for an
accessory component
(VCR, Camcorder, etc.)
P+
P-
AV
Video
L-Audio-R
L
R
VIDEO
OUTPUT
AUDIO
OUTPUT
Initial Installation