2 0
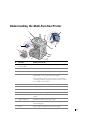
U n d e r s t a n d i n g t h e S o f t w a r e
www
.dell.com/supplies | support.dell.com
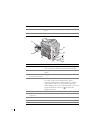
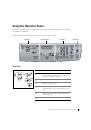
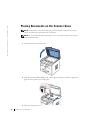
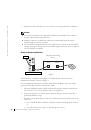
Assigning an IP Address
Before using the printer on the network, you must set an IP address, subnet mask, and
gateway for the multi-function printer. If you want DHCP or BOOTP to automatically set
the IP address, a DHCP or BOOTP server must exist on the network.
To configure the IP address manually, you can use the supplied
Drivers and Utilities
CD.
Print the Configuration page of the printer to see the current network configuration and
MAC address. You will need this information to configure the printer for the network.
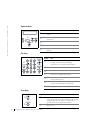
1
Make sure that the multi-function printer is connected to your network and powered
on. Close all unnecessary programs.
2
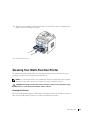
Insert the
Drives and Utilities
CD.
3
If necessary, select a language by pressing the Language button on the main screen.
4
Select
SetIP Address Utility
. The list of printers available in the network displays.
5
Select the printer you want to assign an IP to. The printer’s default IP address can be
found on the Configuration page for the printer.
6
When you finish setting the IP address for the printer, exit the program.
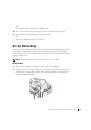
Installing Dell Software For Network Printing
When you connect your printer to the network, you must first configure the TCP/IP
settings for the printer. After you have assigned and verified the TCP/IP settings, you are
ready to install the Dell software on each network computer.
You can install the Dell software on the network computers locally or remotely.
NOTE:
You need administrative access to install printer drivers on the network computers.
1
Make sure that the printer is connected to your network and powered on. Close all
unnecessary programs. For details about connecting on the network, see page 11.
2
Insert the
Drivers and Utilities
CD.
3
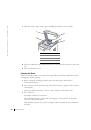
If necessary, select a language by pressing the
Language
button on the main screen.
4
Select
Network Installation
.
5
If you want to install the drivers on this computer for network operation, select
Local
Installation
, and click
Next
.
If you want to install the Dell software on the remote computers or network servers on
the same network, select
Remote Installation
. The domain administrator’s ID and
password are required. Select the client computer(s) in the same domain on a network
and click
Next
.
 1
1
 2
2
 3
3
 4
4
 5
5
 6
6
 7
7
 8
8
 9
9
 10
10
 11
11
 12
12
 13
13
 14
14
 15
15
 16
16
 17
17
 18
18
 19
19
 20
20
 21
21
 22
22
 23
23
 24
24
 25
25
 26
26
 27
27
 28
28
 29
29
 30
30
 31
31
 32
32
 33
33
 34
34
 35
35
 36
36
 37
37
 38
38
 39
39
 40
40
 41
41
 42
42
 43
43
 44
44
 45
45
 46
46
 47
47
 48
48
 49
49
 50
50
 51
51
 52
52
 53
53
 54
54
 55
55
 56
56
 57
57
 58
58
 59
59
 60
60
 61
61
 62
62
 63
63
 64
64
 65
65
 66
66
 67
67
 68
68
 69
69
 70
70
 71
71
 72
72
 73
73
 74
74
 75
75
 76
76
 77
77
 78
78
 79
79
 80
80
 81
81
 82
82
 83
83
 84
84
 85
85
 86
86
 87
87
 88
88
 89
89
 90
90
 91
91
 92
92
 93
93
 94
94
 95
95
 96
96
 97
97
 98
98
 99
99
 100
100
 101
101
 102
102
 103
103
 104
104
 105
105
 106
106
 107
107
 108
108
 109
109
 110
110
 111
111
 112
112
 113
113
 114
114
 115
115
 116
116
 117
117
 118
118
 119
119
 120
120
 121
121
 122
122
 123
123
 124
124
 125
125
 126
126
 127
127
 128
128
 129
129
 130
130
 131
131
 132
132
 133
133
 134
134
Инструкции и руководства похожие на DELL 1600n