4 8
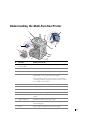
U s i n g Yo u r M u l t i - Fu n c t i o n Pr i n t e r
www
.dell.com/supplies | support.dell.com
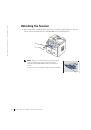
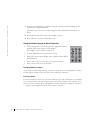
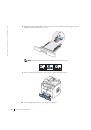
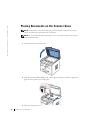
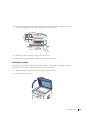
Receiving a Fax
NOTE:
The Dell Laser Multi-Function Printer 1600n cannot receive color faxes.
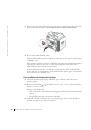
1
Press <Menu> until “
Fax Setup
” appears on the top line of the display.
The first available menu item, “
Receive Mode
” displays on the bottom line.
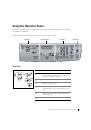
2
Press <Select>
.
3
Use the scroll button ( or ) to select the default receiving mode you want to use.
You can select the following options:
•
Fax
mode (automatic receive mode)
: The multi-function printer answers an
incoming call and automatically goes into receive mode. The number of rings
before the multi-function printer answers can be set in the Ring To Answer
option. Please refer to the
User’s Guide
. If the user memory is full, the
multi-function printer is changed to Tel mode.
•
Tel
mode (manual receive mode)
: Automatic fax reception is turned off. You can
receive a fax by picking up the handset of the extension phone and then pressing
the remote receive code (refer to the
User’s Guide
), or by pressing <On Hook
Dial> (you can hear voice or fax tones from the remote machine) and then
<Send Fax>
on the operator panel.
•
Ans/Fax
mode
: The multi-function printer can share one telephone line with an
answering machine. In this mode, the multifunction printer will monitor the fax
signal and pick up the line if there are fax tones. If the phone communication in
your country is serial, this mode is not available.
•
DRPD
mode
: Before using the Distinctive Ring Pattern Detection (DRPD)
option, distinctive ring service must be installed on your telephone line at your
location to dial your fax number from outside.
4
Press <Select> to save the selection.
5
To return to Standby mode, press <Return>.
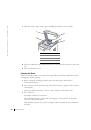
Your machines provides an additional option, Secure Receive, to receive and print
received faxes. Refer to “Advanced Fax” in the fax menu options, see page 51.
 1
1
 2
2
 3
3
 4
4
 5
5
 6
6
 7
7
 8
8
 9
9
 10
10
 11
11
 12
12
 13
13
 14
14
 15
15
 16
16
 17
17
 18
18
 19
19
 20
20
 21
21
 22
22
 23
23
 24
24
 25
25
 26
26
 27
27
 28
28
 29
29
 30
30
 31
31
 32
32
 33
33
 34
34
 35
35
 36
36
 37
37
 38
38
 39
39
 40
40
 41
41
 42
42
 43
43
 44
44
 45
45
 46
46
 47
47
 48
48
 49
49
 50
50
 51
51
 52
52
 53
53
 54
54
 55
55
 56
56
 57
57
 58
58
 59
59
 60
60
 61
61
 62
62
 63
63
 64
64
 65
65
 66
66
 67
67
 68
68
 69
69
 70
70
 71
71
 72
72
 73
73
 74
74
 75
75
 76
76
 77
77
 78
78
 79
79
 80
80
 81
81
 82
82
 83
83
 84
84
 85
85
 86
86
 87
87
 88
88
 89
89
 90
90
 91
91
 92
92
 93
93
 94
94
 95
95
 96
96
 97
97
 98
98
 99
99
 100
100
 101
101
 102
102
 103
103
 104
104
 105
105
 106
106
 107
107
 108
108
 109
109
 110
110
 111
111
 112
112
 113
113
 114
114
 115
115
 116
116
 117
117
 118
118
 119
119
 120
120
 121
121
 122
122
 123
123
 124
124
 125
125
 126
126
 127
127
 128
128
 129
129
 130
130
 131
131
 132
132
 133
133
 134
134