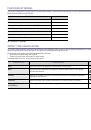
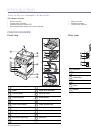
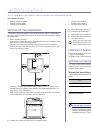
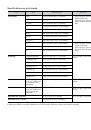
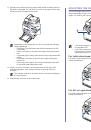
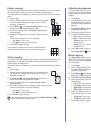
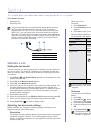
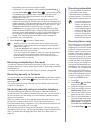
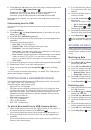
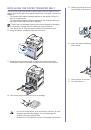
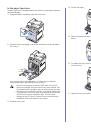
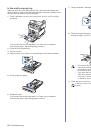
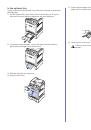
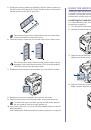
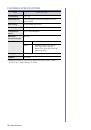
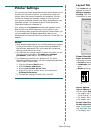
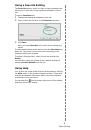
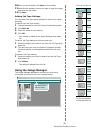
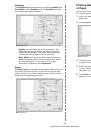
Scanning
|
37
•
W
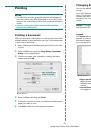
Local PC
X
:
Choosing USB or Network to scan. If connected by
USB, move to step 7. If connected by Network, move to step 8.
•
Not Available:
Neither connected by USB nor Network. Check the
port connection.
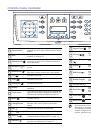
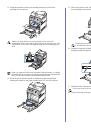
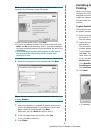
7.
Press the left/right arrow until the port you want appears on the display.
8.
Enter the registered user ID and PIN and click
OK
.
9.
From
Scan Destination
, press the left/right arrow until the application
program you want appears, then press
OK
.
Default setting is
My Documents
.
10.
To scan from the default setting, press
Color Start
(
)
or
Black Start
(
)
. Press the left/right button until the setting you want appears then
press
OK
.
11.
Scanning begins.
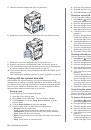
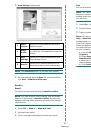
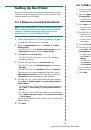
SCANNING BY A NETWORK CONNECTION
If you have connected your printer to a network and set up the network
parameters correctly, you can scan and send images over the network.
Preparing for network scanning
Before using your printer’s network scanning features, you need to
configure the following settings, depending on your scan destination:
•
Register as an authorized user for scanning to email, FTP, or SMB
•
Set up the SMTP server for scanning to email
•
Set up the FTP servers for scanning to FTP
•
Set up the SMB servers for scanning to SMB
User authentication for network scanning
To send an email, FTP, SMB or Network, you must register authorized
local or network users using Embedded Web Service.
•
If user authentication has been activated, only authorized local users
or on the DB server (SMB, LDAP, Kerberos) can send scanned data
to the network (email, FTP, SMB, Network).
•
For network scanning using the authentication feature, you must
register the network or local authentication configuration using the
Embedded Web Service.
•
User authentication has 3 options: none (Default), network
authentication, and local authentication.
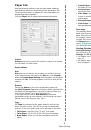
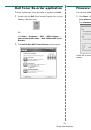
Registering local authorized users
1.
Enter your printer’s IP address as the URL in a browser and click
Go
to access the web site of your printer.
2.
Click
Machine Settings
.
3.
Select
Local Authentication
on the
General Setup
of the
User
Authentication
web page.
4.
Click
Add
.
5.
Select an index number corresponding to the location for storing the
entry, from 1 to 50.
6.
Enter your name, auth ID, password, e-mail address and phone
number.
You need to enter the registered user ID and password in the printer
when you start scanning to email from the control panel.
7.
Click
Apply
.
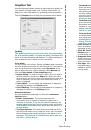
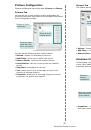
Register authorized network users
1.
Enter your printer’s IP address as the URL in a browser and click
Go
to access the web site of your printer.
2.
Click
Machine Settings
.
3.
Select
Network Authentication
on the
General Setup
of
User
Authentication
web page.
4.
Click
Apply
and
OK
.
5.
Select the
Authentication Type
that you prefer.
6.
Configure the values for each feature, as follows.
7.
Click
Apply
.
Network user authenticated by Kerberos
1.
Enter the realm used for
Kerberos
login.
2.
Select
IP Address
or
Host Name
.
3.
Enter the IP address in dotted decimal notation or as a host name.
4.
Enter the server port number, from 1 to 65535.
The default port number is 88.
5.
You can add a backup domain as a previous step.
6.
Click
Apply
.
Network user authorized by SMB
1.
Enter the domain that is used for
SMB
login.
2.
Select
IP Address
or
Host Name
.
3.
Enter the IP address in dotted decimal notation or as a host name.
4.
Enter the server port number, from 1 to 65535.
The default port number is 139.
5.
You can add a backup domain as a previous step.
6.
Click
Apply
.
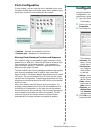
Network authorized user by LDAP
1.
Enter your printer’s IP address as the URL in a browser and click
Go
to access the web site of your printer.
2.
Click
Machine Settings
and
LDAP Server Setup
.
3.
Select
IP Address
or
Host Name
.
4.
Enter the IP address in dotted decimal notation or as a host name.
5.
Enter the server port number, from 1 to 65535.
The default port number is 389.
6.
Enter
Search Root Directory
, the top search level of the LDAP
directory tree.
7.
Select
Authentication method
. Two options for LDAP server login.
Anonymous
:This is used to bind with null password and login ID
(Password and login ID are grayed out in Embedded Web Service).
Simple
: This is used to bind with the login ID and password in
Embedded Web Service.
8.
Check the box next to
Append Root to Base DN
.
9.
Select
Match User’s Login ID to the following LDAP attribute
(options are CN, UID, or UserPrincipalName).
•
ID is the same ID as the registered ID for
Dell Scan Manager
.
•
PIN is the 4 digit number registered for
Dell Scan Manager
.
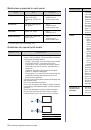
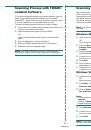
To add or delete the folder where the scanned file is saved, add or
delete the application program in
Dell Scan Manager
→
Set Scan
Button
.
•
Scanned image is saved in computer's
My Documents
→
My
Pictures
→
Dell
folder.
•
You can use Tawin driver to scan quickly in
Dell Scan
Manager
program.
•
You can also scan by pressing Window's
Start
→
Control
Panel
→
Dell Scan Manager
→
Quick Scan
.
User can add up to 6 alternate domains.
 1
1
 2
2
 3
3
 4
4
 5
5
 6
6
 7
7
 8
8
 9
9
 10
10
 11
11
 12
12
 13
13
 14
14
 15
15
 16
16
 17
17
 18
18
 19
19
 20
20
 21
21
 22
22
 23
23
 24
24
 25
25
 26
26
 27
27
 28
28
 29
29
 30
30
 31
31
 32
32
 33
33
 34
34
 35
35
 36
36
 37
37
 38
38
 39
39
 40
40
 41
41
 42
42
 43
43
 44
44
 45
45
 46
46
 47
47
 48
48
 49
49
 50
50
 51
51
 52
52
 53
53
 54
54
 55
55
 56
56
 57
57
 58
58
 59
59
 60
60
 61
61
 62
62
 63
63
 64
64
 65
65
 66
66
 67
67
 68
68
 69
69
 70
70
 71
71
 72
72
 73
73
 74
74
 75
75
 76
76
 77
77
 78
78
 79
79
 80
80
 81
81
 82
82
 83
83
 84
84
 85
85
 86
86
 87
87
 88
88
 89
89
 90
90
 91
91
 92
92
 93
93
 94
94
 95
95
 96
96
 97
97
 98
98
 99
99
 100
100
 101
101
 102
102
 103
103
 104
104
 105
105
 106
106
 107
107
 108
108
 109
109
 110
110
 111
111
 112
112
 113
113
 114
114
 115
115
 116
116
 117
117
 118
118
 119
119
 120
120
 121
121
 122
122
 123
123
 124
124
 125
125
 126
126
 127
127
 128
128
 129
129
 130
130
 131
131
 132
132
 133
133
 134
134
 135
135
 136
136
 137
137
 138
138
 139
139
 140
140
 141
141