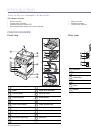
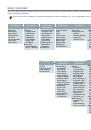
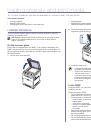
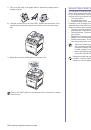
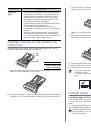
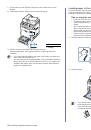
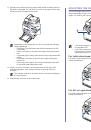
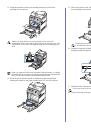
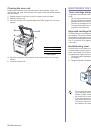
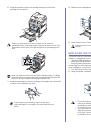
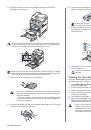
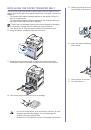
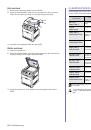
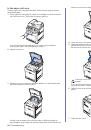
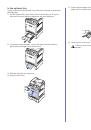
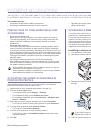
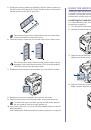
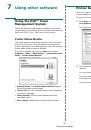
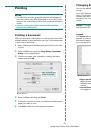
Installing accessories
|
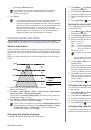
87
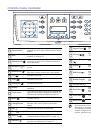
6.
Press the left/right arrow until
Cancel
appears and press
OK
.
If you enter the incorrect password,
Invalid Password
appears.
Reenter the correct password.
7.
Press the left/right arrow until
Yes
appears and press
OK
.
To promote a file from the queue:
You can select a job waiting in the Active Job Queue and change its
print order so that it can be printed sooner.
1.
Press
Menu
(
)
until
System Setup
appears on the bottom line of
the display and press
OK
.
2.
Press the left/right arrow until
Job Manage
appears and press
OK
.
3.
Press the left/right arrow until
Active Job
appears and press
OK
.
4.
Press the left/right arrow until the user’s name and file name you
want appear and press
OK
.
5.
If the select file is a confidential print job, enter the specified 4-digit
password.
Press the left/right arrow to enter the first digit and press
OK
. The
cursor automatically moves to the next digit position. Enter the 2nd,
3rd, and 4th digit in the same way.
6.
Press the left/right arrow until
Promote
appears and press
OK
.
If you enter the incorrect password,
Invalid Password
appears.
Reenter the correct password.
To print a file immediately:
You can print a job scheduled to be printed at a specified time
immediately. In this case, the job currently printing is stopped and the
selected job will be printed. This function is available when the job is
scheduled for later printing.
1.
Press
Menu
(
)
until
System Setup
appears on the bottom line of
the display and press
OK
.
2.
Press the left/right arrow until
Job Manage
appears and press
OK
.
3.
Press the left/right arrow until
Active Job
appears and press
OK
.
4.
Press the left/right arrow until the user’s name and file name you
want appear and press
OK
.
5.
If the select file is a confidential print job, enter the specified 4-digit
password.
Press the left/right arrow to enter the first digit and press
OK
. The
cursor automatically moves to the next digit position. Enter the 2nd,
3rd, and 4th digit in the same way.
6.
Press the left/right arrow until
Release
appears and press
OK
.
This option appears only when you select a
Delay
print job. See
page 86.
If you enter the incorrect password,
Invalid Password
appears.
Reenter the correct password.
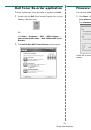
Printing using the form files
You can store up to 10 form files in the hard disk and make them printed
with your document.
First, you need to create a form file using the printer driver. See the
Software section
.
1.
Press
Menu
(
)
until
System Setup
appears on the bottom line of
the display and press
OK
.
2.
Press the left/right arrow until
Form Menu
appears and press
OK
.
3.
Press the left/right arrow until the form you want appears and press
OK
.
•Off:
Prints in normal mode.
•Single Form:
Prints all page using the first form.
•Double Form:
Prints the front page using the first form and the
back page using the second form.
4.
Press
Back (
)
to return to the upper menu level.
5.
Press the left/right arrow until
Select Form
appears and press
OK
.
6.
Press
OK
when
1st Form
appears.
7.
Press the left/right arrow until the form file you want appears and
press
OK
.
If you select
Double Form
, continue the next step.
8.
Press the left/right arrow until
2nd Form
appears and press
OK
.
9.
Press the left/right arrow until the form file for the second form
appears and press
OK
.
File policy
You can choose the file policy for generating file name before you proceed
with the job through hard disk. If the hard disk memory already has the
same name when you entered a new file name, you can rename or
overwrite it.
1.
Press
Menu
(
)
until
System Setup
appears on the bottom line of
the display and press
OK
.
2.
Press the left/right arrow until
Job Manage
appears and press
OK
.
3.
Press the left/right arrow until
File Policy
appears and press
OK
.
4.
Press the left/right arrow until the job setting you want appears and
press
OK
.
•
Rename:
If the hard disk memory already has the same name when
you enter a new file name, the file will be saved as a different name
that is automatically programmed.
•
Overwrite:
You can set the printer to delete previous job information
on hard disk as you store new job information.
5.
Press
OK
.
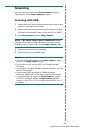
Deleting residual image data
ImageOverwrite
is a security measure for customers who are concerned
about unauthorized access and duplication of classified or private
document.
1.
Press
Menu
(
)
until
System Setup
appears on the bottom line of
the display and press
OK
.
2.
Press the left/right arrow until
ImageOverwrite
appears and press
OK
.
3.
Press the left/right arrow until the job setting you want appears and
press
OK
.
•
Immediate:
All residual image data from the printer will be erased
immediately after each job has been processed.
•
On Demand:
This option provides an on-demand facility for a
system administrator to erase all the real image data remained in
hard disk after this option enabled. All existing jobs will be deleted
regardless of their status and all job submissions will be prohibited
for the duration of the overwrite.
4.
Press the left/right arrow to move to
On
or
Off
for
Immediate
.
Press the left/right arrow to move to
Enable
or
Disable
for
On
Demand
.
5.
Press
OK
.
If you selected
On Demand
enabled, the printer confirms if the
overwrite feature starts now. Press the left/right arrow to select
Yes
or
No
. If you select
Yes
,
On Demand
overwrite starts as soon
as you select
Yes
. If you select
No
, this feature will be enabled.
 1
1
 2
2
 3
3
 4
4
 5
5
 6
6
 7
7
 8
8
 9
9
 10
10
 11
11
 12
12
 13
13
 14
14
 15
15
 16
16
 17
17
 18
18
 19
19
 20
20
 21
21
 22
22
 23
23
 24
24
 25
25
 26
26
 27
27
 28
28
 29
29
 30
30
 31
31
 32
32
 33
33
 34
34
 35
35
 36
36
 37
37
 38
38
 39
39
 40
40
 41
41
 42
42
 43
43
 44
44
 45
45
 46
46
 47
47
 48
48
 49
49
 50
50
 51
51
 52
52
 53
53
 54
54
 55
55
 56
56
 57
57
 58
58
 59
59
 60
60
 61
61
 62
62
 63
63
 64
64
 65
65
 66
66
 67
67
 68
68
 69
69
 70
70
 71
71
 72
72
 73
73
 74
74
 75
75
 76
76
 77
77
 78
78
 79
79
 80
80
 81
81
 82
82
 83
83
 84
84
 85
85
 86
86
 87
87
 88
88
 89
89
 90
90
 91
91
 92
92
 93
93
 94
94
 95
95
 96
96
 97
97
 98
98
 99
99
 100
100
 101
101
 102
102
 103
103
 104
104
 105
105
 106
106
 107
107
 108
108
 109
109
 110
110
 111
111
 112
112
 113
113
 114
114
 115
115
 116
116
 117
117
 118
118
 119
119
 120
120
 121
121
 122
122
 123
123
 124
124
 125
125
 126
126
 127
127
 128
128
 129
129
 130
130
 131
131
 132
132
 133
133
 134
134
 135
135
 136
136
 137
137
 138
138
 139
139
 140
140
 141
141