- 60 -
Connecting to a Computer
3
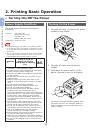
3.
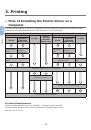
Printing
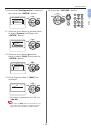
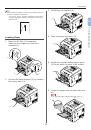
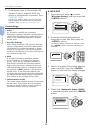
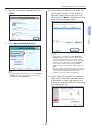
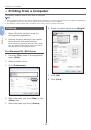
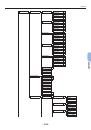
WPS-PIN
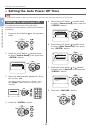
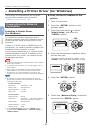
1
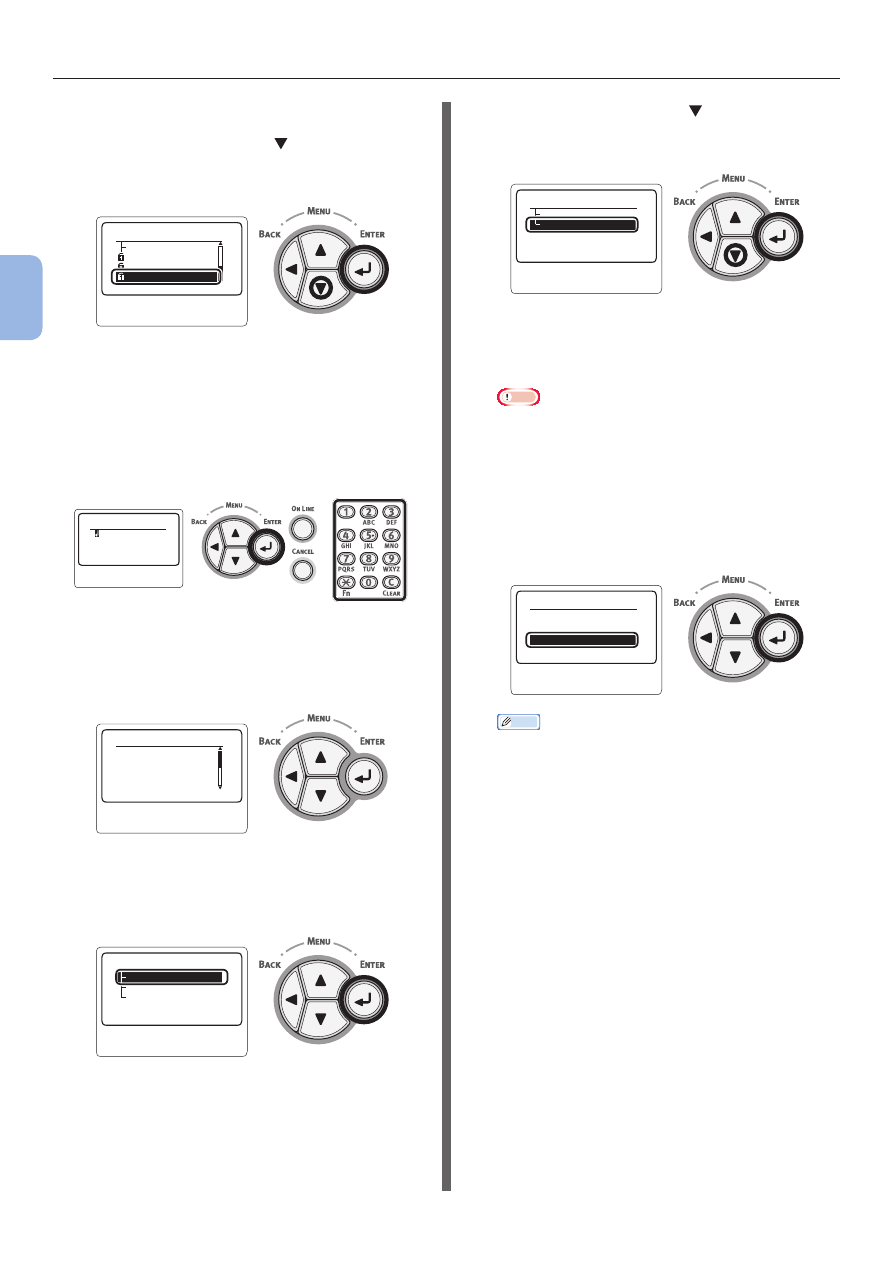
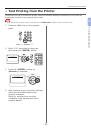
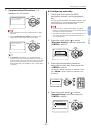
Press the scroll button
to select
[
Wireless Setting
] and then press the
<
ENTER
> button.
䣈䣷䣰䣥䣶䣫䣱䣰䣵䢢䢢䢢䢢䢢䢢
䢢䢢䢢
䢴䢱䢵
䣃䣦䣯䣫䣰䢢䣕䣧䣶䣷䣲
䣒䣴䣫䣰䣶䢢䣕䣶䣣䣶䣫䣵䣶䣫䣥䣵
䣙䣫䣴䣧䣮䣧䣵䣵䢢䣕䣧䣶䣶䣫䣰䣩
䣏䣧䣰䣷䣵
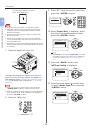
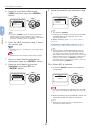
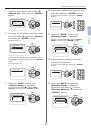
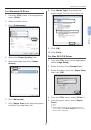
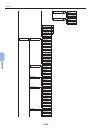
2
Enter the administrator password
using the ten-key pad, then press the
<
ENTER
> button.
The factory default password is “aaaaaa”. Press
the <
ENTER
> button whenever inputting one
character.
䣇䣰䣶䣧䣴䢢䣒䣣䣵䣵䣹䣱䣴䣦
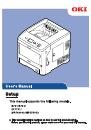
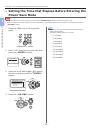
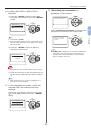
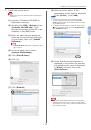
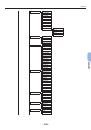
3
When the display shown below appears,
read it carefully. Press the <
ENTER
>
button or wait until the display changes.
䣙䣫䣴䣧䣮䣧䣵䣵䢢䣵䣧䣶䣶䣫䣰䣩䢢䢢䢳䢱䢴
䣕䣧䣶䣶䣫䣰䣩䢢䣹䣫䣴䣧䣮䣧䣵䣵
䣥䣱䣯䣯䣷䣰䣫䣥䣣䣶䣫䣱䣰䣵䢢䣹䣫䣮䣮
䣦䣫䣵䣣䣤䣮䣧䢢䣶䣪䣧䢢䣹䣫䣴䣧䣦
䣥䣱䣯䣯䣷䣰䣫䣥䣣䣶䣫䣱䣰䣵䢰
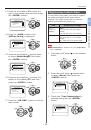
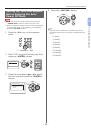
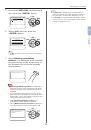
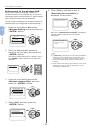
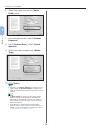
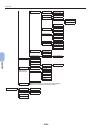
4
Check that [
Automatic Setup (WPS)
]
is selected and then press the <
ENTER
>
button.
䣏䣣䣰䣷䣣䣮䢢䣕䣧䣶䣷䣲
䣙䣫䣴䣧䣮䣧䣵䣵䢢䣴䣧䣥䣱䣰䣰䣧䣥䣶䣫䣱䣰
䣃䣷䣶䣱䣯䣣䣶䣫䣥䢢䣕䣧䣶䣷䣲䢢䢪䣙䣒䣕䢫
䣙䣫䣴䣧䣮䣧䣵䣵䢢䣕䣧䣶䣶䣫䣰䣩䢢䢢
䢢䢢䢢
䢳䢱䢳
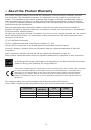
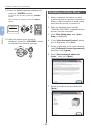
5
Press the scroll button
to select
[
WPS-PIN
] and then press the
<
ENTER
> button.
䣙䣒䣕䢯䣒䣋䣐
䣙䣒䣕䢯䣒䣄䣅
䣕䣧䣶䢢䣣䣷䣶䣱䣯䣣䣶䣫䣥䣣䣮䣮䣻䢢䢪䣙䣒䢢䢳䢱䢳
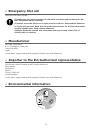
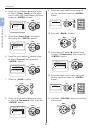
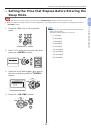
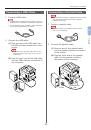
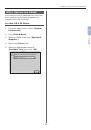
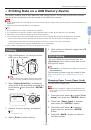
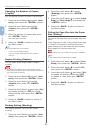
6
Set the 8-character PIN code displayed
on the display screen on the access
point and start WPS-PIN.
Note
● After pressing the button, immediately perform step
7.
●
The PIN code input method and WPS-PIN starting
method differ depending on the access point. For
details, refer to the instruction manual for the access
point.
7
Select [
Yes
] and then press the
<
ENTER
> button.
䣒䣋䣐䢢䣯䣧䣶䣪䣱䣦
䣒䣋䣐䢢䣥䣱䣦䣧䢼䢢䢴䢳䢺䢹䢳䢸䢻䢸
䣐䣱
䣛䣧䣵
䣇䣺䣧䣥䣷䣶䣧䣁
Memo
● If [
No
] is selected, the screen returns to that
from step 5. Each time the confirmation screen is
displayed, the PIN code is automatically generated
and changed.
 1
1
 2
2
 3
3
 4
4
 5
5
 6
6
 7
7
 8
8
 9
9
 10
10
 11
11
 12
12
 13
13
 14
14
 15
15
 16
16
 17
17
 18
18
 19
19
 20
20
 21
21
 22
22
 23
23
 24
24
 25
25
 26
26
 27
27
 28
28
 29
29
 30
30
 31
31
 32
32
 33
33
 34
34
 35
35
 36
36
 37
37
 38
38
 39
39
 40
40
 41
41
 42
42
 43
43
 44
44
 45
45
 46
46
 47
47
 48
48
 49
49
 50
50
 51
51
 52
52
 53
53
 54
54
 55
55
 56
56
 57
57
 58
58
 59
59
 60
60
 61
61
 62
62
 63
63
 64
64
 65
65
 66
66
 67
67
 68
68
 69
69
 70
70
 71
71
 72
72
 73
73
 74
74
 75
75
 76
76
 77
77
 78
78
 79
79
 80
80
 81
81
 82
82
 83
83
 84
84
 85
85
 86
86
 87
87
 88
88
 89
89
 90
90
 91
91
 92
92
 93
93
 94
94
 95
95
 96
96
 97
97
 98
98
 99
99
 100
100
 101
101
 102
102
 103
103
 104
104
 105
105
 106
106
 107
107
 108
108
 109
109
 110
110
 111
111
 112
112
 113
113
 114
114
 115
115
 116
116
 117
117
 118
118
 119
119
 120
120
 121
121
 122
122
 123
123
 124
124
 125
125
 126
126
 127
127
 128
128
 129
129
 130
130
 131
131
 132
132
 133
133
 134
134
 135
135
 136
136
 137
137
 138
138
 139
139
 140
140
 141
141
 142
142
 143
143
 144
144
 145
145
 146
146
 147
147
 148
148
 149
149
 150
150
 151
151
 152
152
 153
153
 154
154
 155
155
 156
156