86
|
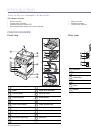
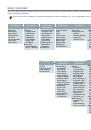
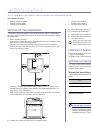
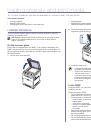
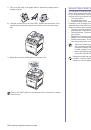
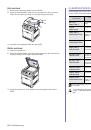
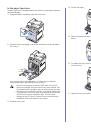
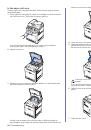
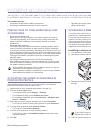
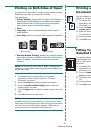
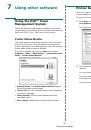
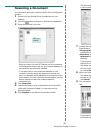
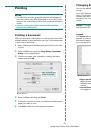
Installing accessories
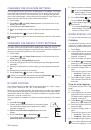
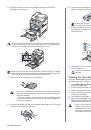
5.
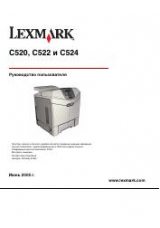
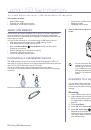
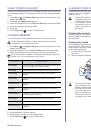
Fasten the screws supplied with your new hard disk.
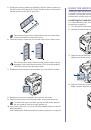
6.
Replace the control board cover and fasten the cover with the screws.
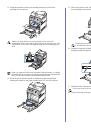
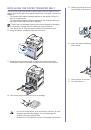
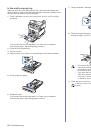
7.
Replace the rear cover and fasten the cover with the screw.
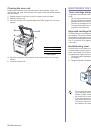
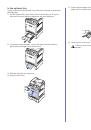
8.
Reconnect the power cord and printer cable, and turn the printer on.
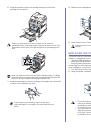
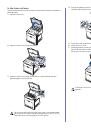
9.
Print a configuration page from the control panel to check if the hard disk
is correctly installed. See "Printing reports" on page 55.
10.
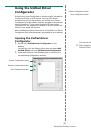
If you use the PS driver, you must activate the added hard disk in the PS
driver properties.
See "Activating the added accessories in printer properties" on page 84.
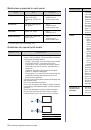
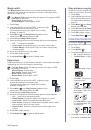
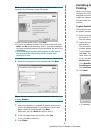
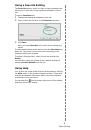
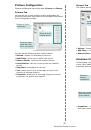
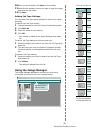
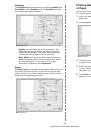
Printing with the optional hard disk
After installing the optional hard disk, you can use advanced printing
features, such as storing or spooling a print job to the hard disk, proofing a
job, and specifying of printing a private job in the printer properties window.
Once you have stored files in the hard disk, you can easily print or delete
the stored files using the control panel of your printer.
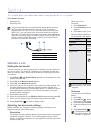
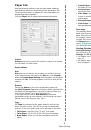
Storing a job
You can store jobs in the installed hard disk.
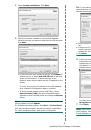
1.
Open the file you want to store.
2.
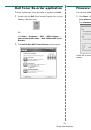
Select
from the
File
menu. The Print window displays.
3.
Click
Properties
. If you see
Setup
,
or
Options
, click the
button instead.
4.
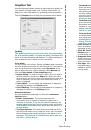
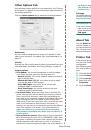
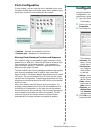
Click the
Other Options
tab and click
Job type
.
5.
Select the print mode you want from the drop-down list.
•
Normal
: Prints in normal mode.
•
Proof
: Prints the first file and after a pause prints the next file.
•
Confidentical
: Stores the files, securing them with a password.
•
Store
: Stores the file to the hard disk.
•
Spool
: Spools the file into the hard disk and prints it from the hard
disk queue.
•
Delay
: Prints the file at a specified time.
6.
Enter the user’s name and file name.
7.
Click
OK
until the Print window is displayed.
8.
Click
OK
or
to start printing.
Printing a stored job
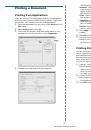
You can print jobs currently stored in the hard disk.
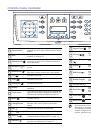
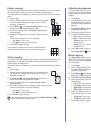
1.
Press
Menu
(
)
until
System Setup
appears on the bottom line of
the display and press
OK
.
2.
Press the left/right arrow until
Job Manage
appears and press
OK
.
3.
Press the left/right arrow until
Store Job
appears and press
OK
.
4.
Press the left/right arrow until the user’s name and file name you
want appear and press
OK
.
5.
If the select file is a confidential print job, enter the specified 4-digit
password.
Press the left/right arrow to enter the first digit and press
OK
. The
cursor automatically moves to the next digit position. Enter the 2nd,
3rd, and 4th digit in the same way.
6.
When
appears, press
OK
.
If you enter the incorrect password,
Invalid Password
appears.
Reenter the correct password.
7.
Press the left/right arrow until the number of copies you want
appears and press
OK
.
8.
Press
OK
. Printing starts.
Deleting a stored job
You can delete jobs currently stored in the hard disk.
1.
Press
Menu
(
)
until
System Setup
appears on the bottom line of
the display and press
OK
.
2.
Press the left/right arrow until
Job Manage
appears and press
OK
.
3.
Press the left/right arrow until
Store Job
appears and press
OK
.
4.
Press the left/right arrow until the user’s name and file name you
want appear and press
OK
.
5.
If the select file is a confidential print job, enter the specified 4-digit
password.
Press the left/right arrow to enter the first digit and press
OK
. The
cursor automatically moves to the next digit position. Enter the 2nd,
3rd, and 4th digit in the same way.
6.
Press the left/right arrow until
Delete
appears and press
OK
.
If you enter the incorrect password,
Invalid Password
appears.
Reenter the correct password.
7.
When
Yes
appears, press
OK
.
Controlling the active job queue
All of the print jobs waiting to be printed are listed in the Active Job
Queue in the order you sent them to the printer. You can delete a job
from the queue before printing, or promote a job to print sooner.
To delete a file from the queue:
1.
Press
Menu
(
)
until
System Setup
appears on the bottom line of
the display and press
OK
.
2.
Press the left/right arrow until
Job Manage
appears and press
OK
.
3.
Press the left/right arrow until
Active Job
appears and press
OK
.
4.
Press the left/right arrow until the user’s name and file name you
want appear and press
OK
.
5.
If the select file is a confidential print job, enter the specified 4-digit
password.
Press the left/right arrow to enter the first digit and press
OK
. The
cursor automatically moves to the next digit position. Enter the 2nd,
3rd, and 4th digit in the same way.
 1
1
 2
2
 3
3
 4
4
 5
5
 6
6
 7
7
 8
8
 9
9
 10
10
 11
11
 12
12
 13
13
 14
14
 15
15
 16
16
 17
17
 18
18
 19
19
 20
20
 21
21
 22
22
 23
23
 24
24
 25
25
 26
26
 27
27
 28
28
 29
29
 30
30
 31
31
 32
32
 33
33
 34
34
 35
35
 36
36
 37
37
 38
38
 39
39
 40
40
 41
41
 42
42
 43
43
 44
44
 45
45
 46
46
 47
47
 48
48
 49
49
 50
50
 51
51
 52
52
 53
53
 54
54
 55
55
 56
56
 57
57
 58
58
 59
59
 60
60
 61
61
 62
62
 63
63
 64
64
 65
65
 66
66
 67
67
 68
68
 69
69
 70
70
 71
71
 72
72
 73
73
 74
74
 75
75
 76
76
 77
77
 78
78
 79
79
 80
80
 81
81
 82
82
 83
83
 84
84
 85
85
 86
86
 87
87
 88
88
 89
89
 90
90
 91
91
 92
92
 93
93
 94
94
 95
95
 96
96
 97
97
 98
98
 99
99
 100
100
 101
101
 102
102
 103
103
 104
104
 105
105
 106
106
 107
107
 108
108
 109
109
 110
110
 111
111
 112
112
 113
113
 114
114
 115
115
 116
116
 117
117
 118
118
 119
119
 120
120
 121
121
 122
122
 123
123
 124
124
 125
125
 126
126
 127
127
 128
128
 129
129
 130
130
 131
131
 132
132
 133
133
 134
134
 135
135
 136
136
 137
137
 138
138
 139
139
 140
140
 141
141
Инструкции и руководства похожие на DELL 2145cn