89
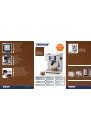
ABOUT THE ESPRESSO MACHINE
The espresso machine brews coffee of rich aroma
and taste, as the perfect brewing temperature of
water, 92–94°C, is ensured. The espresso machine
was designed so that the water temperature can
be watched on an LCD display and the coffee
brewing or production of steam for frothing milk
can be started at the optimal moment.
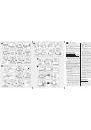
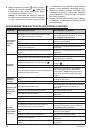
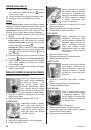
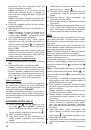
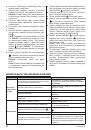
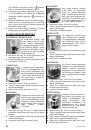
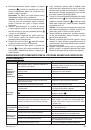
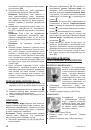
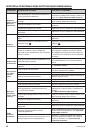
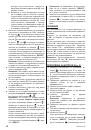
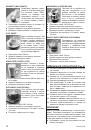
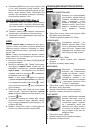
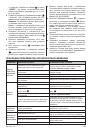
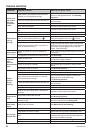
DESCRIPTION OF THE APPLIANCE (Fig. 1)
1. Cup warming plate
2. Control panel with LCD display
3. Brew head
4. Filter holder
5. Water level indicator
6. Measuring spoon
7. Tamping end of the measuring spoon
8. 2.1 l water tank
9. Regulator knob
Turn to the left –
espresso/hot water
from
the head, turn to the right –
steam
or
hot
water
from the steam wand.
10. Steam wand
11. Frothing attachment
12. Large cup height
13. Removable drip tray
14. Rubber antislip legs
15. 1 cup filter
16. 2 cup filter
17. 500 ml mug
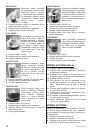
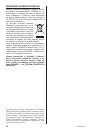
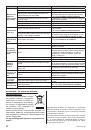
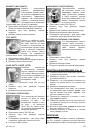
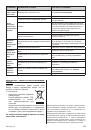
A SHORT GUIDE TO USING THE
ESPRESSO MACHINE
The pictures below are intended to help you
use the espresso machine. Each picture has
its number. The content of the guide will make
references to these pictures, therefore they have
been numbered to ensure they are easy and
comfortable to use.
For example
: Fill up the water tank
(1) (2) (3) (4)
(5)
with cold water – do not use mineral water.
Each time you see such numbers, please refer to
the relevant pictures.
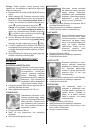
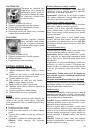
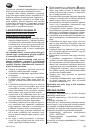
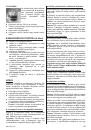
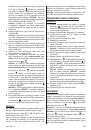
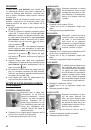
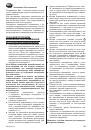
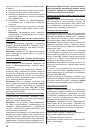
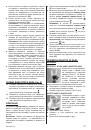
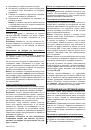
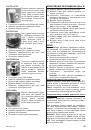
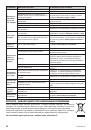
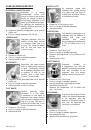
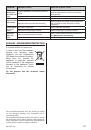
PREPARING THE ESPRESSO MACHINE
(Fig. 2)
1. Open the lid of the water tank.
2. Fill up with cold water and close the lid.
3. Or take out the water tank.
4. Fill up with cold water.
5. Replace the water tank and close the lid.
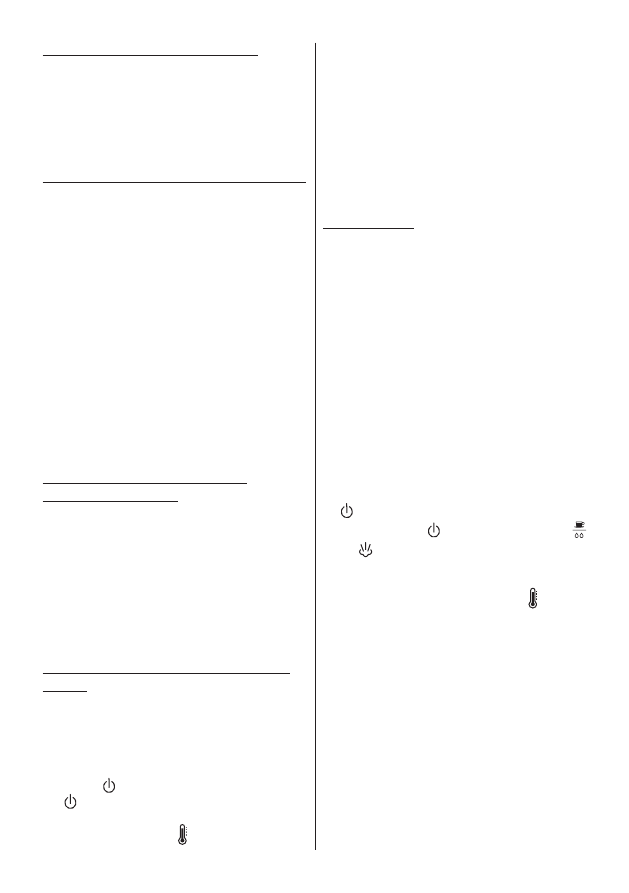
6. Turn the espresso machine on by pressing
button
. The signal light placed on button
will illuminate in red and the line of the
temperature indicator will start flashing
starting from symbol .
Warning:
Before turning the espresso
machine on, check that the knob on the side
of the appliance is in position
0
(off).
7. The espresso machine is ready to use.
8. Warming cups on the plate.
9. Choose a suitable filter and place it in the filter
holder.
10. Place the filer holder in the brew head.
Notice:
Projections on the holder must fit in
the slots of the brew head.
11. Turn the filter holder all the way to the right.
12. Place a large cup under the outlets.
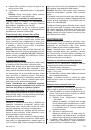
DESCRIPTION
Place the espresso machine on a dry and
●
stable surface.
Check that the drip tray and the grid are in
●
place.
Fill up the water tank with water.
●
There are two ways of filling the tank up with
water:
a) Lift the lid of the water tank; it is in the top
part of the espresso machine
(1)
, and using
e.g. a jug, fill it up with fresh cold water or
with filtered water
(2)
and close the lid.
b) Alternatively, the water tank can be taken
out and filled up with fresh cold water. To
do this, lift the lid and using it as a handle,
slide the water tank out
(3)
. Next, fill it up
with fresh cold water or with filtered water
(4)
. Replace the water tank and close the
lid
(5)
.
Plug the connecting cord into a 230V
●
alternating current mains socket. Press button
to turn the espresso machine on
(6)
. A red
light on button and a light on button
or
, depending on which one has been
pressed, will come on and the line of the
temperature indicator on the LCD display will
begin to flash starting from symbol to inform
that the espresso machine is on and is being
heated. When the line of the temperature
indicator on the LCD display stops flashing
and an inscription saying
“READY”
shows, it
indicates that the espresso machine is heated
and ready to use
(7)
.
Warning
: Before turning the espresso machine
on, check that the regulator knob on the side
of the espresso machine is in position
0
(off).
Place cups or other dishes on the warming
●
plate
(8)
.
Notice
: When using the appliance for the first
time, or when the appliance has not been used
for a longer time, it is crucial that the espresso
machine is rinsed.
To do this, place a one or two cup filter in the
●
holder
(9)
. Place the filter holder in the brew
head
(10)
(11)
.
GW13-023_v02