G
ETTING
S
ET
U
P
:
S
CENARIO
T
WO
– POD P
LAYS
L
IVE
3 • 12
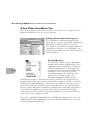
POD Takes Over
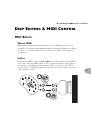
If your POD is running into a power amp or speakers, or into the front end of a
guitar amplifier, you generally want to
switch the
A.I.R. switch to the AMP
position
. This disables the part of the digital signal processing which is simulating
a speaker, moving air, and microphone – which you probably don’t want, because
you’ve got a real physical speaker right there in the guitar amp which is doing its
part to shape the tone of your POD. (Of course, we have sometimes found that
small open-back combos sound better with the A.I.R. switch in the
DIRECT
position; you may want to experiment with both for your set up). If you don’t want
the A.I.R.,
DON’T connect headphones
to POD, as they will override the
A.I.R. switch and turn the extra processing on so things sound right in the
headphones (and wrong on the amp). Connect a standard guitar cable from the
POD left output (POD’s mono output) to the input of the guitar amplifier (or plug
in both Left and Right if you have a stereo setup).
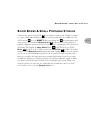
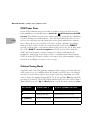
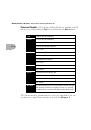
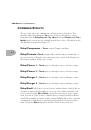
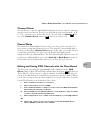
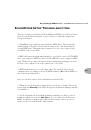
Cabinet Tuning Mode
Your POD can be tuned for optimal performance with a variety of systems when the
A.I.R. switch is set to its AMP position. By default, your POD expects be plugged
in before an open-backed cabinet. If you want to plug into something else, you’ll
want to change the Cabinet Tuning Mode. To do this, hold the
Save
button while
powering up your POD. The POD’s display will show a letter for one of the Cabinet
Tuning Modes; press the
Up
and
Down
arrows to pick the mode, then press
Save
.
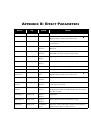
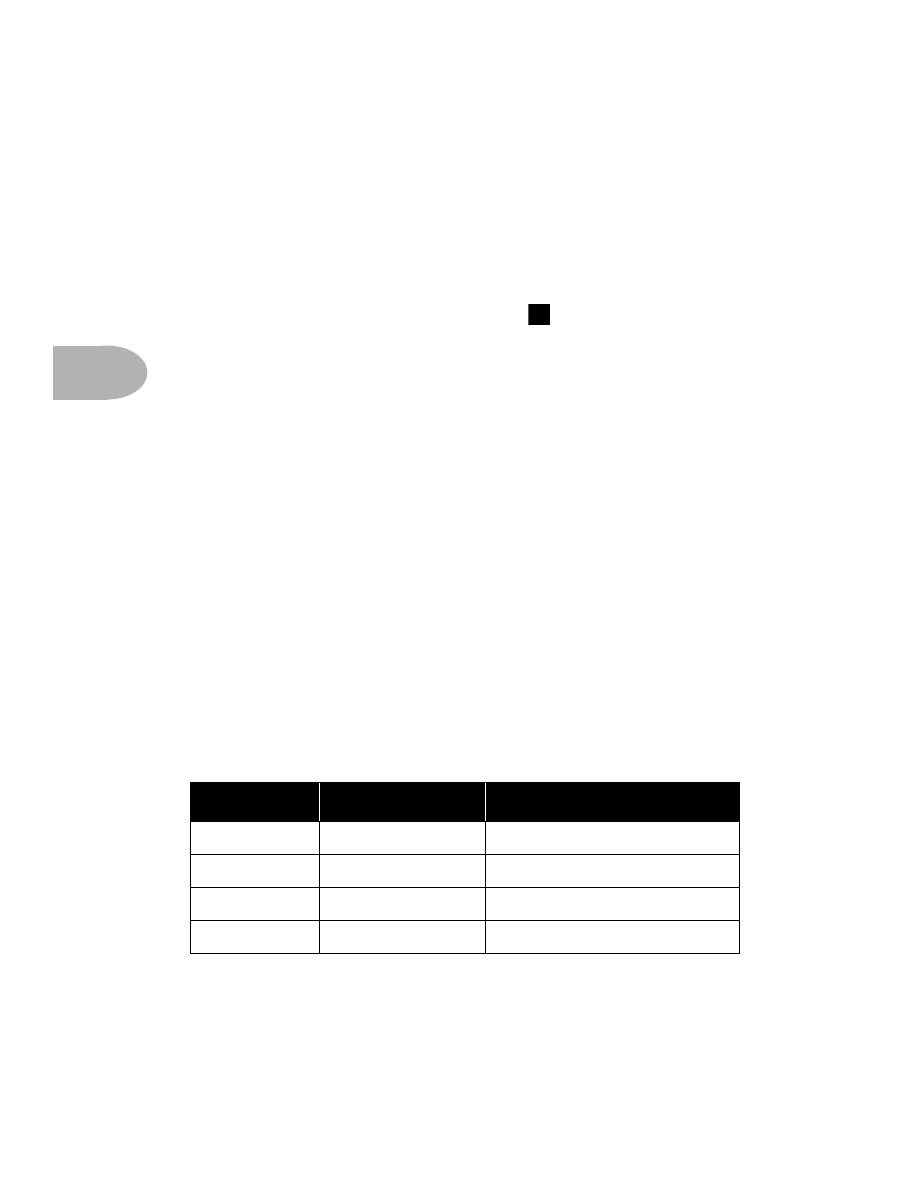
Use Mode...
when POD is...
& your speaker cabs are...
A
feeding power amp
closed back
(ideal for 4x12 cab)
B
feeding power amp
open back
(ideal for 1x12 cab)
C (default)
in front of combo/head
open back
(ideal for 1x12 or 2x12 cab)
D
in front of combo/head
closed back
(ideal for 4x12 cab)
6