Deep Editing & MIDI Control:
O
THER
T
HINGS
Y
OU
C
AN
D
O
WITH
MIDI
8•9
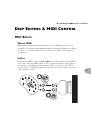
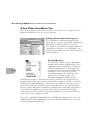
The POD front panel knobs all send out appropriate MIDI controllers (as do the
wah and volume pedals of the optional Floor Board foot controller) that you can
record into a MIDI track as you play through your POD along with a MIDI
sequence. Follow the
Return to Sender
hook up instructions in Chapter 3 to set
up your audio.
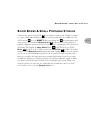
Hook your POD’s MIDI OUT to a MIDI IN on your sequencing setup. Hook a
sequencer MIDI OUT to POD’s MIDI IN, and make sure POD and your sequencer
are set to the same MIDI Channel.
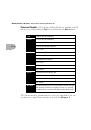
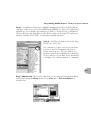
To allow MIDI-controlled automation, you need to set up a MIDI track in your
sequencer to record the data flowing from POD’s MIDI OUT. Set up a MIDI track
to receive POD’s MIDI output, record-enable it, and start the sequencer recording.
Slowly turn POD’s
Drive
knob all the way up and then all the way down as your
sequencer records, and then stop your sequencer. Now, look at the data that’s been
recorded into the POD MIDI track on your sequencer. You’ll see that you’ve
recorded MIDI controller #13 messages. This is the controller that’s assigned to
POD’s Drive parameter. Play back the recorded MIDI track as you play through
POD (or play back recorded direct guitar audio through POD), and you’ll hear the
Drive changes that you recorded into your MIDI track.
To automate POD parameters that aren’t accessible from front panel controls (like
the Reverb Tone), you need to use a hardware MIDI controller, or setup an on-
screen fader or other controller on your software MIDI sequencer to transmit the
correct MIDI Controller number on POD’s MIDI Channel.
To minimize “zipper” noise when controlling parameter changes via
MIDI, try making gradual, rather than sudden changes to POD settings.