C
REATING
& S
TORING
S
OUNDS
:
E
DIT
M
ODE
6 • 3
advance. We provided you with a way to get those settings. Just press and keep
holding the
Save
button on your friend’s POD and turn any one of the POD’s
knobs (except the
Output Level
knob – that one’s not saved into programs).
Don’t worry, holding down the
Save
button won’t cause your settings to be altered
or cause Save Mode to be entered. Instead, you’ll notice one of the little arrows
below the
Tuner
button will light up. The arrow tells you which way to turn the
knob so that it will match the stored memory’s setting for that control. When the
knob position exactly matches the stored setting, the arrows will both light up.
(The
Amp Model
and
Effects
knobs don’t give you the left or right arrows on
their own; they will only light the two arrows together when you have the knob in
the right place.) After you’ve done this for every knob and noted the
Tap
speed,
you can write down the settings on the Programmer’s sheet, take it home, enter it
in your own POD, and write the anthem for a future (or past) generation. And be
sure to thank us in the album’s liner notes. To check that you’ve got everything
just right, once the knobs are set, you can also switch to Manual Mode and see if
the sound changes. (It shouldn’t, unless the
Tap
speed is different.)
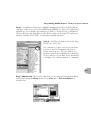
If that sounds too complicated, and you have a MIDI cable handy, flip ahead to
Chapter 8: “Deep Editing & MIDI Control”
to find out how to swap sounds
between two PODs with MIDI. It’s also possible to swap POD sounds on computer,
using the emagic SoundDiver software – for both Macintosh and Windows
computers – that’s included on the CD with this manual.
E
DIT
M
ODE
Alright, so let’s say you’ve got that sound you saved in one of POD’s handy
channels, and you want to add some more Bass. No problem. If you haven’t
already selected the memory you want, then go ahead and get on those
Up
and
Down
buttons to recall the sound. Now, grab the
Bass
knob and crank it up. The
word “EDITED” lights up to the left of POD’s single-digit display, letting you know
that you’ve made a change to your stored channel memory, and (if you like it