9
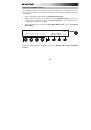
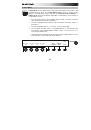
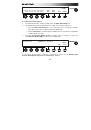
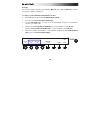
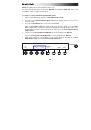
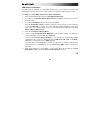
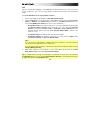
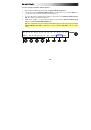
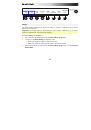
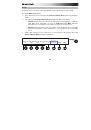
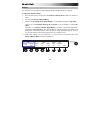
10.
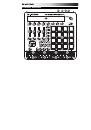
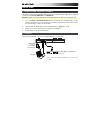
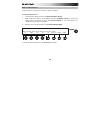
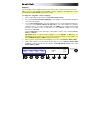
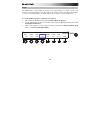
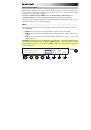
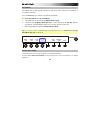
Assignable Faders:
Use these faders to send MIDI CC messages to your software or
external MIDI device. Alternatively, you can set the faders to communicate with your
software using the Mackie Control or HUI protocols or to communicate with Arsenal. See
Working with Presets: Assignable Controls
for more information.
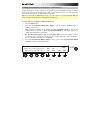
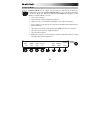
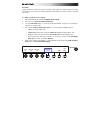
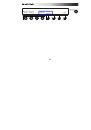
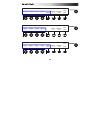
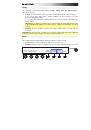
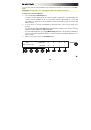
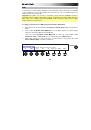
11.
Assignable Buttons:
Use these buttons to send MIDI CC messages or Program Change
messages to your software or external MIDI device. They can function as momentary,
toggle (latching), or single-message buttons. Alternatively, you can set the buttons to
communicate with your software using the Mackie Control or HUI protocols or to
communicate with Arsenal. See
Working with Presets: Assignable Controls
for more
information.
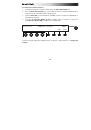
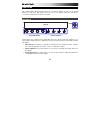
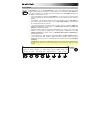
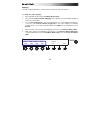
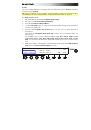
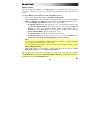
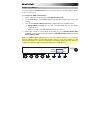
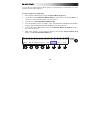
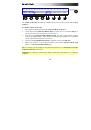
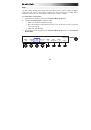
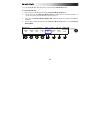
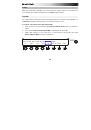
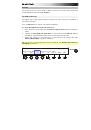
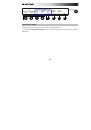
12.
Control Bank:
Press this button to cycle through the four independent banks of
Assignable Knobs
,
Assignable Faders
, and
Assignable Buttons
. The current control
bank letter (A–D) will appear in the display. All 12 physical controls will always be in the
same bank (e.g., you cannot adjust a knob in Control Bank A and a fader in Control Bank
B simultaneously).
Press and hold this button to see an overview of the control mapping (
MIDI
,
Mackie
Control
,
HUI
, or
Arsenal
) for the entire control bank. Use the
assignable buttons
to
select the control bank you are viewing.
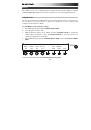
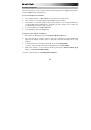
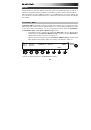
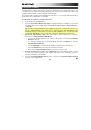
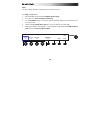
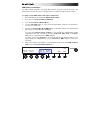
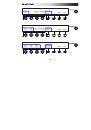
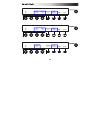
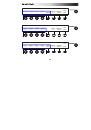
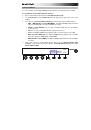
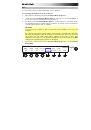
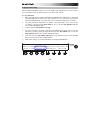
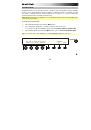
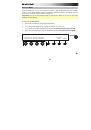
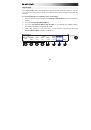
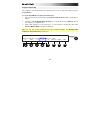
13.
Pads:
Use these pads to trigger drum hits or other samples in your software or external
MIDI sound module. The pads are pressure- and velocity-sensitive, which makes them
very responsive and intuitive to play.
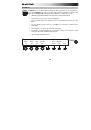
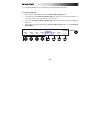
14.
Pad Bank:
Press this button to cycle through the four independent banks of
pads
. The
current pad bank letter (
A–D
) will appear in the display.
Press and hold this button to access the pads' secondary functions:
•
Press
Pad 1
,
2
,
3
, or
4
to directly select
Pad Bank A
,
B
,
C
, or
D
(respectively).
•
Press and hold
Pad 9
,
10
,
11
, or
12
to mute or unmute
Pad Bank A
,
B
,
C
, or
D
(respectively) in the current Sequence. This is essentially a momentary mute feature
for each pad bank.
•
Press
Pad 13
,
14
,
15
, or
16
to mute or unmute
Pad Bank A
,
B
,
C,
or
D
(respectively)
in the current Sequence. This is essentially a toggle (latching) mute feature for each
pad bank.