MXF Clip Operations
136
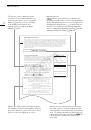
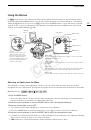
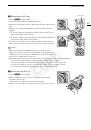
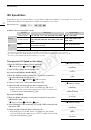
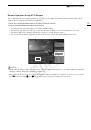
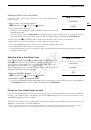
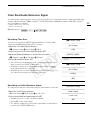
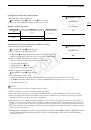
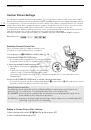
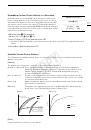
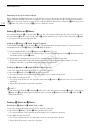
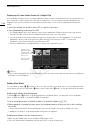
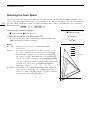
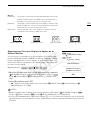
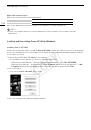
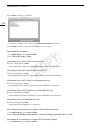
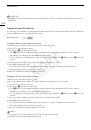
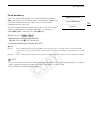
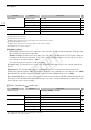
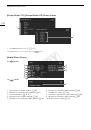
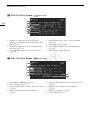
Displaying a Frame Index Screen of a Single Clip
You can display an index screen of a single clip broken down as frames at fixed intervals. This is useful when you
have a long clip or wish to play back a clip from a certain point. You can change how many thumbnails are
displayed. You can also perform other operations from this index screen, such as adding and deleting shot
marks.
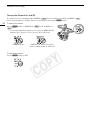
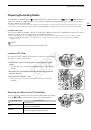
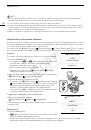
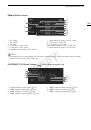
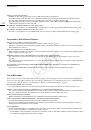
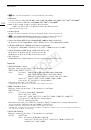
1 Select the desired clip and then press SET to open the clip menu.
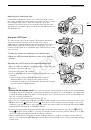
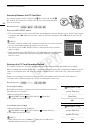
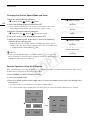
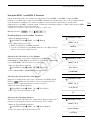
2 Select [Expand Clip] and then press SET.
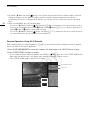
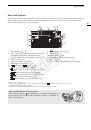
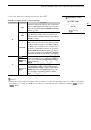
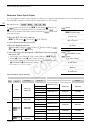
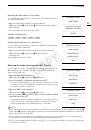
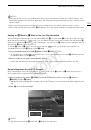
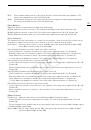
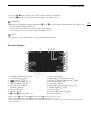
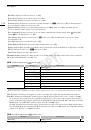
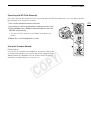
• The [Expand Clip] index screen appears, which shows thumbnails of frames taken from the clip at fixed
intervals. The time code under the thumbnail indicates the time code of the frame.
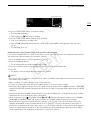
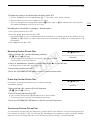
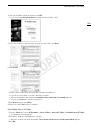
• You can change the fixed interval between frames by showing more or fewer thumbnails. To show more
thumbnails, open the clip menu and select [More Index Pics] and then press SET. To show fewer
thumbnails, select [Fewer Index Pics] and then press SET.
• Press the INDEX button or CANCEL button to return to the clip index screen.
NOTES
• After you finish playing back a clip from this index screen, the index screen that was open before the [Expand
Clip] index screen will appear.
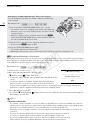
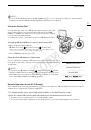
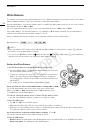
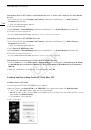
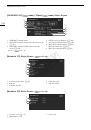
Adding Shot Marks
You can add shot marks (
"
,
#
or both) to shots in a clip you want to set apart. Later, you can display an index
screen that shows only the clips with a
"
mark, only the clips with a
#
mark, or only clips with either shot mark.
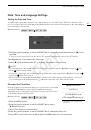
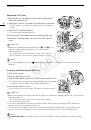
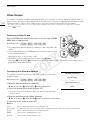
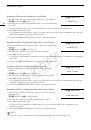
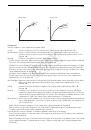
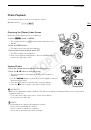
Adding Shot Marks during Playback
To add an
"
mark or
#
mark to a clip during playback or playback pause, you must first set an assignable
button to [Add Shot Mark 1] or [Add Shot Mark 2] in advance.
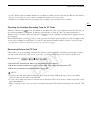
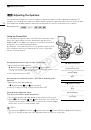
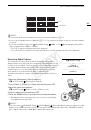
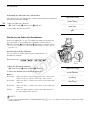
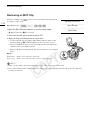
1 Set an assignable button to [Add Shot Mark 1] or [Add Shot Mark 2] (
A
111).
2 During playback or playback pause, press the assignable button at the point in the clip to add the
shot mark.
• A message indicating the shot mark appears on the screen and the shot mark is added to the clip.
• Adding a shot mark to a clip during playback will pause the playback.
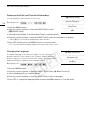
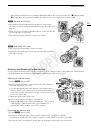
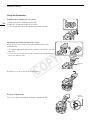
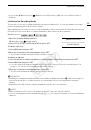
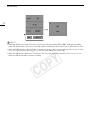
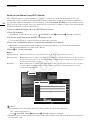
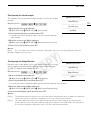
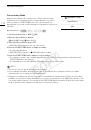
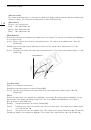
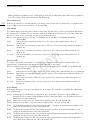
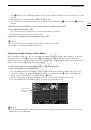
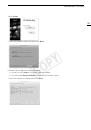
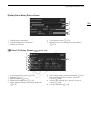
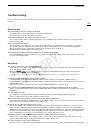
Adding Shot Marks from the Index Screen
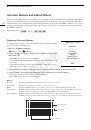
1 Open the [Shot Mark] index screen or [Expand Clip] index screen.
2 Select the desired frame (thumbnail) and then press SET to open the clip menu.
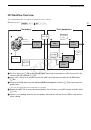
Time code of the
displayed frame
Thumbnail icon:
Indicates the frame
used as the clip
thumbnail in the clip
index screen.
COP
Y
 1
1
 2
2
 3
3
 4
4
 5
5
 6
6
 7
7
 8
8
 9
9
 10
10
 11
11
 12
12
 13
13
 14
14
 15
15
 16
16
 17
17
 18
18
 19
19
 20
20
 21
21
 22
22
 23
23
 24
24
 25
25
 26
26
 27
27
 28
28
 29
29
 30
30
 31
31
 32
32
 33
33
 34
34
 35
35
 36
36
 37
37
 38
38
 39
39
 40
40
 41
41
 42
42
 43
43
 44
44
 45
45
 46
46
 47
47
 48
48
 49
49
 50
50
 51
51
 52
52
 53
53
 54
54
 55
55
 56
56
 57
57
 58
58
 59
59
 60
60
 61
61
 62
62
 63
63
 64
64
 65
65
 66
66
 67
67
 68
68
 69
69
 70
70
 71
71
 72
72
 73
73
 74
74
 75
75
 76
76
 77
77
 78
78
 79
79
 80
80
 81
81
 82
82
 83
83
 84
84
 85
85
 86
86
 87
87
 88
88
 89
89
 90
90
 91
91
 92
92
 93
93
 94
94
 95
95
 96
96
 97
97
 98
98
 99
99
 100
100
 101
101
 102
102
 103
103
 104
104
 105
105
 106
106
 107
107
 108
108
 109
109
 110
110
 111
111
 112
112
 113
113
 114
114
 115
115
 116
116
 117
117
 118
118
 119
119
 120
120
 121
121
 122
122
 123
123
 124
124
 125
125
 126
126
 127
127
 128
128
 129
129
 130
130
 131
131
 132
132
 133
133
 134
134
 135
135
 136
136
 137
137
 138
138
 139
139
 140
140
 141
141
 142
142
 143
143
 144
144
 145
145
 146
146
 147
147
 148
148
 149
149
 150
150
 151
151
 152
152
 153
153
 154
154
 155
155
 156
156
 157
157
 158
158
 159
159
 160
160
 161
161
 162
162
 163
163
 164
164
 165
165
 166
166
 167
167
 168
168
 169
169
 170
170
 171
171
 172
172
 173
173
 174
174
 175
175
 176
176
 177
177
 178
178
 179
179
 180
180
 181
181
 182
182
 183
183
 184
184
 185
185
 186
186
 187
187
 188
188
 189
189
 190
190
 191
191
 192
192
 193
193
 194
194
 195
195
 196
196
 197
197
 198
198
 199
199
 200
200
 201
201
 202
202
 203
203
 204
204
 205
205
 206
206
 207
207
 208
208
 209
209
 210
210
 211
211
 212
212