53
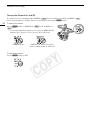
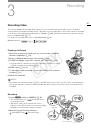
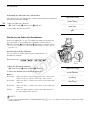
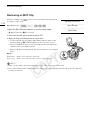
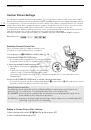
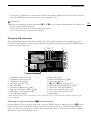
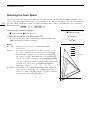
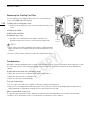
Recording Video
IMPORTANT
• Observe the following precautions while the CF
2
or CF
3
access indicator is illuminated in red. Failure to do
so may result in permanent data loss.
- Do not open the CF card slot cover of the CF card slot being accessed and remove the CF card.
- Do not disconnect the power source or turn off the camera.
• Be sure to save your recordings regularly (
A
153), especially after making important recordings. Canon shall
not be liable for any loss or corruption of data.
NOTES
• By default, [
4K/2K/MXF Setup]
>
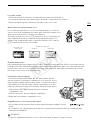
[Rec Command] is set to [On]. With this function, when you connect the
camera to another device using the 3G-SDI terminals (in 4K and 2K modes) or HD/SD SDI terminal (in MXF
mode), if you start or stop recording with the camera, the other device will also start or stop recording.
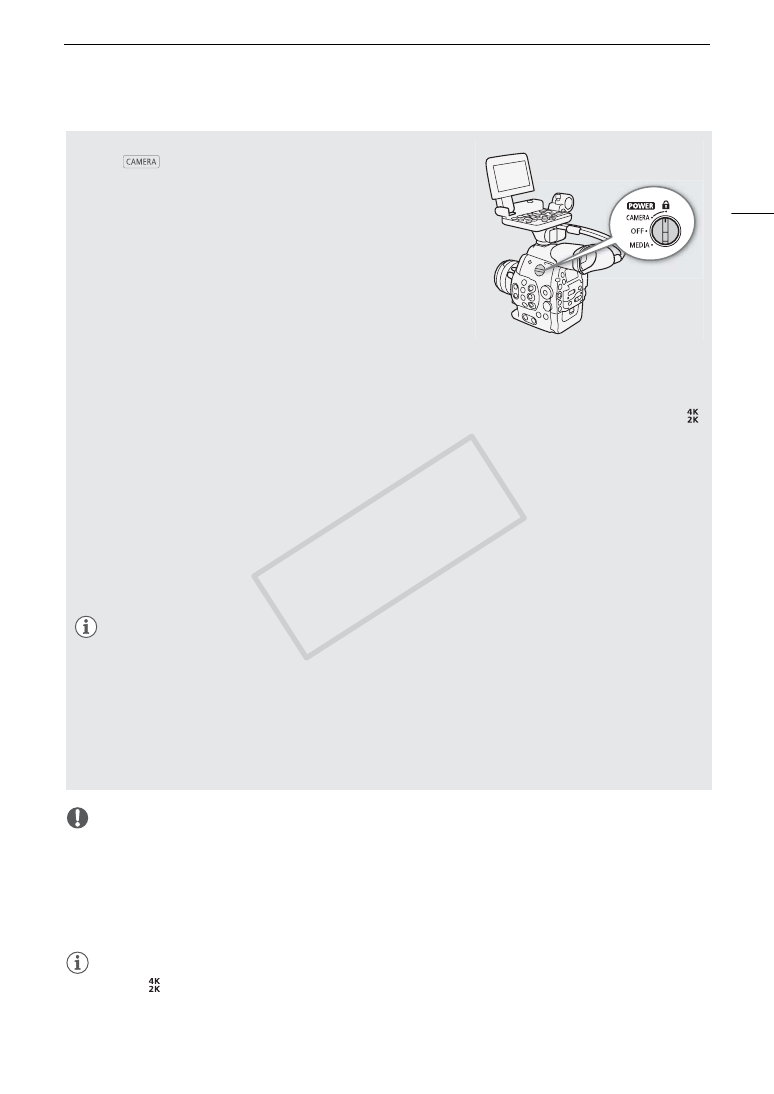
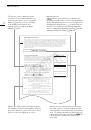
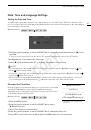
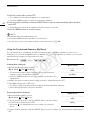
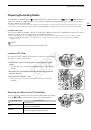
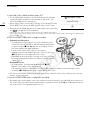
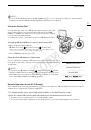
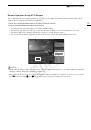
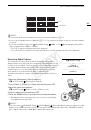
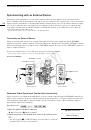
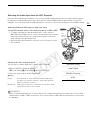
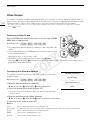
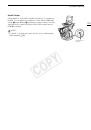
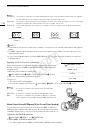
Locking the Controls in Recording Mode
Once in
mode, you can set the
Q
switch to
C
(key lock)
to lock all the physical controls (buttons and switches) on the camera*,
save for the START/STOP button. With the [
w
Other Functions]
>
[Custom Function]
>
[
C
START/STOP] setting, you can even choose
to lock all buttons, including the START/STOP button. In such case, you
can use Wi-Fi Remote to operate the camera. This is useful in
preventing settings from being changed due to inadvertently pressing
one of the buttons. Return the
Q
switch to the CAMERA position
to reactivate the controls.
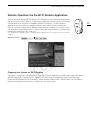
* The Wi-Fi Remote application also has a key lock function that is limited only to the
controls on the application’s screens (you will still be able to use the controls on the
camera). Press [
D
] to lock the application’s controls; press [
C
] to reactivate them.
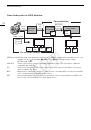
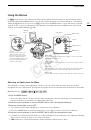
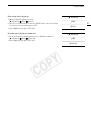
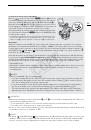
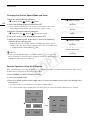
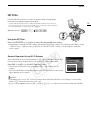
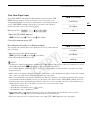
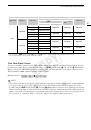
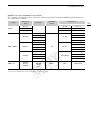
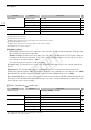
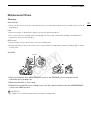
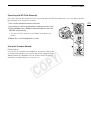
About Clips
When the camera records an MXF clip, it also assigns a 6-character clip name consisting of a 2-character
prefix (letters or numerals) and 4 numerals (for example, “AA0001”). The last 4 numbers serve as a running
counter that increases every time a clip is recorded. You can set the initial clip name in advance using the [
4K/2K/MXF Setup]
>
[Clip Name]
>
[Title Prefix] and [Number Setting] settings. You cannot change the clip
name after the clip is recorded.
In 4K and 2K modes, the clip name is included with the video signal that is output from the 3G-SDI terminals.
If you use the software
Cinema RAW Development
to develop RAW clips recorded with an external recorder
and export them, MXF clips recorded on a CF card and the exported files can be given similar names to make
post-production more efficient. In the following cases, the clip name is not sent to the external recorder.
• During MXF mode.
• When the CF card in the camera cannot be recorded on, does not have enough available space or has an access error.
• During 4K and 2K modes, when using the interval recording, frame recording or slow & fast motion
recording modes.
NOTES
• When recording MXF clips, the following apply.
- If you are recording with two CF cards and the CF card you are using becomes full while recording, the
clip will continue uninterrupted on the other CF card when relay recording (
A
46) is activated. In such
case, the recording will be recorded as separate clips.
- If you record using the custom picture and metadata settings, those settings will be recorded with the
clip. For more details, refer to
Custom Picture Settings
(
A
114) and
Using Metadata
(
A
97).
- The video (stream) file in a clip will be split approximately every 2 GB for clips with a long recording time
(approximately every 1 GB during slow motion recording). Even in such case, playback will be continuous.
COP
Y
 1
1
 2
2
 3
3
 4
4
 5
5
 6
6
 7
7
 8
8
 9
9
 10
10
 11
11
 12
12
 13
13
 14
14
 15
15
 16
16
 17
17
 18
18
 19
19
 20
20
 21
21
 22
22
 23
23
 24
24
 25
25
 26
26
 27
27
 28
28
 29
29
 30
30
 31
31
 32
32
 33
33
 34
34
 35
35
 36
36
 37
37
 38
38
 39
39
 40
40
 41
41
 42
42
 43
43
 44
44
 45
45
 46
46
 47
47
 48
48
 49
49
 50
50
 51
51
 52
52
 53
53
 54
54
 55
55
 56
56
 57
57
 58
58
 59
59
 60
60
 61
61
 62
62
 63
63
 64
64
 65
65
 66
66
 67
67
 68
68
 69
69
 70
70
 71
71
 72
72
 73
73
 74
74
 75
75
 76
76
 77
77
 78
78
 79
79
 80
80
 81
81
 82
82
 83
83
 84
84
 85
85
 86
86
 87
87
 88
88
 89
89
 90
90
 91
91
 92
92
 93
93
 94
94
 95
95
 96
96
 97
97
 98
98
 99
99
 100
100
 101
101
 102
102
 103
103
 104
104
 105
105
 106
106
 107
107
 108
108
 109
109
 110
110
 111
111
 112
112
 113
113
 114
114
 115
115
 116
116
 117
117
 118
118
 119
119
 120
120
 121
121
 122
122
 123
123
 124
124
 125
125
 126
126
 127
127
 128
128
 129
129
 130
130
 131
131
 132
132
 133
133
 134
134
 135
135
 136
136
 137
137
 138
138
 139
139
 140
140
 141
141
 142
142
 143
143
 144
144
 145
145
 146
146
 147
147
 148
148
 149
149
 150
150
 151
151
 152
152
 153
153
 154
154
 155
155
 156
156
 157
157
 158
158
 159
159
 160
160
 161
161
 162
162
 163
163
 164
164
 165
165
 166
166
 167
167
 168
168
 169
169
 170
170
 171
171
 172
172
 173
173
 174
174
 175
175
 176
176
 177
177
 178
178
 179
179
 180
180
 181
181
 182
182
 183
183
 184
184
 185
185
 186
186
 187
187
 188
188
 189
189
 190
190
 191
191
 192
192
 193
193
 194
194
 195
195
 196
196
 197
197
 198
198
 199
199
 200
200
 201
201
 202
202
 203
203
 204
204
 205
205
 206
206
 207
207
 208
208
 209
209
 210
210
 211
211
 212
212