11
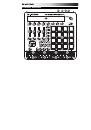
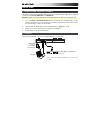
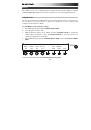
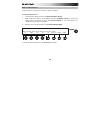
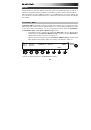
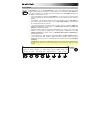
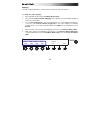
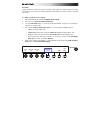
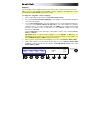
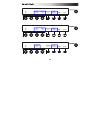
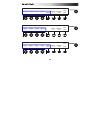
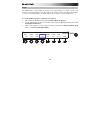
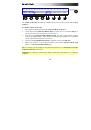
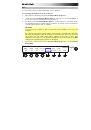
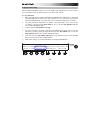
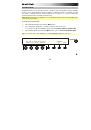
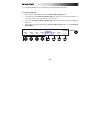
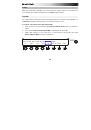
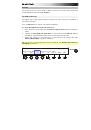
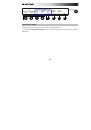
23.
Select:
Press and hold this button to enter Select Mode in which you can access the
secondary functions of the
Step Switches
(which will appear in the display). Release the
button to exit Select Mode. See the
section for more
information.
24.
Mute:
Press this button to activate or deactivate Pad Mute Mode. In this mode, press a
pad to mute or unmute it. You can mute multiple pads simultaneously. You can also
press the third
Function Button
to unmute
all
pads simultaneously.
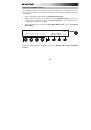
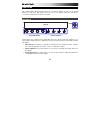
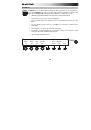
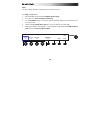
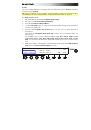
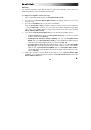
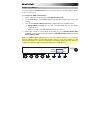
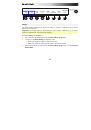
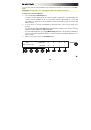
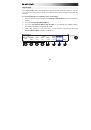
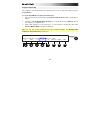
25.
Solo:
Press this button to activate or deactivate Pad Solo Mode. In this mode, press a
pad to solo or un-solo it. You can solo multiple pads simultaneously. You can also press
the third
Function Button
to un-solo
all
pads simultaneously.
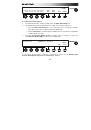
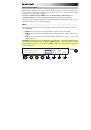
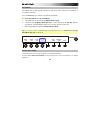
26.
Next Sequence (Next Seq):
Press this button to enter Next Sequence Mode in which
you can press the pads to trigger the Sequence with the same number. You can also use
the
Function Buttons
to set how the Sequences play back (
Mode
) and move from one to
another (
When
and
Timing
).
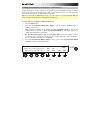
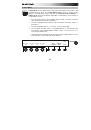
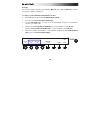
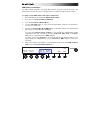
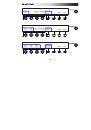
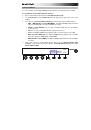
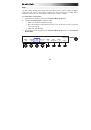
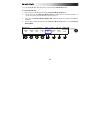
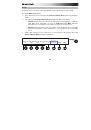
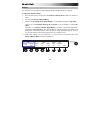
27.
Pad Button:
Press this button to enter or exit Pad Mode where you can adjust various
parameters that determine how the pads behave.
28.
Control Button (Ctrl):
Press this button to enter or exit Control Mode where you can
adjust various parameters affecting the knobs, faders, and assignable buttons.
29.
Sequence Button (Seq):
Press this button to enter or exit Sequence Mode where you
can adjust various parameters affecting the Sequencer.
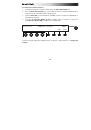
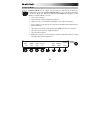
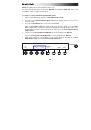
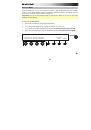
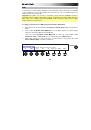
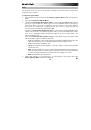
30.
Tempo:
Tap this button at the desired rate to enter a new tempo.
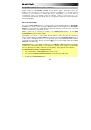
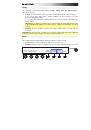
31.
DAW Control:
You can configure these buttons to send messages to your digital audio
workstation (DAW, or your music software) using the Mackie Control or HUI protocol. To
learn how to do this, see
Working with Presets: DAW Control Buttons
.