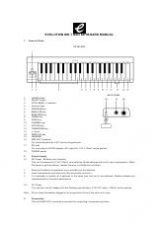
39
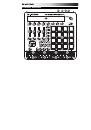
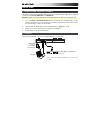
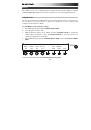
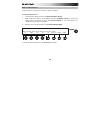
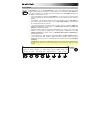
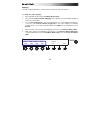
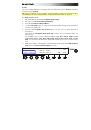
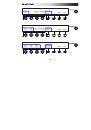
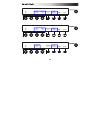
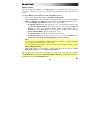
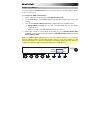
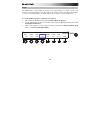
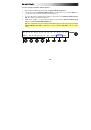
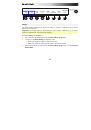
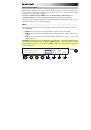
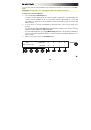
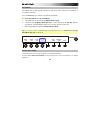
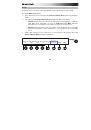
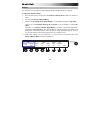
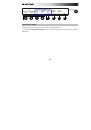
Assignable Controls
(Knobs, Faders, and Buttons)
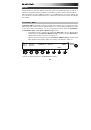
Trigger Finger Pro's
Assignable Controls
are the knobs, faders, and buttons below the
display on the left side. You can use these controls to send MIDI CC or Program Change
messages to your software or external MIDI device. Alternatively, you can set them to
communicate with your software using the Mackie Control or HUI protocols or to
communicate with Arsenal. (The knobs also let you adjust the parameters shown right above
them in the display.)
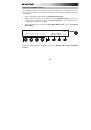
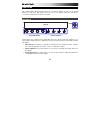
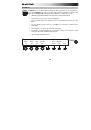
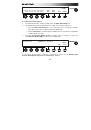
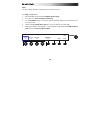
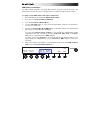
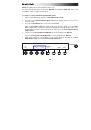
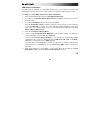
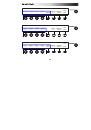
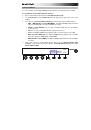
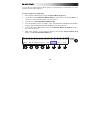
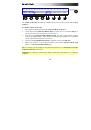
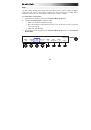
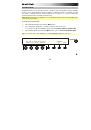
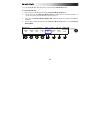
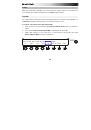
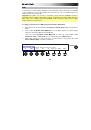
About Control Banks
Press the
Control Bank
button to cycle through the four independent banks of
Assignable
Controls
. The current control bank letter (
A–D
) will appear in the display. If the
Assignable
Buttons
in each bank are colored differently (which is likely the case), then their colors will
change to indicate the control bank, as well.
Note:
To learn how to configure the settings of your
DAW Control
buttons, see the
section of this chapter.
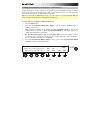
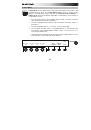
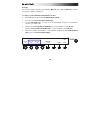
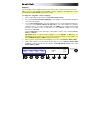
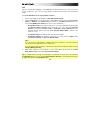
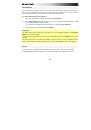
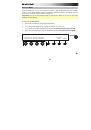
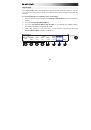
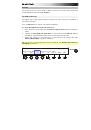
Alternatively, you select a control bank directly (without cycling through all of them) by
pressing and holding the
Control Bank
button and then pressing
Assignable Button 1
,
2
,
3
,
or
4
to select Control Bank A, B, C, or D, respectively. The selected Assignable Button will be
completely lit and its letter will have an asterisk
(
)
next to it in the display (while the
Control
Bank
button is held down).
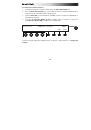
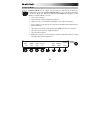
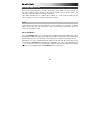
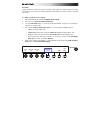
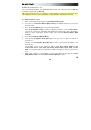
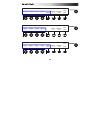
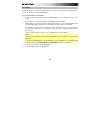
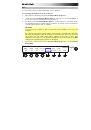
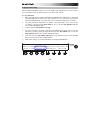
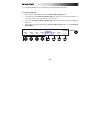
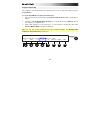
Important:
When a control bank's mapping is set to
Mackie
or
HUI
, that bank's Assignable
Controls can control either Tracks 1-4 or Tracks 5-8. (This does not apply to control banks
whose mapping is set to MIDI or Arsenal, even though the option appears in the display.)
To switch between Tracks 1-4 and Tracks 5-8:
1.
Press and hold the
Control Bank
button (in any mode).
2.
Press the fourth
Function Button (Tracks)
to switch between
1-4
or
5-8
.
3.
Release the
Control Bank
button.