
- 142 -
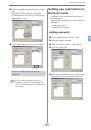
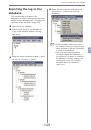
7. Saving managed data to the database
7
7. Saving managed data to the database
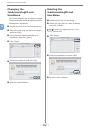
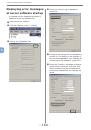
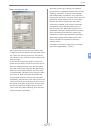
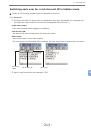
This section explains how to export the log, Job Account ID, and fee charge definition to
the database, and how to browse the log, Job Account ID, and fee charge definition from a
web browser. The log can be exported to the database from the point at which it is obtained
from the printer. The Job Account ID can be exported to the database at the point when it
is registered to or deleted form the printer, or when the settings are changed. To export the
managed information to the database, the following settings need to be configured.
• Database software settings (page 132)
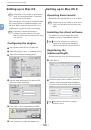
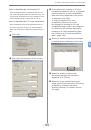
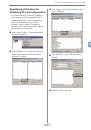
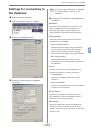
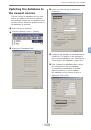
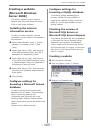
• Settings for connecting to the database (page 143)
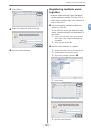
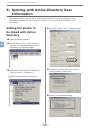
In order to export the managed log and Job Account ID information to the database, the
following settings also need to be configured in addition to the settings listed above.
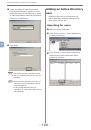
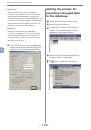
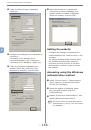
• Settings for recording information to the database of the printer that you want to export
managed information to must be enabled (page 144)
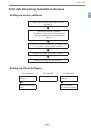
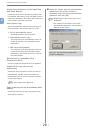
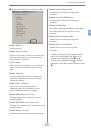
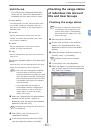
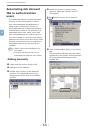
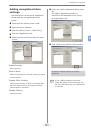
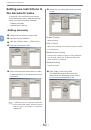
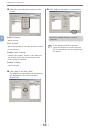
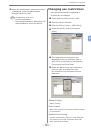
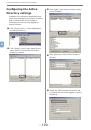
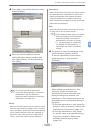
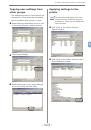
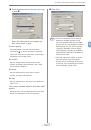
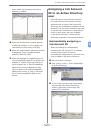
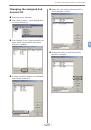
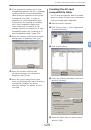
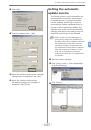
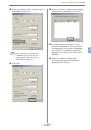
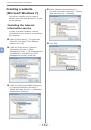
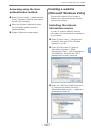
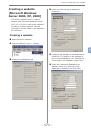
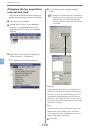
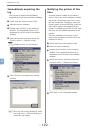
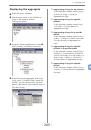
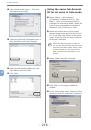
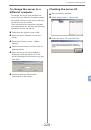
Configuring the database
software settings
Connecting using Microsoft
SQL Server or Microsoft SQL
Server Express
When the server software is installed
in the Windows 2000 operating system
and connects to Microsoft SQL Server
or Microsoft SQL Server Express, it is
necessary to install version 2.7 or higher of
MDAC (Microsoft Data Access Components)
to the Windows 2000 operating system.
MDAC can be downloaded from the
Microsoft website.
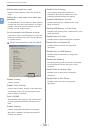
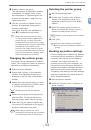
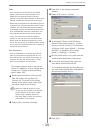
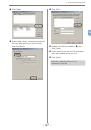
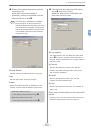
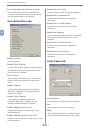
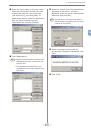
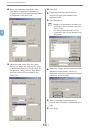
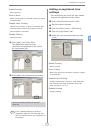
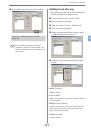
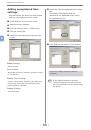
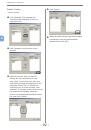
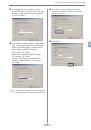
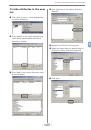
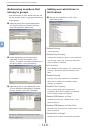
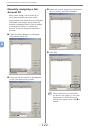
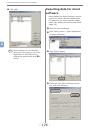
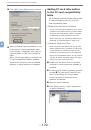
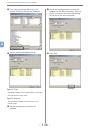
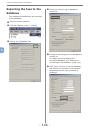
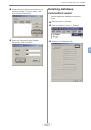
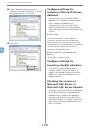
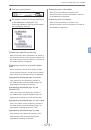
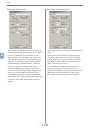
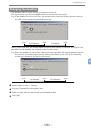
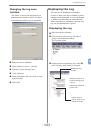
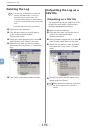
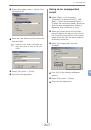
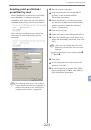
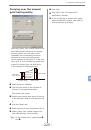
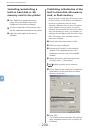
Connecting to MySQL
Database
When using MySQL on a different computer
to that which contains the server software,
libmysql.dll needs to exist in the server
software installation folder.
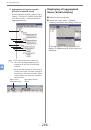
1
Copy libmysql.dll from the "bin" folder or
"lib" folder of the installation folder of the
MySQL installation to be used
2
Paste the file into the installation folder of
the server software.
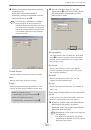
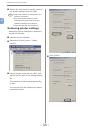
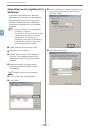
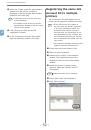
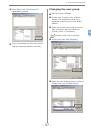
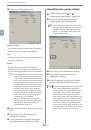
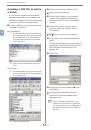
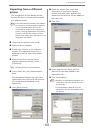
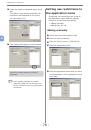
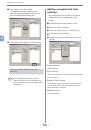
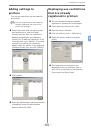
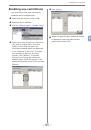
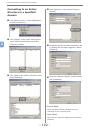
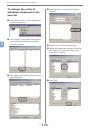
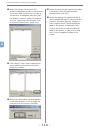
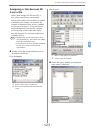
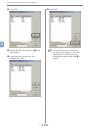
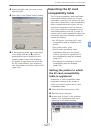
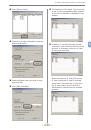
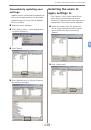
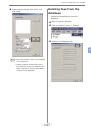
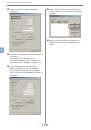
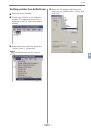
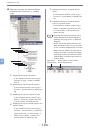
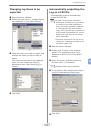
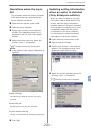
Depending on the MySQL version, the
administrator "root" permissions may not
be sufficient. In this case, increase the
permission level.
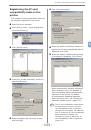
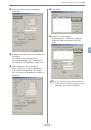
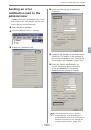
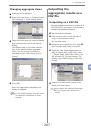
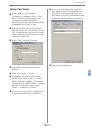
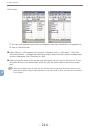
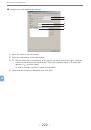
1
Start [MySQL Server Instance Config
Wizard] and check the [Include Bin
Directory in Windows PATH] check box to
complete the settings.
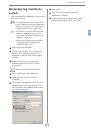
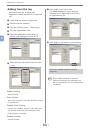
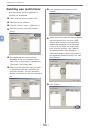
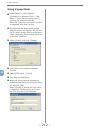
2
Start the command prompt in Windows
OS.
3
Execute the following command.
Mysql –u root –p
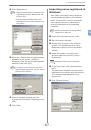
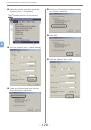
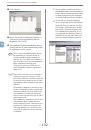
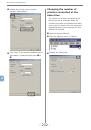
4
Enter the administrator "root" password
that was set when MySQL was installed.
5
Execute the following command.
grant all privileges on *.* to 'root'@'%'
with grant option;
 1
1
 2
2
 3
3
 4
4
 5
5
 6
6
 7
7
 8
8
 9
9
 10
10
 11
11
 12
12
 13
13
 14
14
 15
15
 16
16
 17
17
 18
18
 19
19
 20
20
 21
21
 22
22
 23
23
 24
24
 25
25
 26
26
 27
27
 28
28
 29
29
 30
30
 31
31
 32
32
 33
33
 34
34
 35
35
 36
36
 37
37
 38
38
 39
39
 40
40
 41
41
 42
42
 43
43
 44
44
 45
45
 46
46
 47
47
 48
48
 49
49
 50
50
 51
51
 52
52
 53
53
 54
54
 55
55
 56
56
 57
57
 58
58
 59
59
 60
60
 61
61
 62
62
 63
63
 64
64
 65
65
 66
66
 67
67
 68
68
 69
69
 70
70
 71
71
 72
72
 73
73
 74
74
 75
75
 76
76
 77
77
 78
78
 79
79
 80
80
 81
81
 82
82
 83
83
 84
84
 85
85
 86
86
 87
87
 88
88
 89
89
 90
90
 91
91
 92
92
 93
93
 94
94
 95
95
 96
96
 97
97
 98
98
 99
99
 100
100
 101
101
 102
102
 103
103
 104
104
 105
105
 106
106
 107
107
 108
108
 109
109
 110
110
 111
111
 112
112
 113
113
 114
114
 115
115
 116
116
 117
117
 118
118
 119
119
 120
120
 121
121
 122
122
 123
123
 124
124
 125
125
 126
126
 127
127
 128
128
 129
129
 130
130
 131
131
 132
132
 133
133
 134
134
 135
135
 136
136
 137
137
 138
138
 139
139
 140
140
 141
141
 142
142
 143
143
 144
144
 145
145
 146
146
 147
147
 148
148
 149
149
 150
150
 151
151
 152
152
 153
153
 154
154
 155
155
 156
156
 157
157
 158
158
 159
159
 160
160
 161
161
 162
162
 163
163
 164
164
 165
165
 166
166
 167
167
 168
168
 169
169
 170
170
 171
171
 172
172
 173
173
 174
174
 175
175
 176
176
 177
177
 178
178
 179
179
 180
180
 181
181
 182
182
 183
183
 184
184
 185
185
 186
186
 187
187
 188
188
 189
189
 190
190
 191
191
 192
192
 193
193
 194
194
 195
195
 196
196
 197
197
 198
198
 199
199
 200
200
 201
201
 202
202
 203
203
 204
204
 205
205
 206
206
 207
207
 208
208
 209
209
 210
210
 211
211
 212
212
 213
213
 214
214
 215
215
 216
216
 217
217
 218
218
 219
219
 220
220
 221
221
 222
222
 223
223
 224
224
 225
225
 226
226
 227
227
 228
228
 229
229
 230
230
 231
231
 232
232
 233
233
 234
234
 235
235
 236
236
 237
237
 238
238
 239
239