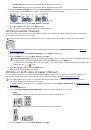
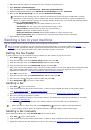
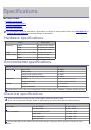
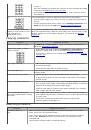
Windows® 7
Intel® Pentium® IV 1 GHz 32-bit or 64-bit processor or
higher
1 GB (2 GB)
16 GB
Support for Direct® 9 graphics with 128 MB memory (to enable the Aero theme).
DVD-R/W Drive
Windows Server®
2008 R2
Intel® Pentium® IV 1 GHz (x86) or 1.4 GHz (x64) processors
(2 GHz or faster)
512 MB (2048
MB)
10 GB
Internet Explorer® 5.0 or higher is the minimum requirement for all Windows operating systems.
Administrator rights are required to install the software.
Windows Terminal Services
is compatible with this machine.
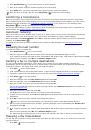
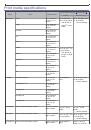
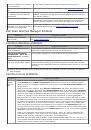
Macintosh
OPERATING
SYSTEM
Requirements (recommended)
CPU
RAM
free HDD
space
Mac OS X 10.3 ~
10.4
Intel® Processors
PowerPC G4/ G5
128 MB for a PowerPC based Mac
(512 MB)
512 MB for a Intel-based Mac (1 GB)
1 GB
Mac OS X 10.5
Intel® Processors
867 MHz or faster Power PC
G4/ G5
512 MB (1 GB)
1 GB
Mac OS X 10.6
Intel® Processors
1 GB (2 GB)
1 GB
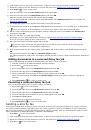
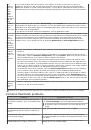
Linux
Item
Requirement (recommended)
Operating system RedHat® Enterprise Linux WS 4, 5 (32/64 bit)
Fedora Core 2~10 (32/64 bit)
SuSE Linux 9.1 (32 bit)
OpenSuSE® 9.2, 9.3, 10.0, 10.1, 10.2, 10.3, 11.0, 11.1 (32/64 bit)
Mandrake 10.0, 10.1 (32/64 bit)
Mandriva 2005, 2006, 2007, 2008, 2009 (32/64 bit)
Ubuntu 6.06, 6.10, 7.04, 7.10, 8.04, 8.10 (32/64 bit)
SuSE Linux Enterprise Desktop 9, 10 (32/64 bit)
Debian 3.1, 4.0, 5.0 (32/64 bit)
CPU
Pentium® IV 2.4 GHz (Intel Core™2)
RAM
512 MB (1024 MB)
Free HDD space
1 GB (2 GB)
It is necessary to claim swap partition of 300 MB or larger for working with large scanned images.
The Linux scanner driver supports the optical resolution at maximum.
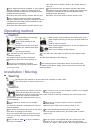
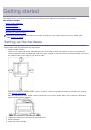
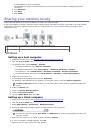
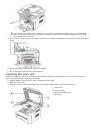
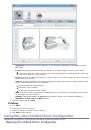
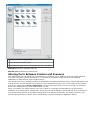
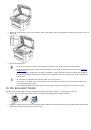
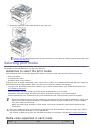
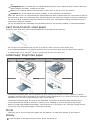
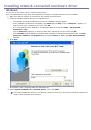
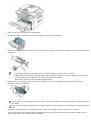
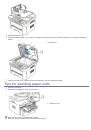
Installing USB connected machine’s driver
A locally connected machine is a machine directly attached to your computer using the USB cable. )
Only use an USB cable shorter than 3 m (118 in. ).
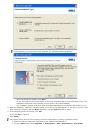
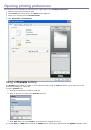
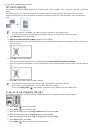
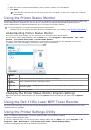
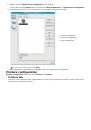
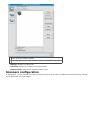
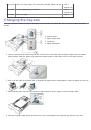
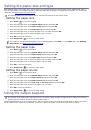
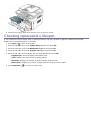
Windows
You can install the machine software using the typical or custom method.
The following steps below are recommended for most users who use a machine directly connected to your computer.
All components necessary for machine operations will be installed.
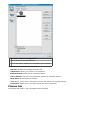
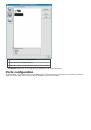
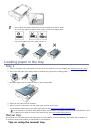
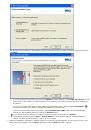
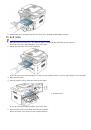
1.
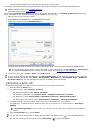
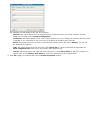
Make sure that the machine is connected to the computer and powered on.
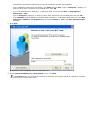
If the “
Found New Hardware Wizard
” window appears during the installation procedure, click
Cancel
in
close the window.
2.
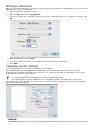
Insert the supplied software CD into your CD/DVD drive.
 1
1
 2
2
 3
3
 4
4
 5
5
 6
6
 7
7
 8
8
 9
9
 10
10
 11
11
 12
12
 13
13
 14
14
 15
15
 16
16
 17
17
 18
18
 19
19
 20
20
 21
21
 22
22
 23
23
 24
24
 25
25
 26
26
 27
27
 28
28
 29
29
 30
30
 31
31
 32
32
 33
33
 34
34
 35
35
 36
36
 37
37
 38
38
 39
39
 40
40
 41
41
 42
42
 43
43
 44
44
 45
45
 46
46
 47
47
 48
48
 49
49
 50
50
 51
51
 52
52
 53
53
 54
54
 55
55
 56
56
 57
57
 58
58
 59
59
 60
60
 61
61
 62
62
 63
63
 64
64
 65
65
 66
66
 67
67
 68
68
 69
69
 70
70
 71
71
 72
72
 73
73
 74
74
 75
75
 76
76
 77
77
 78
78
 79
79
 80
80
 81
81
 82
82
 83
83
 84
84
 85
85
 86
86
 87
87
 88
88
 89
89
 90
90
 91
91
 92
92
 93
93
 94
94
 95
95
 96
96
 97
97
 98
98
 99
99
 100
100
 101
101
 102
102
 103
103
 104
104
 105
105
 106
106
 107
107
 108
108
 109
109
 110
110
 111
111
 112
112
 113
113
 114
114
 115
115
 116
116
 117
117
 118
118
 119
119
 120
120
 121
121
 122
122
 123
123
 124
124
 125
125
 126
126
 127
127
 128
128
 129
129
 130
130
 131
131
 132
132
 133
133
 134
134
 135
135
 136
136
 137
137
 138
138