1.
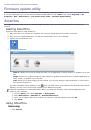
Make sure that the machine is connected to your computer and powered on.
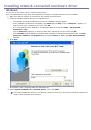
2.
Open
Dell Scan and Fax Manager
.
From the
Start
menu, click
Control Panel
>
Dell Scan and Fax Manager
.
3.
Select the appropriate machine from
Dell Scan and Fax Manager
and click
Properties
.
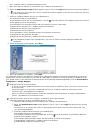
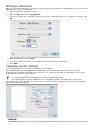
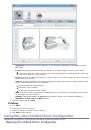
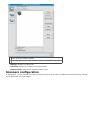
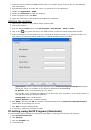
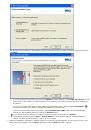
4.
Move to the
Set Fax Receiving
tab and activate
Enable Fax Receiving
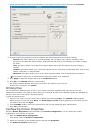
.
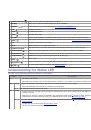
This feature can be used by only one user at a time because the fax may have confidential or private
information. If fax receiving is set to another user and you attempt to enable it, a pop-up window will
appear. Try again when fax receiving is not being used by another user. You can set the following options
through the
Set Fax Receiving
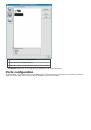
tab:
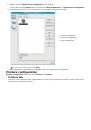
Enable Fax Receiving:
You can select whether to use or not.
File Format:
You can convert the received faxes to PDF or TIFF.
Save Location:
Selects location to save the converted faxes.
Prefix:
Selects file or folder scheme as prefix.
Notify me when fax received:
Shows popup window to notify receiving a fax.
Print received fax:
After receiving the fax, set prints information for the received fax.
5.
When setting is done, press
OK
.
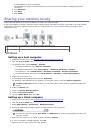
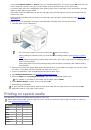
Sending a fax in your machine
This part explains how to send a fax and the special methods of transmission.
When you place the originals, you can use either the document feeder or the scanner glass (See
). If the originals are placed on both the document feeder and the scanner glass, the machine will read
the originals on the document feeder first, which has higher priority in scanning.
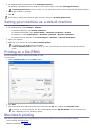
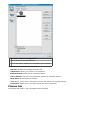
Setting the fax header
In some countries, you are required by law to indicate your fax number on any fax you send.
1.
Press
Menu (
)
on the control panel.
2.
Press the left/right arrow until
System Setup
appears and press
OK
.
3.
Press the left/right arrow until
Machine Setup
appears and press
OK
.
4.
Press the left/right arrow until
Machine ID
appears and press
OK
.
5.
Enter your name or the company name using the number keypad. You can enter alphanumeric characters using
the number keypad, and include special symbols by pressing the 1 button. For details on how to enter
alphanumeric characters, see
Entering characters using the number keypad
.
6.
Press
OK
to save the ID.
7.
Press the left/right arrow until
Machine Fax No.
appears and press
OK
.
8.
Enter your fax number using the number keypad and press
OK
.
9.
Press
Stop/Clear (
) to return to ready mode.
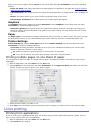
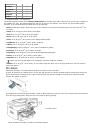
Sending a fax
1.
Press
Fax
(
) on the control panel.
2.
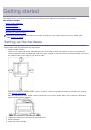
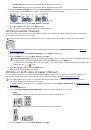
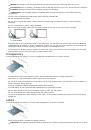
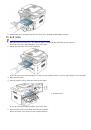
Load originals face up into the document feeder, or place a single original face down on the scanner glass.
(See
3.
Adjust the resolution and the darkness to suit your fax needs (See
Adjusting the document settings
4.
Enter the receiving fax machine’s number.
You can use speed dial numbers, or group dial numbers. For details about storing and searching for a number,
see
.
5.
Press
Start
(
) on the control panel. The machine starts to scan and send a fax to destinations.
When you want to cancel a fax job, press
Stop/Clear (
)
before the machine start transmission.
If you used the scanner glass, the machine shows the message asking to place another page.
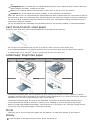
Sending a fax manually
This method is sending a fax using
On Hook Dial
on the control panel.
1.
Press
Fax
(
) on the control panel.
2.
Load originals face up into the document feeder, or place a single original face down on the scanner glass.
3.
Adjust the resolution and the darkness to suit your fax needs (See
 1
1
 2
2
 3
3
 4
4
 5
5
 6
6
 7
7
 8
8
 9
9
 10
10
 11
11
 12
12
 13
13
 14
14
 15
15
 16
16
 17
17
 18
18
 19
19
 20
20
 21
21
 22
22
 23
23
 24
24
 25
25
 26
26
 27
27
 28
28
 29
29
 30
30
 31
31
 32
32
 33
33
 34
34
 35
35
 36
36
 37
37
 38
38
 39
39
 40
40
 41
41
 42
42
 43
43
 44
44
 45
45
 46
46
 47
47
 48
48
 49
49
 50
50
 51
51
 52
52
 53
53
 54
54
 55
55
 56
56
 57
57
 58
58
 59
59
 60
60
 61
61
 62
62
 63
63
 64
64
 65
65
 66
66
 67
67
 68
68
 69
69
 70
70
 71
71
 72
72
 73
73
 74
74
 75
75
 76
76
 77
77
 78
78
 79
79
 80
80
 81
81
 82
82
 83
83
 84
84
 85
85
 86
86
 87
87
 88
88
 89
89
 90
90
 91
91
 92
92
 93
93
 94
94
 95
95
 96
96
 97
97
 98
98
 99
99
 100
100
 101
101
 102
102
 103
103
 104
104
 105
105
 106
106
 107
107
 108
108
 109
109
 110
110
 111
111
 112
112
 113
113
 114
114
 115
115
 116
116
 117
117
 118
118
 119
119
 120
120
 121
121
 122
122
 123
123
 124
124
 125
125
 126
126
 127
127
 128
128
 129
129
 130
130
 131
131
 132
132
 133
133
 134
134
 135
135
 136
136
 137
137
 138
138
Инструкции и руководства похожие на DELL 1135n