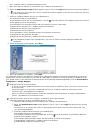
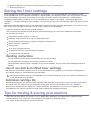
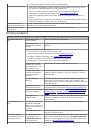
4.
The
Set Scan Button
tab allows you to change the saving destination and scan settings, add or delete application
program, and format files.
You can change the scanning machine by using the
Change Port
tab (Local or Network).
5.
When setting is done, press
OK
.
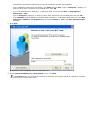
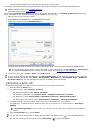
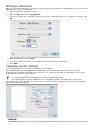
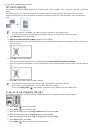
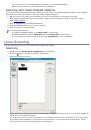
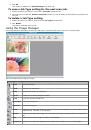
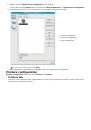
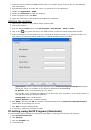
Set Scan Button
tab
Scan Destination
Available Destination List:
Shows the list of applications currently linked to scanned images in the PC’s
registry. Select the program you want to use and click the right arrow and add to
Front Panel Destination
List
.
Front Panel Destination List:
Shows the list of applications to open scanned image.
Add Application:
Allows you to add application you want to use to
Available Destination List
,
Remove Application:
Allows you to remove an item added by the user in the
Available Destination List
.
File Format:
Allows you to select the form of scanned data to be saved. You can choose among
BMP
,
JPEG
,
, and
TIFF
.
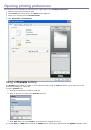
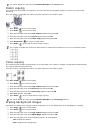
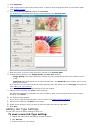
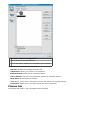
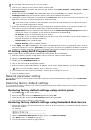
Scan Property
Computer ID:
Shows the ID of your computer.
Save Location:
Allows you to choose the location of the default saving folder.
Resolution:
Allows you to choose the scan resolution.
Scan Color:
Allows you to choose the scan color.
Scan Size:
Allows you to choose the scan size.
ADF Duplex:
Automatically scans both sides. If your model does not support this option, it will be grayed out.
Show Preview:
Checking this box allows you to preview applied scan options. You can modify the options
before scanning.
Default:
Allows you to go back to default options.
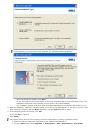
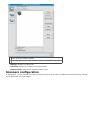
Change Port
tab
Local Scanner
Select when your machine is connected via USB or LPT port.
Network Scanner
Select when your machine is connected via network port.
Auto detection on the network:
Automatically detects your machine.
IP address:
Enter in your machine’s IP address to detect your machine.
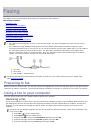
Scanning with TWAIN-enabled software
If you want to scan documents using other software, you will need to use TWAIN-compliant software, such as Adobe
Photoshop.
Follow the steps below to scan with TWAIN-compliant software:
1.
Make sure that the machine is connected to your computer and powered on.
2.
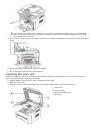
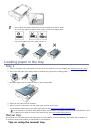
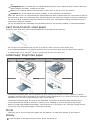
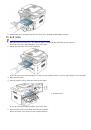
Load originals face up into the document feeder, or place a single original face down on the scanner glass.
(See
).
3.
Open an application, such as Adobe Photoshop.
4.
Open the TWAIN window and set the scan options.
5.
Scan and save your scanned image.
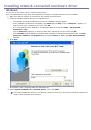
Scanning using the WIA driver
Your machine also supports the Windows Image Acquisition (WIA) driver for scanning images. WIA is one of the
standard components provided by Microsoft Windows XP and works with digital cameras and scanners. Unlike the
TWAIN driver, the WIA driver allows you to scan and easily adjust images without using additional software.
The WIA driver works only on Windows XP/Vista with a USB port.
Windows XP
1.
Make sure that the machine is connected to your computer and powered on.
 1
1
 2
2
 3
3
 4
4
 5
5
 6
6
 7
7
 8
8
 9
9
 10
10
 11
11
 12
12
 13
13
 14
14
 15
15
 16
16
 17
17
 18
18
 19
19
 20
20
 21
21
 22
22
 23
23
 24
24
 25
25
 26
26
 27
27
 28
28
 29
29
 30
30
 31
31
 32
32
 33
33
 34
34
 35
35
 36
36
 37
37
 38
38
 39
39
 40
40
 41
41
 42
42
 43
43
 44
44
 45
45
 46
46
 47
47
 48
48
 49
49
 50
50
 51
51
 52
52
 53
53
 54
54
 55
55
 56
56
 57
57
 58
58
 59
59
 60
60
 61
61
 62
62
 63
63
 64
64
 65
65
 66
66
 67
67
 68
68
 69
69
 70
70
 71
71
 72
72
 73
73
 74
74
 75
75
 76
76
 77
77
 78
78
 79
79
 80
80
 81
81
 82
82
 83
83
 84
84
 85
85
 86
86
 87
87
 88
88
 89
89
 90
90
 91
91
 92
92
 93
93
 94
94
 95
95
 96
96
 97
97
 98
98
 99
99
 100
100
 101
101
 102
102
 103
103
 104
104
 105
105
 106
106
 107
107
 108
108
 109
109
 110
110
 111
111
 112
112
 113
113
 114
114
 115
115
 116
116
 117
117
 118
118
 119
119
 120
120
 121
121
 122
122
 123
123
 124
124
 125
125
 126
126
 127
127
 128
128
 129
129
 130
130
 131
131
 132
132
 133
133
 134
134
 135
135
 136
136
 137
137
 138
138