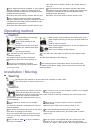
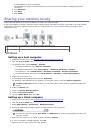
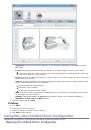
7.
Press the left/right arrow until the setting you want appears and press
OK
.
Resolution
: Sets the image resolution.
Scan Color
: Sets the color mode.
Scan Format
: Sets the file format in which the image is to be saved.
Scan Size
: Sets the image size.
Scan Format
appears only when you selected the Scan destination to
My Documents
.
If you want to scan from the default setting, press
Start
.
8.
Scanning begins.
Scanned image is saved in computer’s
My Documents
>
My Pictures
>
Dell
folder.
You can use Twain driver to scan quickly in
Dell Scan and Fax Manager
program.
You can also scan by pressing Window’s
Start
>
Control Panel
>
Dell Scan and Fax Manager
>
Quick Scan
.
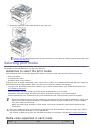
For network connected machine
Make sure the printer driver is installed on your computer using the software CD, since the printer driver includes
the scan program (See
Installing network connected machine’s driver
).
1.
Make sure that your machine and the computer are connected to a network and Dell Scan and Fax Manager is
installed on the computer.
2.
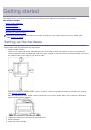
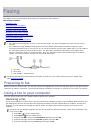
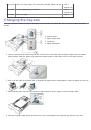
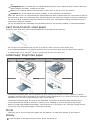
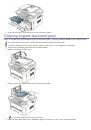
Load originals face up into the document feeder, or place a single original face down on the scanner glass.
3.
Press
Scan
(
) on the control panel.
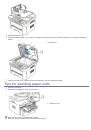
4.
Press the left/right arrow until
Scan To PC
appears and press
OK
.
5.
Press the left/right arrow until
Network PC
appears and press
OK
.
If you see
Not Available
message, check the port connection.
6.
Select your registered computer
ID
, and enter the
Password
if necessary.
ID
is the same ID as the registered
Computer ID
for
Dell Scan and Fax Manager
.
Password
is the 4 digit number registered
Password
for
Dell Scan and Fax Manager
.
7.
Press the left/right arrow until the application program you want appears and press
OK
.
Default setting is
My Documents
.
To add or delete the folder where the scanned file is saved, add or delete the application program in
Dell
Scan and Fax Manager
>
Properties
>
Set Scan Button
.
8.
Press the left/right arrow until the setting you want appears and press
OK
.
Resolution
: Sets the image resolution.
Scan Color
: Sets the color mode.
Scan Format
: Sets the file format in which the image is to be saved.
Scan Size
: Sets the image size.
Scan Format
appears only when you selected the Scan destination to
My Documents
.
If you want to scan from the default setting, press
Start
.
9.
Scanning begins.
Scanned image is saved in computer’s
My Documents
>
My Pictures
>
Dell
folder.
You can use Twain driver to scan quickly in
Dell Scan and Fax Manager
program.
You can also scan by pressing Window’s
Start
>
Control Panel
>
Dell Scan and Fax Manager
>
Quick Scan
.
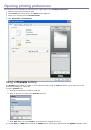
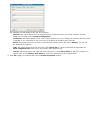
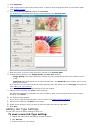
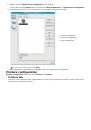
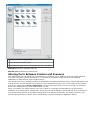
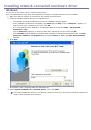
Using Dell Scan and Fax Manager
If you have installed the printer driver, the Dell Scan and Fax Manager program is installed too. Start Dell Scan and
Fax Manager program to find out about this program information and the installed scan driver's condition. Through this
program, you can change scan settings and add or delete the folders where scanned documents are saved in your
computer.
The Dell Scan and Fax Manager program can only be used in the Windows.
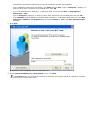
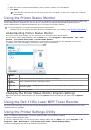
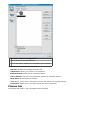
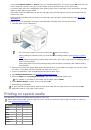
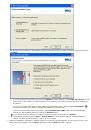
1.
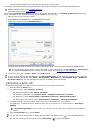
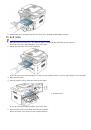
From the
Start
menu, click
Control Panel
>
Dell Scan and Fax Manager
.
2.
Select the appropriate machine from the Dell Scan and Fax Manager window.
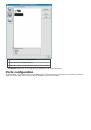
3.
Press
Properties
.
 1
1
 2
2
 3
3
 4
4
 5
5
 6
6
 7
7
 8
8
 9
9
 10
10
 11
11
 12
12
 13
13
 14
14
 15
15
 16
16
 17
17
 18
18
 19
19
 20
20
 21
21
 22
22
 23
23
 24
24
 25
25
 26
26
 27
27
 28
28
 29
29
 30
30
 31
31
 32
32
 33
33
 34
34
 35
35
 36
36
 37
37
 38
38
 39
39
 40
40
 41
41
 42
42
 43
43
 44
44
 45
45
 46
46
 47
47
 48
48
 49
49
 50
50
 51
51
 52
52
 53
53
 54
54
 55
55
 56
56
 57
57
 58
58
 59
59
 60
60
 61
61
 62
62
 63
63
 64
64
 65
65
 66
66
 67
67
 68
68
 69
69
 70
70
 71
71
 72
72
 73
73
 74
74
 75
75
 76
76
 77
77
 78
78
 79
79
 80
80
 81
81
 82
82
 83
83
 84
84
 85
85
 86
86
 87
87
 88
88
 89
89
 90
90
 91
91
 92
92
 93
93
 94
94
 95
95
 96
96
 97
97
 98
98
 99
99
 100
100
 101
101
 102
102
 103
103
 104
104
 105
105
 106
106
 107
107
 108
108
 109
109
 110
110
 111
111
 112
112
 113
113
 114
114
 115
115
 116
116
 117
117
 118
118
 119
119
 120
120
 121
121
 122
122
 123
123
 124
124
 125
125
 126
126
 127
127
 128
128
 129
129
 130
130
 131
131
 132
132
 133
133
 134
134
 135
135
 136
136
 137
137
 138
138