job.
1.
Press
Copy
(
) on the control panel.
2.
Press
Menu
(
) on the control panel.
3.
Press the left/right arrow until
Copy Feature
appears and press
OK
.
4.
Press the left/right arrow until
Original Type
appears and press
OK
.
5.
Press the left/right arrow until the image mode you want appears and press
OK
.
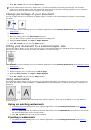
Text
: Use for originals containing mostly text.
Text/Photo
: Use for originals with mixed text and photographs.
Photo
: Use when the originals are photographs.
6.
Press
Stop/Clear
(
) to return to ready mode.
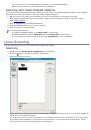
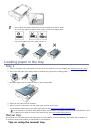
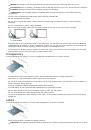
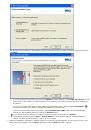
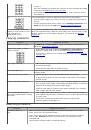
Reducing or enlarging copies
You can reduce or enlarge the size of a copied image from 25% to 400% when you copy original documents from
the scanner glass, or from 25% to 100% from the ADF.
To select from the predefined copy sizes:
1.
Press
Copy
(
) on the control panel.
2.
Press
Menu
(
) on the control panel.
3.
Press the left/right arrow until
Copy Feature
appears and press
OK
.
4.
Press the left/right arrow until
Reduce/Enlarge
appears and press
OK
.
5.
Press the left/right arrow until the size setting you want appears and press
OK
.
6.
Press
Stop/Clear
(
) to return to ready mode.
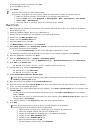
To scale the copy by directly entering the scale rate:
1.
Press
Copy
(
) on the control panel.
2.
Press
Menu
(
) on the control panel.
3.
Press the left/right arrow until
Copy Feature
appears and press
OK
.
4.
Press the left/right arrow until
Reduce/Enlarge
appears and press
OK
.
5.
Press the left/right arrow until
Custom
appears and press
OK
.
6.
Press the left/right arrow or numeric keypad to enter the copy size you want. Pressing and holding the
left/right arrow allows you to quickly scroll to the number you want.
7.
Press
OK
to save the selection.
8.
Press
Stop/Clear
(
) to return to ready mode.
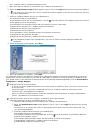
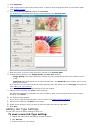
When you make a reduced copy, black lines may appear at the bottom of your copy.
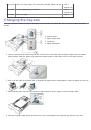
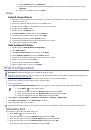
Changing the default copy settings
The copy options, including darkness, original type, copy size, collation, and number of copies, can be set to those
most frequently used. When you copy a document, the default settings are used unless they have been changed by
using the corresponding buttons on the control panel.
1.
Press
Copy
(
) on the control panel.
2.
Press
Menu
(
) on the control panel.
3.
Press the left/right arrow until
Copy Setup
appears and press
OK
.
4.
Press the left/right arrow until
Change Default
appears and press
OK
.
5.
Press the left/right arrow until the setup option you want appears and press
OK
.
6.
Press the left/right arrow until the setting you want appears and press
OK
.
7.
Repeat steps 5 through 6, as needed.
8.
Press
Stop/Clear
(
) to return to ready mode.
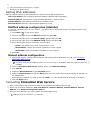
While you are setting copy options, pressing
Stop/Clear
(
) cancels the changed settings and restores the
defaults.
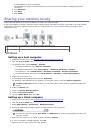
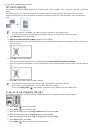
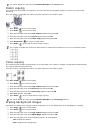
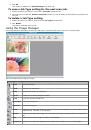
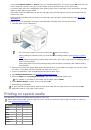
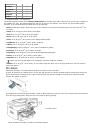
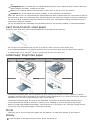
Using special copy features
 1
1
 2
2
 3
3
 4
4
 5
5
 6
6
 7
7
 8
8
 9
9
 10
10
 11
11
 12
12
 13
13
 14
14
 15
15
 16
16
 17
17
 18
18
 19
19
 20
20
 21
21
 22
22
 23
23
 24
24
 25
25
 26
26
 27
27
 28
28
 29
29
 30
30
 31
31
 32
32
 33
33
 34
34
 35
35
 36
36
 37
37
 38
38
 39
39
 40
40
 41
41
 42
42
 43
43
 44
44
 45
45
 46
46
 47
47
 48
48
 49
49
 50
50
 51
51
 52
52
 53
53
 54
54
 55
55
 56
56
 57
57
 58
58
 59
59
 60
60
 61
61
 62
62
 63
63
 64
64
 65
65
 66
66
 67
67
 68
68
 69
69
 70
70
 71
71
 72
72
 73
73
 74
74
 75
75
 76
76
 77
77
 78
78
 79
79
 80
80
 81
81
 82
82
 83
83
 84
84
 85
85
 86
86
 87
87
 88
88
 89
89
 90
90
 91
91
 92
92
 93
93
 94
94
 95
95
 96
96
 97
97
 98
98
 99
99
 100
100
 101
101
 102
102
 103
103
 104
104
 105
105
 106
106
 107
107
 108
108
 109
109
 110
110
 111
111
 112
112
 113
113
 114
114
 115
115
 116
116
 117
117
 118
118
 119
119
 120
120
 121
121
 122
122
 123
123
 124
124
 125
125
 126
126
 127
127
 128
128
 129
129
 130
130
 131
131
 132
132
 133
133
 134
134
 135
135
 136
136
 137
137
 138
138