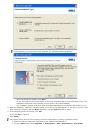
3.
4.
Press the left/right arrow until
Language
appears and press
OK
.
5.
Press the left/right arrow to display the language you want.
6.
Press
OK
to save the selection.
7.
Press
Stop/Clear
(
) to return to ready mode.
Setting the date and time
When you set the time and date, they are used in delay fax and delay print. They are printed on reports. If, however,
they are not correct, you need to change it for the correct time being.
If the machine’s power is cut off, you need to reset the correct time and date once the power has been restored.
1.
Press
Menu
(
) on the control panel.
2.
Press the left/right arrow until
System Setup
appears and press
OK
.
3.
Press the left/right arrow until
Machine Setup
appears and press
OK
.
4.
Press the left/right arrow until
Date & Time
appears and press
OK
.
5.
Enter the correct time and date using left/right arrow or numeric keypad.
Month = 01 to 12,
Day = 01 to 31,
Year = requires four digits,
Hour = 01 to 12,
Minute = 00 to 59,
and you can also select AM or PM.
6.
Press
OK
to save the selection.
7.
Press
Stop/Clear
(
) to return to ready mode.
Changing the clock mode
You can set your machine to display the current time using either a 12-hour or 24-hour format.
1.
Press
Menu
(
) on the control panel.
2.
Press the left/right arrow until
System Setup
appears and press
OK
.
3.
Press the left/right arrow until
Machine Setup
appears and press
OK
.
4.
Press the left/right arrow until
Clock Mode
appears and press
OK
.
5.
Press the left/right arrow to select the other mode and press
OK
.
6.
Press
Stop/Clear
(
) to return to ready mode.
Changing the default mode
Your machine is preset to Copy mode. You can switch this default mode between Fax mode and Copy mode.
1.
Press
Menu
(
) on the control panel.
2.
Press the left/right arrow until
System Setup
appears and press
OK
.
3.
Press the left/right arrow until
Machine Setup
appears and press
OK
.
4.
Press the left/right arrow until
Default Mode
appears and press
OK
.
5.
Press the left/right arrow to select the mode you want.
6.
Press
OK
to save the selection.
7.
Press
Stop/Clear
(
to return to ready mode.
Setting sounds
You can control the following sounds:
Key sound
: Turns the key sound
On
or
Off
. With this option set to
On
, a tone sounds each time a key is pressed.
Alarm Sound
: Turns the alarm sound
On
or
Off
. With this option set to
On
, an alarm tone sounds when an error
occurs or fax communication ends.
Speaker
: Turns
On
or
Off
the sounds from the telephone line through the speaker, such as a dial tone or a fax
tone. With this option set to
Comm.
which means “Common”, the speaker is on until the remote machine answers.
You can adjust the volume level using
On Hook Dial
. If your machine has a handset, you can adjust the
volume level using the handset.
 1
1
 2
2
 3
3
 4
4
 5
5
 6
6
 7
7
 8
8
 9
9
 10
10
 11
11
 12
12
 13
13
 14
14
 15
15
 16
16
 17
17
 18
18
 19
19
 20
20
 21
21
 22
22
 23
23
 24
24
 25
25
 26
26
 27
27
 28
28
 29
29
 30
30
 31
31
 32
32
 33
33
 34
34
 35
35
 36
36
 37
37
 38
38
 39
39
 40
40
 41
41
 42
42
 43
43
 44
44
 45
45
 46
46
 47
47
 48
48
 49
49
 50
50
 51
51
 52
52
 53
53
 54
54
 55
55
 56
56
 57
57
 58
58
 59
59
 60
60
 61
61
 62
62
 63
63
 64
64
 65
65
 66
66
 67
67
 68
68
 69
69
 70
70
 71
71
 72
72
 73
73
 74
74
 75
75
 76
76
 77
77
 78
78
 79
79
 80
80
 81
81
 82
82
 83
83
 84
84
 85
85
 86
86
 87
87
 88
88
 89
89
 90
90
 91
91
 92
92
 93
93
 94
94
 95
95
 96
96
 97
97
 98
98
 99
99
 100
100
 101
101
 102
102
 103
103
 104
104
 105
105
 106
106
 107
107
 108
108
 109
109
 110
110
 111
111
 112
112
 113
113
 114
114
 115
115
 116
116
 117
117
 118
118
 119
119
 120
120
 121
121
 122
122
 123
123
 124
124
 125
125
 126
126
 127
127
 128
128
 129
129
 130
130
 131
131
 132
132
 133
133
 134
134
 135
135
 136
136
 137
137
 138
138
Инструкции и руководства похожие на DELL 1135n