2.
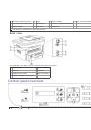
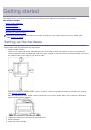
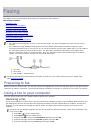
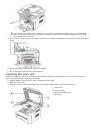
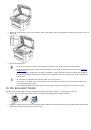
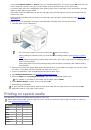
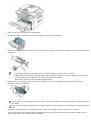
Load originals face up into the document feeder, or place a single original face down on the scanner glass.
(See
).
3.
From the
Start
menu, select
Control Panel
, >
Scanners and Cameras
.
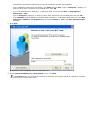
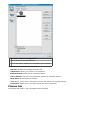
4.
Double click your scanner driver icon. The
Scanner and Camera wizard
appears.
5.
Click
Next
.
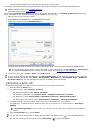
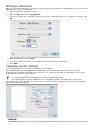
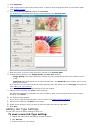
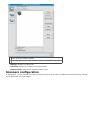
6.
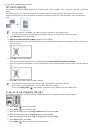
Set the option in
Choose scanning preferences
window and click
Preview
to see how your options affect the
picture.
7.
Click
Next
.
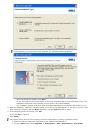
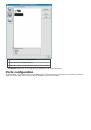
8.
Enter a picture name, and select a file format and destination to save the picture.
9.
Your picture has been successfully copied to your computer. Choose one of the options on screen.
10.
Click
Next
.
11.
Click
Finish
.
Windows Vista
1.
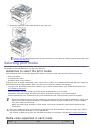
Make sure that the machine is connected to your computer and powered on.
2.
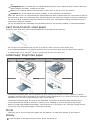
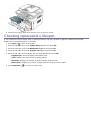
Load originals face up into the document feeder, or place a single original face down on the scanner glass.
(See
).
3.
From the
Start
menu select
Control Panel
>
Hardware and Sound
>
Scanners and Cameras
.
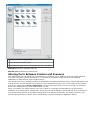
4.
Double click
Scan a document or picture
.
Windows Fax and Scan
application appears.
You can click on
View scanners and cameras
to view scanners,
If there is no
Scan a document or picture
, open the MS paint program and from the
File
click
From
Scanner or Camera...
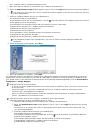
5.
Click
New Scan
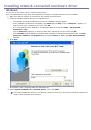
. Scan driver appears.
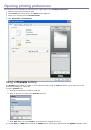
6.
Choose your scanning preferences and click
Preview
to see your preferences affect the picture.
7.
Click
Scan
.
If you want to cancel the scan job, press the
Cancel
button on the
Scanner and Camera wizard
.
Windows 7
1.
Make sure that the machine is connected to your computer and powered on.
2.
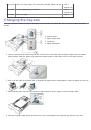
Load originals face up into the document feeder, or place a single original face down on the scanner glass
(See
).
3.
From the
Start
menu select
Control Panel
>
Hardware and Sound
>
Devices and Printers
.
4.
Click right button of mouse on device driver icon in
Printers and Faxes
>
Start Scan
.
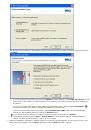
New Scan
application
appears.
5.
Choose your scanning preferences and click
Preview
to see your preferences affect the picture.
6.
Click
Scan
.
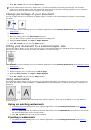
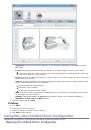
Macintosh scanning
Scanning with Image Capture
You can scan documents using
Image Capture
program. Macintosh OS offers
Image Capture
program.
1.
Make sure that your machine and computer are turned on and properly connected to each other.
2.
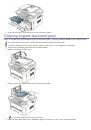
Load originals face up into the document feeder, or place a single original face down on the scanner glass.
(See
).
3.
Start
Applications
and click
Image Capture
.
If
No Image Capture device connected
message appears, disconnect the USB cable and reconnect it. If
the problem continues, refer to the
Image Capture
’s help.
4.
Set the scan options on this program.
5.
Scan and save your scanned image.
For more information about using
Image Capture
, refer to the
Image Capture
’s help.
Scan process differ according to TWAIN-compliant software. Please refer to the user’s guide of the software.
When scanning does not operate, update Mac OS to the latest version. Scanning operates properly in Mac
OS 10.4.7 or higher.
Use TWAIN-compliant softwares to apply more scan options.
 1
1
 2
2
 3
3
 4
4
 5
5
 6
6
 7
7
 8
8
 9
9
 10
10
 11
11
 12
12
 13
13
 14
14
 15
15
 16
16
 17
17
 18
18
 19
19
 20
20
 21
21
 22
22
 23
23
 24
24
 25
25
 26
26
 27
27
 28
28
 29
29
 30
30
 31
31
 32
32
 33
33
 34
34
 35
35
 36
36
 37
37
 38
38
 39
39
 40
40
 41
41
 42
42
 43
43
 44
44
 45
45
 46
46
 47
47
 48
48
 49
49
 50
50
 51
51
 52
52
 53
53
 54
54
 55
55
 56
56
 57
57
 58
58
 59
59
 60
60
 61
61
 62
62
 63
63
 64
64
 65
65
 66
66
 67
67
 68
68
 69
69
 70
70
 71
71
 72
72
 73
73
 74
74
 75
75
 76
76
 77
77
 78
78
 79
79
 80
80
 81
81
 82
82
 83
83
 84
84
 85
85
 86
86
 87
87
 88
88
 89
89
 90
90
 91
91
 92
92
 93
93
 94
94
 95
95
 96
96
 97
97
 98
98
 99
99
 100
100
 101
101
 102
102
 103
103
 104
104
 105
105
 106
106
 107
107
 108
108
 109
109
 110
110
 111
111
 112
112
 113
113
 114
114
 115
115
 116
116
 117
117
 118
118
 119
119
 120
120
 121
121
 122
122
 123
123
 124
124
 125
125
 126
126
 127
127
 128
128
 129
129
 130
130
 131
131
 132
132
 133
133
 134
134
 135
135
 136
136
 137
137
 138
138
Инструкции и руководства похожие на DELL 1135n