Инструкция для ZELMER 13Z010

(скачивание инструкции бесплатно)
Формат файла: PDF
Доступность: Бесплатно как и все руководства на сайте. Без регистрации и SMS.
Дополнительно: Чтение инструкции онлайн
background image

The mode for setting 1 cup of espresso coffee has been restored to the 

factory set amount.

If the setting for 2 cups of espresso needs to be restored, follow the 


description above 1-3 but pressing the button for setting 2 cups of es

-

presso instead of the button for setting 1 cup of espresso.

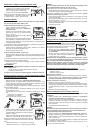
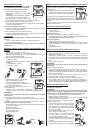
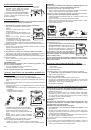
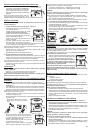
Preparing frothed milk for  cappuccino coffee

Steam function for cappuccino coffee
WARNING:
Since the temperature required for producing steam is higher than 

the  temperature  for  espresso,  espresso  coffee  should  therefore  be 

prepared  before  frothing  milk.  Otherwise  espresso  coffee  may  be 

burnt.

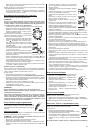
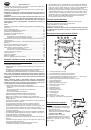
Attach the cappuccino attachment 


(14)

 to the 

steam wand 

(12)

.

Prepare espresso in a larger cup.


Press  the  cappuccino  brewing  button,  a  sig

-


nal sound will be heard and the light indicating 

temperature will start flashing.

The pilot light of the main switch will start giving 

continuous light when the appliance has reached 

the required temperature.

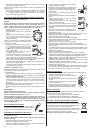
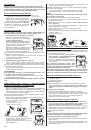
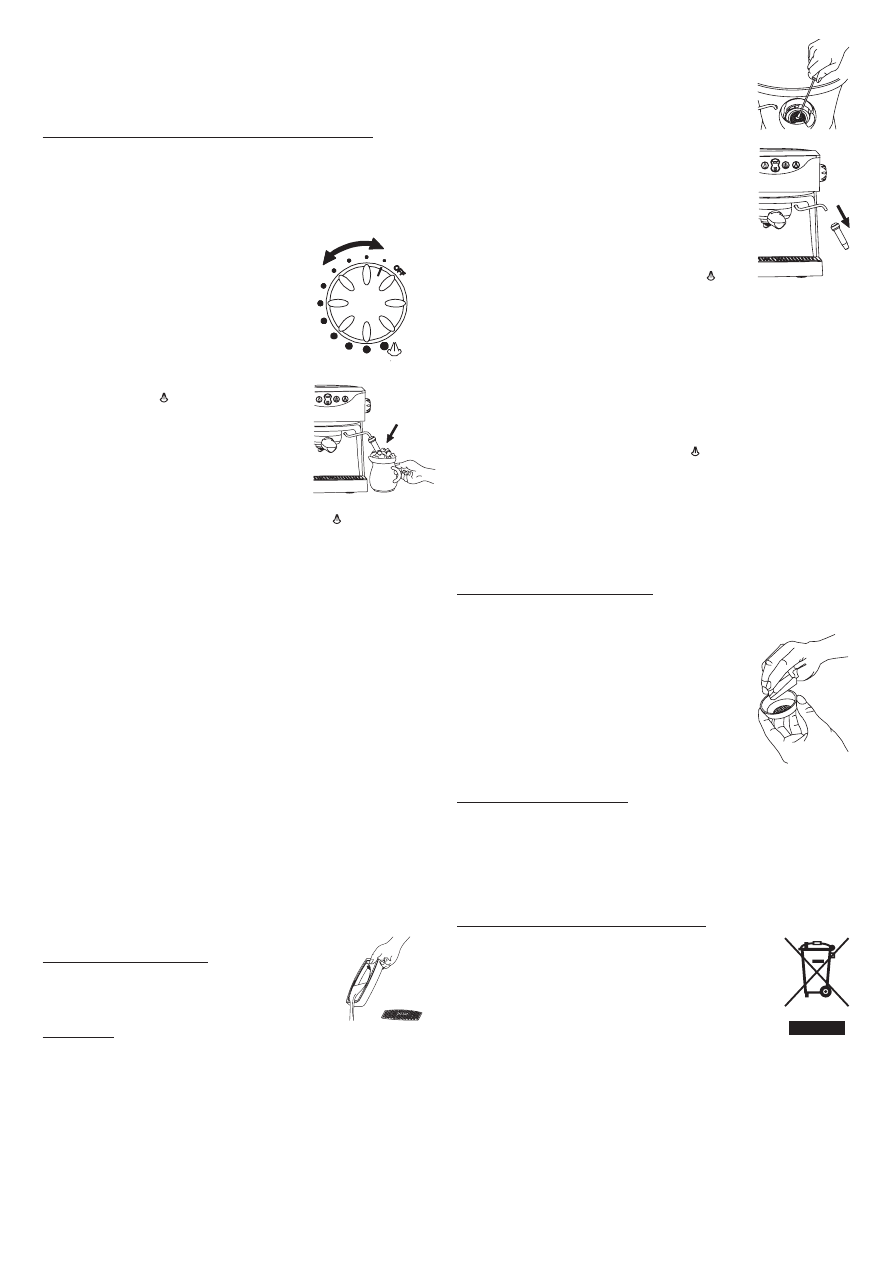
Place  an  empty  cup  under  the  cappucciono 


attachment and slowly set the steam regulator 

knob into position  . Allow water to flow until 

steam appears. Next turn the steam regulator 

knob back to position 

„OFF”

.

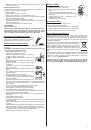
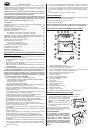
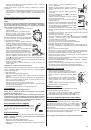
Pour milk into a cup with a handle (or a special 


cappuccino cup) to about 1/3 of its capacity.

Immerse  the  cappuccino  attachment  so  it 


is about 2 cm under the surface – the upper 

outlet in the cappuccino attachment just below 

the surface of milk.

Slowly turn the steam regulator knob into position 


. The force of the 

steam produced may be changed by turning the steam regulator knob 

into another position.

When  the  milk  is  hot  enough  and  froth  has  been  produced,  turn  the 


regulator knob back into position 

„OFF”

.

Pour or spoon the frothed milk into espresso coffee. The cappuccino 


coffee is ready.

Filling the espresso machine with water – replenishing water

If there is no water left in the espresso machine, the pump will operate 

loudly or steam will not come out of the steam wand while the cappuccino 

function is on.

In this situation:

Disconnect the espresso machine from the power supply network.


Fill the water tank with water (See the description under “How to fill the 


water tank”).

Plug the appliance into a suitable mains socket. The appliance will turn 


on producing a deep sound and the pilot light of the main switch will 

start flashing.

Place an empty container under the brew head.


Press the manual espresso brewing button to allow half of the water 


from the water tank to flow.

The espresso machine has been filled and is ready to be used.


WARNING!
Be careful! The steam wand is hot!
Check that the temperature light is off before you start frothing milk.
Always use the steam function again only after the temperature light 

has come off. If the temperature light starts flashing during milk fro

-

thing,  turn  the  steam  regulator  knob  back  into  position  “OFF”  and 

wait until the light starts giving continuous light.

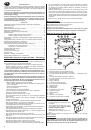
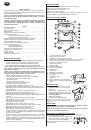
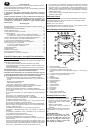
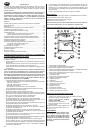
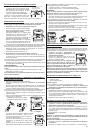
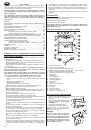
Emptying the drip tray

When  the  drip  tray  is  full  with  water,  the  “Empty  the 

drip tray” indicator (19) will rise above the grid for cups. 

The water from the drip tray needs to be removed.
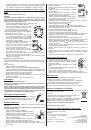
Descaling

It is recommended that scale is removed from the appliance every 3 mon

-

ths using citric acid.

NOTICE – Important: Dissolve 2 tablespoonfuls (about 30 g) of citric 

acid in 1 liter of water.

Disconnect the appliance from the power supply network.


Check that the appliance has cooled down completely.


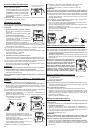
Before descaling, unscrew the „brewing grid” from the brew head using 


a screwdriver.

Clean  the  „brew  grid”  and  the  brew  head  from  scale  and  remains  of 


coffee.

Replace the spring of the valve and the washer on the brew head (wi

-


thout the grid) and screw them on tightly.

Take the cappuccino attachment 


(14)

 off the steam 

wand 

(12)

.

Fill the water tank with 1 liter of a pre-prepared so

-


lution of citric acid.

Close the water tank lid and place the tank in the 


appliance.

Place empty containers under the brew head and 


the steam wand.

Plug the appliance into a suitable mains socket .


Press the cappuccino brewing button, a sound sig

-


nal will be heard and a pilot light of the main switch 

will start flashing.

The pilot light of the main switch will start giving off 


continuous light when the appliance has reach the 

required temperature.

Press the espresso brewing button until half of the 


descaling solution has flown through.

Turn the steam regulator knob into position 


.

When steam comes out, turn it back into position 


OFF

.

Allow  the  remaining  part  of  the  descaling  solution  to  work  inside  the 


espresso machine for about 10 minutes.

Place an empty container under the brew head.


Press the manual brewing button.


Allow all of the descaling solution to flow through.


Continue the activities by pressing and holding the manual espresso 


brewing button until two tankfuls of clean water have flown through.

Fill the tank with cold water again.


Place an empty container under the brew head and the steam wand.


Press the cappuccino brewing button and wait until the pilot light stops 


flashing and starts giving continuous light.

Set the steam regulator knob in position 


 for 30 seconds. Turn off the 

cappuccino brewing button.

Press the manual espresso brewing button so that the remaining water 


can flow through the brew head.

Press the main switch to turn off the appliance and allow it to cool.


Unscrew the spring of the valve and the washer from the brew head 


and replace the “brew grid” with the spring of the valve and the washer 

on the brew head.

Replace the cappuccino attachment on the steam wand.


Cleaning and maintenance

Disconnect the appliance from the power supply network. 


Check that the appliance has cooled down completely.


Wipe the body of the appliance with a damp cloth 


or a damp sponge.

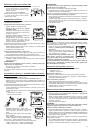
Remove the filter holder from the appliance and re

-


move the used coffee.

Clean  the  filter  holder  and  the  filter  with  a  damp 


cloth or a damp sponge.

Remove the grid for cups and the drip tray from the 


appliance and empty water and coffee which have 

been spilt on them and then clean them.

Take out the cappuccino attachment to clean it by 


pulling it downwards.

Standard requirements

Espresso machines meet the requirements of standards in force.

The appliance is compliant with the requirements of the following directi

-

ves:

The Low Voltage Directive (LVD) – 2006/95/EC


Electromagnetic Compatibility (EMC) – 2004/108/EC


The product is affixed with a CE Mark on the data plate.

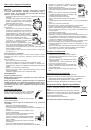
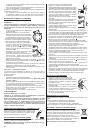
Ecology – Environment protection

Each user can protect the natural environment. It is neither 

difficult nor expensive.

In order to do it: put the cardboard packing into recycling pa

-

per container; put the polyethylene (PE) bags into container 

for plastic.

When worn out, dispose the appliance to particular disposal 

centre, because of the dangerous elements of this applian

-

ce, which can be hazardous for natural environment.

Do not dispose into the domestic waste disposal!!!

GW 13-010

1
2
3
4
5
6
7
8
9
10
11
12
13
14
15
16
17
18
19
20
21
22
23
24
25
26
27
28
Оглавление инструкции
  • Страница 1 из 29
    PL 1–4 Instrukcja użytkowania Ekspres do kawy ZELMER Typ 13Z010 ZELMER SA 35-016 Rzeszów, ul. Hoffmanowej 19, Polska www.zelmer.pl CZ 5–7 SK 8–10 Návod k obsluze Espresso ZELMER Typ 13Z010 Návod na použitie Kávovar ZELMER Typ 13Z010 ZELMER CZECH s.r.o. Horní Těrlicko 770,735 42 Těrlicko Tel.: 596
  • Страница 2 из 29
    PL Szanowni Klienci! Prosimy o uważne przeczytanie niniejszej instrukcji obsługi. Szczególną uwagę należy poświęcić wskazówkom bezpieczeństwa. Instrukcję obsługi prosimy zachować, aby można było korzystać z niej również w trakcie późniejszego użytkowania wyrobu. Producent nie odpowiada za
  • Страница 3 из 29
    Zakładanie i zdejmowanie pojemnika sitka Pojemnik sitka (15) zawsze zakładaj: –– od strony lewej, wciskając go do góry (kierunek a) tak, aby uchwyt zmieścił się w wybraniu w osłonie głowicy parzenia (7), –– przekręć w prawo do oporu (kierunek b). Zdejmowanie pojemnika sitka wykonuj w odwrotnej
  • Страница 4 из 29
    –– Jeżeli trzeba przywrócić ustawienie na 2 filiżanki „espresso”, postępuj według powyższego opisu 1–3 naciskając przycisk nastawiania 2 filiżanek „espresso” zamiast przycisku nastawiania 1 filiżanki „espresso”. Przygotowanie spienionego mleka do kawy „cappuccino” Funkcja pary do kawy „cappuccino”
  • Страница 5 из 29
    CZ Vážení zákazníci! Důkladně se prosím seznamte s tímto návodem k obsluze. Zejména bezpečnostním pokynům věnujte zvláštní pozornost. Návod k obsluze uschovejte pro případné další použití. Výrobce neodpovídá za případné škody způsobené nevhodným použitím espresa nebo za škody způsobené použitím
  • Страница 6 из 29
    Proplachování systému Příprava espresa bez funkce automatického nastavení Systém propláchněte před prvním použitím a po delší době, kdy jste espreso nepoužívali. Pro přípravu kávy nemusíte volit funkci automatického nastavení a připravit si ručně požadované množství kávy. –– Postupujte stejně jako
  • Страница 7 из 29
    –– Nalijte nebo lžičkou naložte napěněné mléko do kávy espreso. Káva cappuccino je hotová. Nalévání/doplňování vody Pokud spotřebujete veškerou vodu ze zásobníku, ozve se hlasitý provoz čerpadla a z trysky nebude vycházet pára. V takovém případě: –– Odpojte přístroj od přívodu el. proudu. ––
  • Страница 8 из 29
    SK Vážení klienti! Žiadame Vás o pozorné prečítanie tohto návodu na použitie. Osobitnú pozornosť je potrebné venovať bezpečnostným pokynom. Návod na použitie žiadame uchovať, aby ho bolo možné použiť aj počas doby ďalšieho používania výrobku. Výrobca nezodpovedá za prípadné škody zapríčinené
  • Страница 9 из 29
    Vkladanie a vyberanie nádoby sitka Nádobu sitka (15) vždy vkladajte: –– z ľavej strany tlačiac ju nahor (smer a) tak, aby rúčka vošlo do zárezu v kryte pariacej hlavy (7), –– pretočte vpravo na doraz (smer b). Nádobu sitka vyberajte v opačnom poradí – z pravej na ľavú stranu a potom vyberte z
  • Страница 10 из 29
    Príprava speneného mlieka do kávy „cappuccino“ Funkcia pary do kávy „cappuccino“ Upozornenie: Nakoľko je teplota potrebná na vytvorenie pary vyššia ako teploty na „espresso“, je potrebné kávu „espresso“ pripraviť pred spenením mlieka; v opačnom prípade môže byť káva „espresso“ pripálená. –– Na
  • Страница 11 из 29
    H Tisztelt Vásárlók! Kérjük figyelmesen olvassák el az alábbi használati utasítást. Különös figyelmet kell szentelni a biztonsági előirásoknak. A használati utasítást kérjük megőrizni, hogy a termék későbbi használata során is rendelkezésre álljon. A Gyártó nem vállal magára felelősséget a
  • Страница 12 из 29
    A szűrő edény felhelyezése és levétele A szűrő edényt (15) mindig így helyezze fel: –– bal oldali irányból felfelé tolva (a irányban) úgy, hogy a fogantyú a kivételkor a főzőfej védőfedelébe férjen (7), –– fordítsa el jobbra ütközésig (b irányban). A szűrő edény levételét fordított sorrendben
  • Страница 13 из 29
    Habos tejes „cappuccino” készítése A „cappuccino” gőzölésének a funkciója FIGYELEM: Mivel a gőz képződéséhez szükséges hőmérséklet magasabb a „presszó” kávé főzéséhez szükséges hőmérsékletnél, ezért a „presszó” kávét a tej habosodása előtt kell elkészíteni; ellenkező esetben a „presszó” kávé
  • Страница 14 из 29
    RO Stimaţi Clienţi! Vă rugăm să citiţi cu atenţie instrucţiunile de utilizare de faţă. Se cuvine să acordaţi o atenţie deosebită indicaţiilor privind siguranţa. Vă rugăm să păstraţi aceste instrucţiuni, pentru a le putea consulta şi mai târziu, în timpul utilizării aparatului. Producătorul nu
  • Страница 15 из 29
    Montarea şi demontarea manetei pentru sită Întotdeauna montaţi maneta pentru sită: În capul pentru prepararea cafelei, din carcasa, ales. –– de la stânga, împingând în sus (direcţia a), astfel încât maneta să intre în capul ales pentru prepararea cafelei (7) din carcasă; –– rotiţi la dreapta, până
  • Страница 16 из 29
    –– După 10 secunde, daţi drumul întrerupătorului principal, pe urmă butonului pentru o ceaşcă de „espresso”. Reglarea pentru o ceaşcă de cafea espresso a revenit la cantitatea programată din fabrică. –– Dacă trebuie să reveniţi la programarea din fabricaţie pentru cantitatea de 2 ceşti de
  • Страница 17 из 29
    RU Уважаемые Пользователи ! Просим внимательно ознакомиться с настоящей инструкцией по обслуживанию. Особое внимание необходимо обратить на правила техники безопасности. Просим сохранить инструкцию, чтобы ею можно было пользоваться в ходе дальнейшей эксплуатации прибора. Изготовитель не несет
  • Страница 18 из 29
    Установка фильтродержателя Установка фильтродержателя в заварочной головке. Фильтродержатель (15) всегда устанавливается следующим образом: –– начиная поворачивать его слева направо и одновременно прижимая вверх (направление a), плотно установите фильтродержатель в заварочную головку (7), –– затем
  • Страница 19 из 29
    –– Через 10 секунд отпустите главный выключатель, а затем кнопку выбора порций (1 чашка эспрессо). Выбор порции для 1 чашки кофе эспрессо восстановлен на фабрично запрограммированное количество. –– Если нужно будет выбрать порцию для 2 чашек кофе, поступайте, как описано выше в пкт 1 -3, нажимая
  • Страница 20 из 29
    BG Уважаеми клиенти! Моля прочетете внимателно тази инструкция за употреба. Особено внимание обърнете на препоръките за безопасност. Моля запазете инструкцията за употреба, за да можете да я ползвате и по време на понататъшното използване на уреда. Производителят не отговаря за евентуални повреди,
  • Страница 21 из 29
    Поставяне и сваляне на съда на цедката Съдът на цедката (15) се слага винаги: Вдлъбнатина в капачето на приставката за –– от лявата страна, като се натисне нагоре приготвяне на кафе (посока а) така, че дръжката да попадне във вдлъбнатината в капачето на приставката за приготвяне на кафе (7), ––
  • Страница 22 из 29
    а след това натиснете и задръжте главния превключвател (натиснете двата бутона и задръжте). –– След 10 секунди пуснете главния превключвател, а след това пуснете бутона за настройка на 1 чашка еспресо. Режимът за настройка на 1 чашка еспресо е върнат на фабрично програмираното количество. –– Ако
  • Страница 23 из 29
    UA Шановні Клієнти! Просимо Вас уважно прочитати інструкцію з експлуатації, приділяючи особливу увагу правилам техніки безпеки. Збережіть інструкцію, щоб Ви могли користатися нею в процесі подальшої експлуатації пристрою. Виробник не відповідає за можливі пошкодження, cпричинені застосуванням
  • Страница 24 из 29
    ЗАСТЕРЕЖЕННЯ! Забороняється використовувати кавоварку, в якій немає води. Резервуар слід наповнити водою, якщо її рівень опустився нижче позначки MIN. Не наливайте у резервуар гарячу воду. З гігієнічних причин не залишайте холодну воду у резервуарі надовго. Встановлення і демонтаж фільтра Фільтр
  • Страница 25 из 29
    –– Через 10 секунд відпустіть основний вимикач, а потім – кнопку налаштування 1 горня "еспрессо". Режим налаштування 1 горня кави “еспрессо” повертається у вихідне положення. –– Якщо необхідно знову встановити приготування 2 горнят "еспрессо", слід діяти згідно з наведеними вказівками 1–3,
  • Страница 26 из 29
    GB Dear Customers! We urge that you read this user’s manual carefully. Special attention needs to be paid to the safety precautions. Please save this manual so it can be referred to in the future use of the product . The manufacturer is not liable for any potential damage caused by using the
  • Страница 27 из 29
    Removing and replacing the filter holder Always fix the filter holder (15): –– from the left, by pressing it upwards (direction a) so that the holder fits in the slot in the cover of the brew head (7), –– turn it all the way to the right (direction b). To remove the filter holder, follow the
  • Страница 28 из 29
    The mode for setting 1 cup of espresso coffee has been restored to the factory set amount. –– If the setting for 2 cups of espresso needs to be restored, follow the description above 1-3 but pressing the button for setting 2 cups of espresso instead of the button for setting 1 cup of espresso.
  • Страница 29 из 29