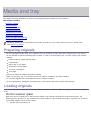
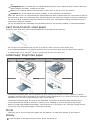
Scanning
Scanning with your machine lets you turn pictures and text into digital files that can be stored on your computer.
This chapter includes:
Basic scanning method
Scanning originals and sending to your computer (
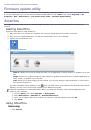
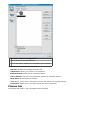
Using Dell Scan and Fax Manager
Scanning with TWAIN-enabled software
Scanning using the WIA driver
Macintosh scanning
Linux Scanning
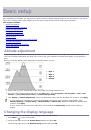
The maximum resolution that can be achieved depends upon various factors, including computer speed, available
disk space, memory, the size of the image being scanned, and bit depth settings. Thus, depending on your system
and what you are scanning, you may not be able to scan at certain resolutions, especially using enhanced
resolution.
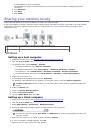
Basic scanning method
You can scan the originals with your machine via an USB cable or the network.
Dell Scan and Fax Manager:
Scan the originals from the control panel. Then, the scanned data will be stored in
the connected computers
My Documents
folder. When you install all the software in the supplied CD, the Dell Scan
and Fax Manager is also automatically installed on your computer. This feature can be used via the local connection
or the network connection (See
Using Dell Scan and Fax Manager
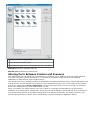
TWAIN:
TWAIN is the one of a preset imaging applications. Scanning an image launches the selected application,
enabling you to control the scanning process. This feature can be used via the local connection or the network
connection (See
Scanning with TWAIN-enabled software
SmarThru:
This program is the accompanying software for your machine. You can use this program to scan
images or documents. This feature can be used via the local connection or the network connection (See
WIA:
WIA stands for Windows Images Acquisition. To use this feature, your computer must be connected directly
with the machine via an USB cable (See
).
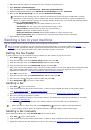
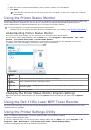
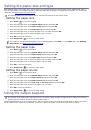
Scanning originals and sending to your computer
(Scan to PC)
You can scan an image on the machine via the Dell Scan and Fax Manager program that is installed in your networked
computer.
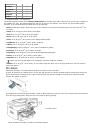
For USB connected machine
This is a basic scanning method for USB connected machine.
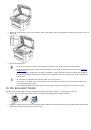
1.
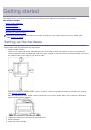
Make sure that the machine is connected to your computer and powered on.
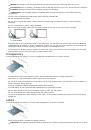
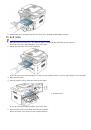
2.
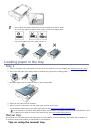
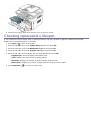
Load originals face up into the document feeder, or place a single original face down on the scanner glass.
(See
).
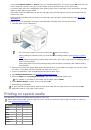
3.
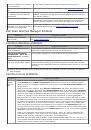
Press
Scan
(
) on the control panel.
4.
Press the left/right arrow until
Scan To PC
appears and press
OK
.
5.
Press the left/right arrow until
Local PC
appears and press
OK
.
If you see
Not Available
message, check the port connection.
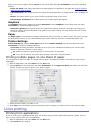
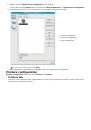
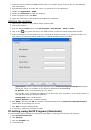
6.
Press the left/right arrow until the application program you want appears and press
OK
.
Default setting is
My Documents
.
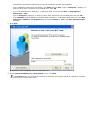
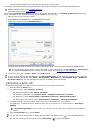
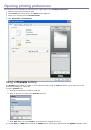
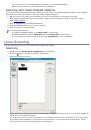
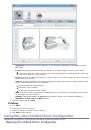
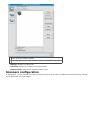
To add or delete the folder where the scanned file is saved, add or delete the application program in
Dell
Scan and Fax Manager
>
Properties
>
Set Scan Button
.
 1
1
 2
2
 3
3
 4
4
 5
5
 6
6
 7
7
 8
8
 9
9
 10
10
 11
11
 12
12
 13
13
 14
14
 15
15
 16
16
 17
17
 18
18
 19
19
 20
20
 21
21
 22
22
 23
23
 24
24
 25
25
 26
26
 27
27
 28
28
 29
29
 30
30
 31
31
 32
32
 33
33
 34
34
 35
35
 36
36
 37
37
 38
38
 39
39
 40
40
 41
41
 42
42
 43
43
 44
44
 45
45
 46
46
 47
47
 48
48
 49
49
 50
50
 51
51
 52
52
 53
53
 54
54
 55
55
 56
56
 57
57
 58
58
 59
59
 60
60
 61
61
 62
62
 63
63
 64
64
 65
65
 66
66
 67
67
 68
68
 69
69
 70
70
 71
71
 72
72
 73
73
 74
74
 75
75
 76
76
 77
77
 78
78
 79
79
 80
80
 81
81
 82
82
 83
83
 84
84
 85
85
 86
86
 87
87
 88
88
 89
89
 90
90
 91
91
 92
92
 93
93
 94
94
 95
95
 96
96
 97
97
 98
98
 99
99
 100
100
 101
101
 102
102
 103
103
 104
104
 105
105
 106
106
 107
107
 108
108
 109
109
 110
110
 111
111
 112
112
 113
113
 114
114
 115
115
 116
116
 117
117
 118
118
 119
119
 120
120
 121
121
 122
122
 123
123
 124
124
 125
125
 126
126
 127
127
 128
128
 129
129
 130
130
 131
131
 132
132
 133
133
 134
134
 135
135
 136
136
 137
137
 138
138