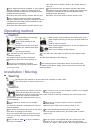
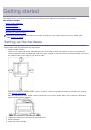
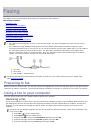
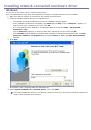
Registering a speed dial number
1.
Press
Fax
(
) on the control panel.
2.
Press
Address Book
( ) on the control panel.
3.
Press the left/right arrow until
New & Edit
appears and press
OK
.
4.
Press the left/right arrow until
Speed Dial
appears and press
OK
.
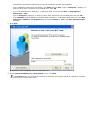
5.
Enter a speed dial number between 0 and 199 and press
OK
.
If an entry is already stored in the number you choose, the display shows the message to allow you to change
it. To start over with another speed dial number, press
Back
.
6.
Enter the name you want and press
OK
.
For details on how to enter alphanumeric characters (See
Entering characters using the number keypad
7.
Enter the fax number you want and press
OK
.
8.
Press
Stop/Clear
(
) to return to ready mode.
Editing speed dial numbers
1.
Press
Fax
(
) on the control panel.
2.
Press
Address Book
( ) on the control panel.
3.
Press the left/right arrow until
New & Edit
appears and press
OK
.
4.
Press the left/right arrow until
Speed Dial
appears and press
OK
.
5.
Enter the speed dial number you want to edit and press
OK
.
6.
Change the name and press
OK
.
7.
Change the fax number and press
OK
.
8.
Press
Stop/Clear
(
) to return to ready mode.
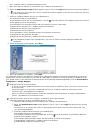
Using speed dial numbers
When you are prompted to enter a destination number while sending a fax, enter the speed dial number at which
you stored the number you want.
For a one-digit (0-9) speed dial number, press and hold the corresponding digit button on the number
keypad.
For a two- or three-digit speed dial number, press the first digit button(s) and then hold down the last digit
button.
You can also search through memory for an entry by pressing Address Book (See
).
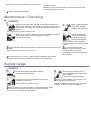
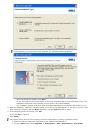
Group dial numbers
If you frequently send the same document to several destinations, you can group these destinations and set them
under a group dial number. You can then use a group dial number to send a document to all of the destinations
within the group. You can set up to 100 (0 through 99) group dial numbers using the destination’s existing speed
dial numbers.
Registering a group dial number
1.
Press
Fax
(
) on the control panel.
2.
Press
Address Book
( ) on the control panel.
3.
Press the left/right arrow until
New & Edit
appears and press
OK
.
4.
Press the left/right arrow until
Group Dial
appears and press
OK
.
5.
Enter a group dial number between 0 and 99 and press
OK
.
If an entry is already stored in the number you choose, the display shows the message to allow you to change
it.
6.
Enter the name you want and press
OK
.
For details on how to enter alphanumeric characters (See
Entering characters using the number keypad
7.
Enter the first few letters of the speed dial’s name you want.
8.
Press the left/right arrow until the name and number you want appears and press
OK
.
9.
Press
OK
when
Yes
appears at the
Another No.?
prompt.
Repeat step 7 to include other speed dial numbers into the group.
10.
When you have finished, press the left/right arrow to select
No
at the
Another No.?
prompt and press
OK
.
11.
Press
Stop/Clear
(
) to return to ready mode.
 1
1
 2
2
 3
3
 4
4
 5
5
 6
6
 7
7
 8
8
 9
9
 10
10
 11
11
 12
12
 13
13
 14
14
 15
15
 16
16
 17
17
 18
18
 19
19
 20
20
 21
21
 22
22
 23
23
 24
24
 25
25
 26
26
 27
27
 28
28
 29
29
 30
30
 31
31
 32
32
 33
33
 34
34
 35
35
 36
36
 37
37
 38
38
 39
39
 40
40
 41
41
 42
42
 43
43
 44
44
 45
45
 46
46
 47
47
 48
48
 49
49
 50
50
 51
51
 52
52
 53
53
 54
54
 55
55
 56
56
 57
57
 58
58
 59
59
 60
60
 61
61
 62
62
 63
63
 64
64
 65
65
 66
66
 67
67
 68
68
 69
69
 70
70
 71
71
 72
72
 73
73
 74
74
 75
75
 76
76
 77
77
 78
78
 79
79
 80
80
 81
81
 82
82
 83
83
 84
84
 85
85
 86
86
 87
87
 88
88
 89
89
 90
90
 91
91
 92
92
 93
93
 94
94
 95
95
 96
96
 97
97
 98
98
 99
99
 100
100
 101
101
 102
102
 103
103
 104
104
 105
105
 106
106
 107
107
 108
108
 109
109
 110
110
 111
111
 112
112
 113
113
 114
114
 115
115
 116
116
 117
117
 118
118
 119
119
 120
120
 121
121
 122
122
 123
123
 124
124
 125
125
 126
126
 127
127
 128
128
 129
129
 130
130
 131
131
 132
132
 133
133
 134
134
 135
135
 136
136
 137
137
 138
138