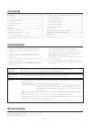
4 (E)
ENGLISH
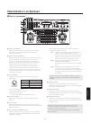
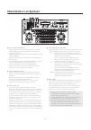
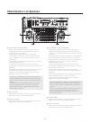
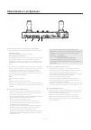
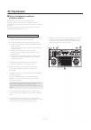
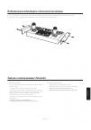
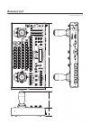
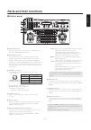
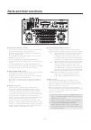
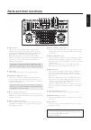
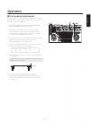
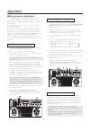
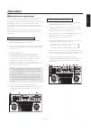
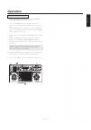
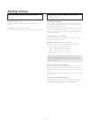
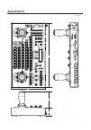
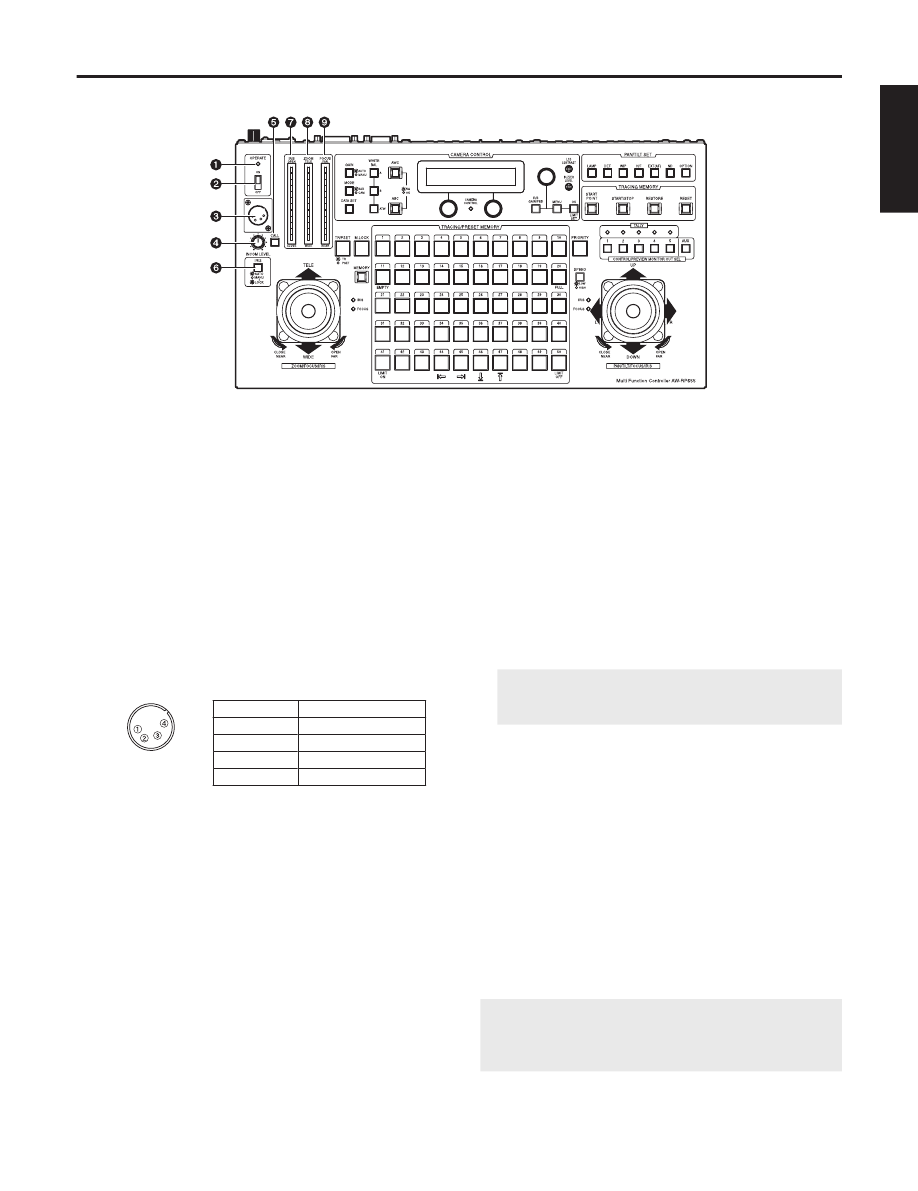
Parts and their functions
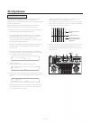
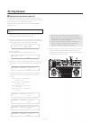
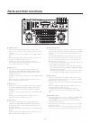
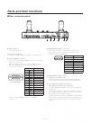
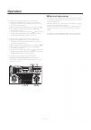
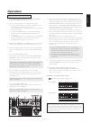
OPERATE lamp
This lamp will come on when power is supplied to this
unit and the OPERATE switch is on.
OPERATE switch
This controls the power of all pan/tilt head systems
(pan/tilt head and convertible camera) connected to
this unit. Allow at least 5 seconds between ON/OFF
operations. Setting the OPERATE switch to OFF will not
turn the power to this unit off. To turn the power to this
unit completely off, the power switch of AC adapter must
be turned off.
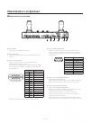
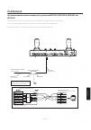
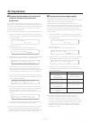
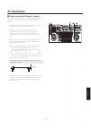
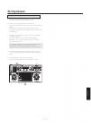
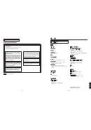
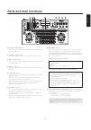
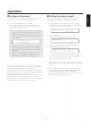
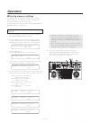
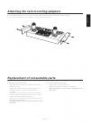
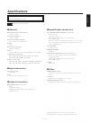
INCOM connector
The headset for inter-communications purposes is
connected here.
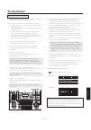
Pin No.
Signal Name
1
MIC GND
2
MIC
3
RECEIVER GND
4
RECEIVER
MIC impedance: 200 ohms
RECEIVER impedance: 600 ohms
<Products recommended>
CC-26K provided by Clear-Com.
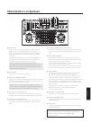
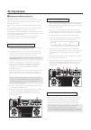
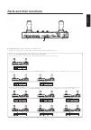
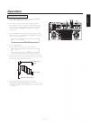
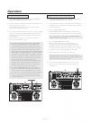
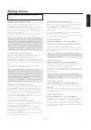
LEVEL control
This is used to adjust the volume of the headset’s
receiver.
CALL button
When this button is pressed, the buzzers on the other
connected additional panels sound, and the CALL
button’s lamp comes on.
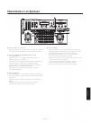
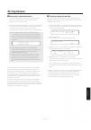
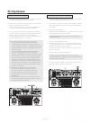
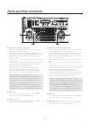
IRIS [AUTO/MANU/LOCK] button
This is used to select how to adjust the lens iris of the
pan/tilt head system currently selected.
Each time it is pressed, the AUTO, MANU or LOCK
setting is selected in turn.
AUTO: The lens iris is adjusted automatically, and the
IRIS button’s lamp comes on. If the
FOCUS/IRIS dial for adjusting the iris is
rotated when AUTO has been selected, the
IRIS button’s lamp flashes as a warning.
MANU: The lens iris is adjusted manually using the
FOCUS/IRIS dial.
At this setting, the IRIS button’s lamp goes off.
LOCK: The lens iris is fixed at the position where it
was adjusted manually, and the IRIS button’s
lamp flashes.
At the LOCK setting, the position of the lens
iris will not be changed even if the
FOCUS/IRIS dial is turned.
Set the button to the MANU position when entering the
lens iris position in the TRACING/PRESET MEMORY
button.
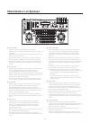
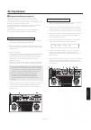
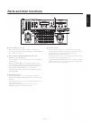
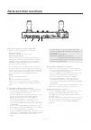
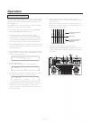
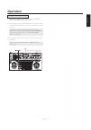
IRIS indicator
This indicates the lens iris position of the pan/tilt head
system currently selected using 12 steps (from CLOSE to
OPEN).
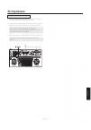
ZOOM indicator
This indicates the lens zoom position of the pan/tilt head
system currently selected using 12 steps (from WIDE to
TELE).
FOCUS indicator
This indicates the lens focus position of the pan/tilt head
system currently selected using 12 steps (from NEAR to
FAR).
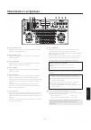
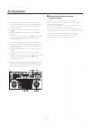
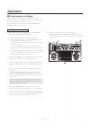
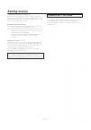
Control panel
The IRIS, ZOOM and FOCUS indicator displays may
not appear depending on the model of pan/tilt head and
camera used.
Contact your local dealer for details.
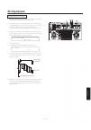
INCOM connector
as seen from above