5 (E)
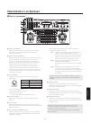
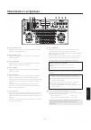
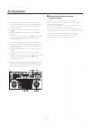
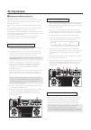
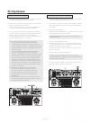
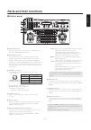
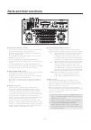
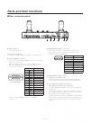
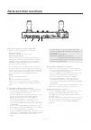
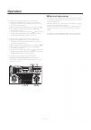
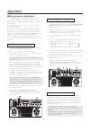
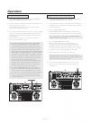
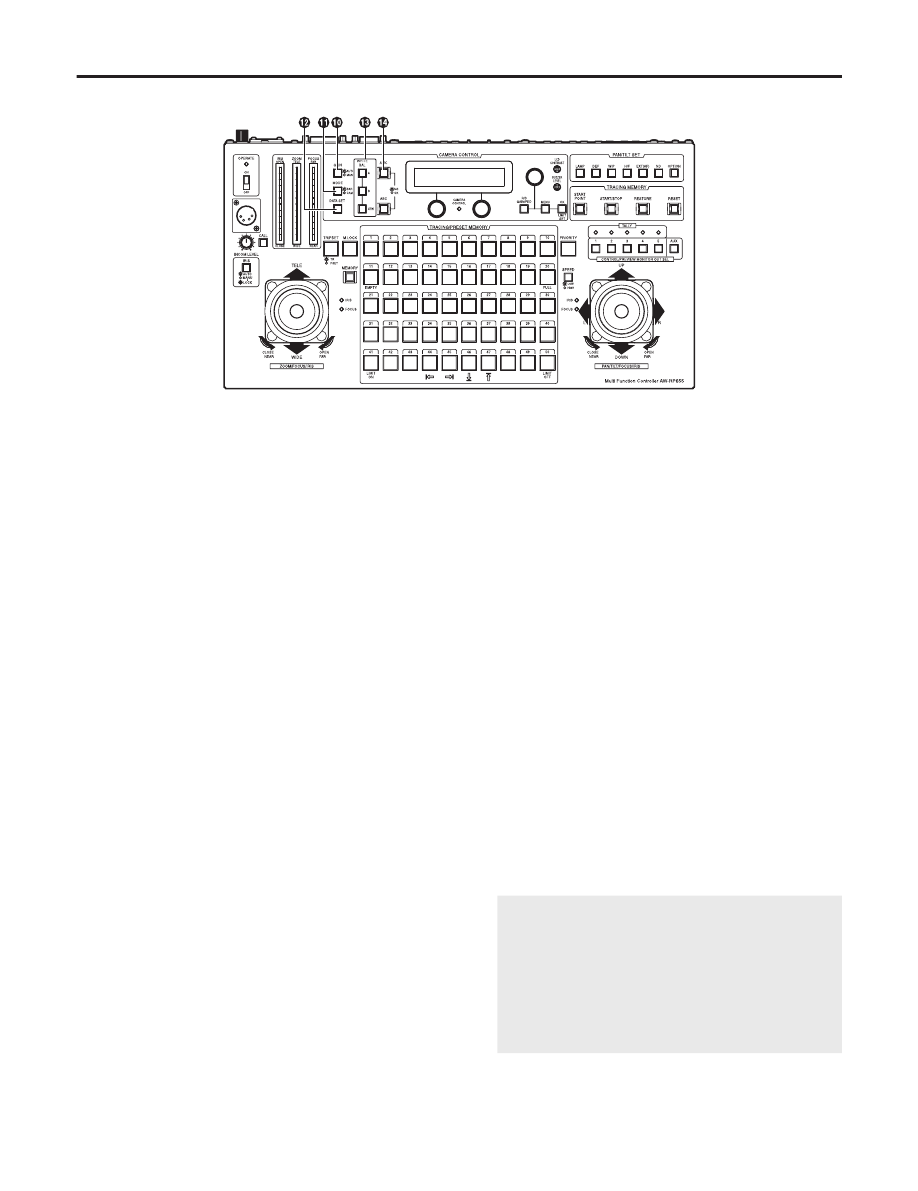
GAIN [AUTO/MANU] button
This is used to select the camera’s gain control mode in
the pan/tilt head system currently selected.
Each time it is pressed, the AUTO mode or MANUAL
mode is selected in turn.
In the AUTO mode, the button’s lamp comes on; in the
MANUAL mode it goes off.
If, in the AUTO mode, the R/B GAIN/PED button is
pressed and the gain is adjusted, the maximum gain can
be set.
If, in the MANUAL mode, the R/B GAIN/PED button is
pressed and the gain is adjusted, any setting from 0 dB to
the night eye mode can be selected for the gain.
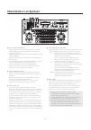
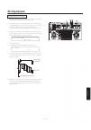
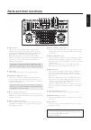
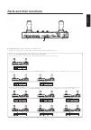
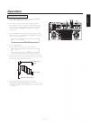
MODE [BAR/CAM] button
This is used to select the camera’s video output signals in
the pan/tilt head system currently selected.
Each time it is pressed, the camera’s colour bar signals
or video signals are selected in turn.
When the colour bar signals are selected, the button’s
lamp comes on; when the video signals are selected, it
goes off.
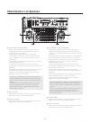
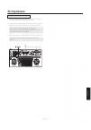
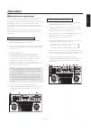
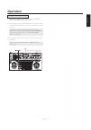
DATA SET button
At times when the multi-function controller has not
recognized a particular pan/tilt head system, such as
when the power to the pan/tilt head system is turned
on or when a particular pan/tilt head system has been
connected after the multi-function controller’s OPERATE
switch has been set to ON, select the pan/tilt head
system concerned, and then press the DATA SET button.
Hold the button down for at least two seconds.
The power of the selected pan/tilt head system will be
turned on, and the camera’s initial settings will be started.
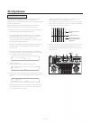
In order to avoid the DATA SET button being operated by
mistake, this button is designed to work only after it has
been held down for at least two seconds.
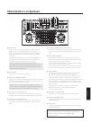
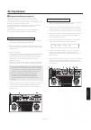
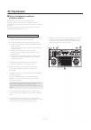
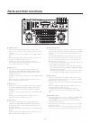
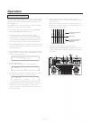
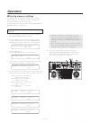
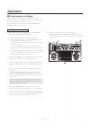
WHITE BAL [A/B/ATW] buttons
These are used to select the camera’s white balance
adjustment in the pan/tilt head system currently selected.
A:
When the A button is pressed, the white balance
status entered in the camera’s memory A is
established, and the A button’s lamp comes on.
If the AWC button is pressed after the A button
was pressed, the white balance is automatically
adjusted and entered in the camera’s memory A.
B:
When the B button is pressed, the white balance
status entered in the camera’s memory B is
established, and the B button’s lamp comes on.
If the AWC button is pressed after the B button
was pressed, the white balance is automatically
adjusted and entered in the camera’s memory B.
ATW: When the ATW button is pressed, the white
balance is set to the automatic adjustment
mode, and the ATW button’s lamp comes on.
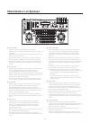
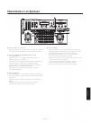
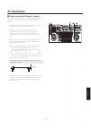
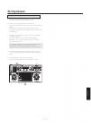
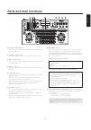
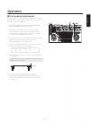
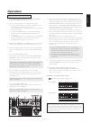
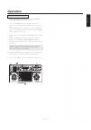
AWC button
When the WHITE BAL [A] button or [B] button has
been selected, press the AWC button to automatically
adjust the white balance and enter the adjustment in the
camera’s memory A or memory B.
While the white balance is being adjusted, the AWC
button’s lamp flashes; when it has been adjusted properly,
it goes off. It comes on when it was not possible to
perform the adjustment.
This function does not work if the MODE button has
been set to BAR (the MODE button’s lamp is lit) or if
ATW has been selected.
It may not be possible to adjust the white balance if
there is no white object on the screen being shot.
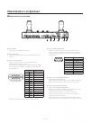
If a pan/tilt head AW-PH300/AW-PH300A/
AW-PH500/AW-PH600 is being used, the AWC
button’s lamp also goes off if the white balance was
not adjusted properly.
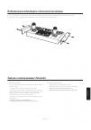
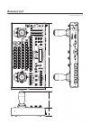
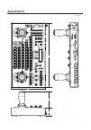
Parts and their functions