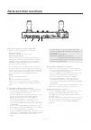
28 (E)
ENGLISH
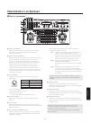
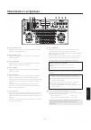
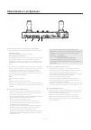
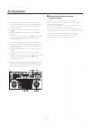
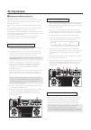
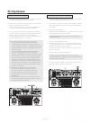
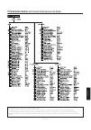
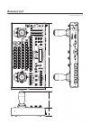
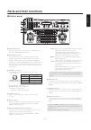
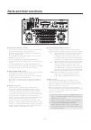
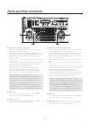
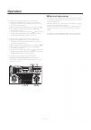
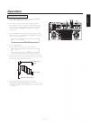
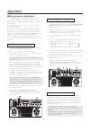
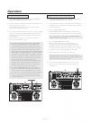
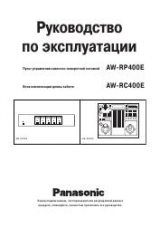
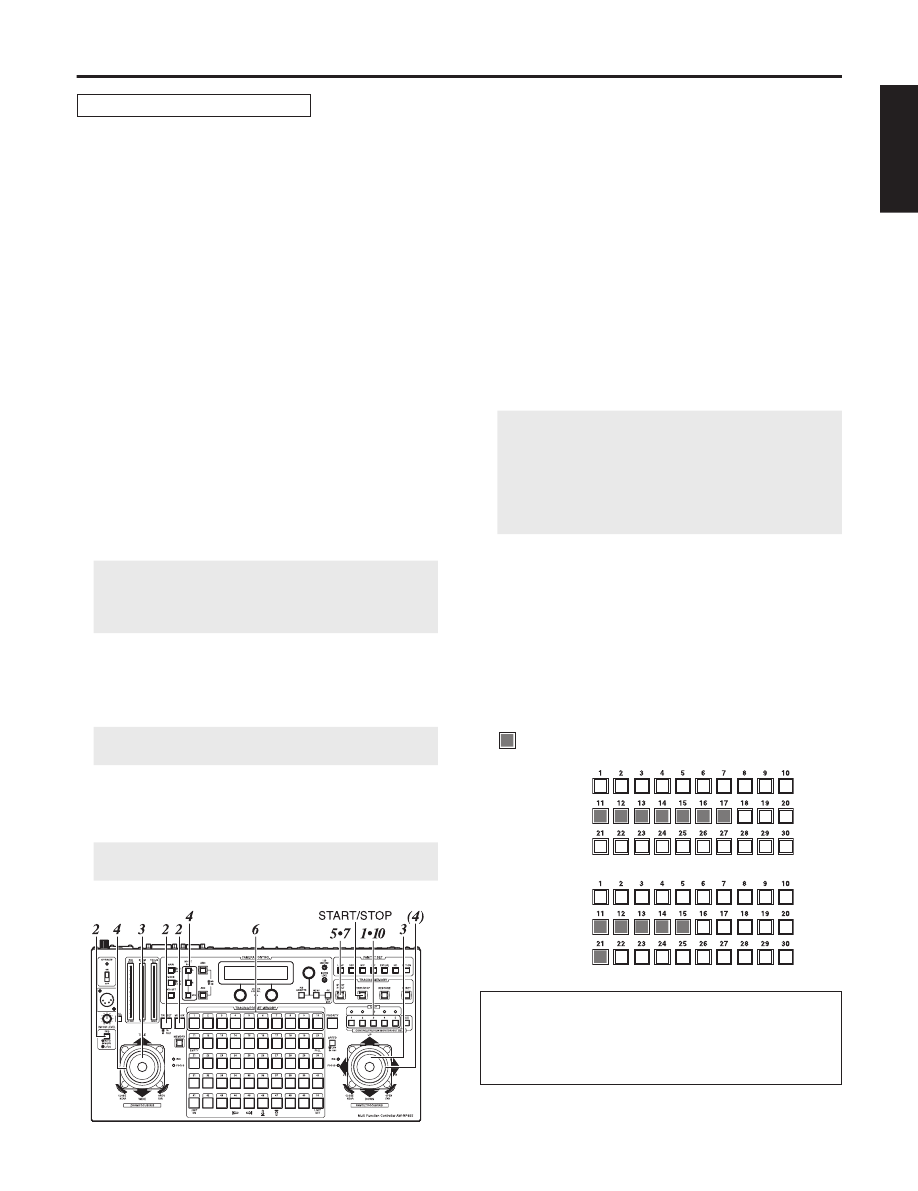
1. Select the pan/tilt head system using the CONTROL/
PREVIEW MONITOR OUT SEL button.
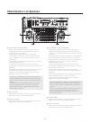
2. Use the following buttons to establish the modes.
Press the IRIS button to establish the MANU mode
(the IRIS button’s lamp now goes off).
If the AUTO mode is established, the lens iris position
will not be entered.
Press the TR/PSET button to establish the tracing
memory mode (the TR/PSET button’s lamp now
comes on).
If the M.LOCK button’s lamp lights, press the M.LOCK
button to establish the memory entry mode (the
M.LOCK button’s lamp now goes off).
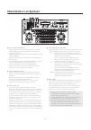
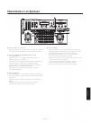
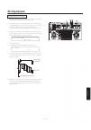
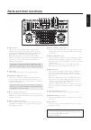
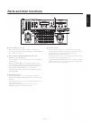
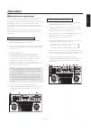
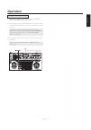
3. Operate the ZOOM lever and PAN/TILT lever, and on the
monitor now check the pictures which are to be shot.
4. Select the white balance from among the A, B and ATW
buttons, and adjust the lens iris using the FOCUS/IRIS
dial.
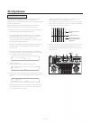
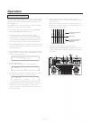
5. Press the START POINT button.
The lamps of those buttons among TRACING/PRESET
MEMORY buttons 1 through 10 in which data can be
entered now come on.
If any button’s lamp remains off, it means that data has
already been entered into that button. To enter data
into a button whose lamp is off, delete the data in the
memory first, and then proceed.
6. Press the button into which data is to be entered.
Only the lamp of the button which was pressed comes
on, and the data is entered as the start position of the
tracing memory.
If the PAN/TILT lever is now operated, the entry mode
will be cancelled.
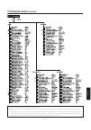
7. Press the START/STOP button.
The START/STOP button’s lamp flashes, and the entry
standby mode is established.
When the START/STOP button is now pressed, the
entry mode will be cancelled.
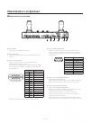
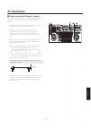
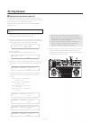
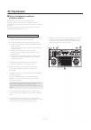
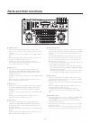
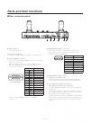
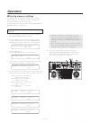
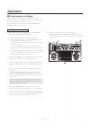
8. The entry in the tracing memory commences as soon
as the pan, tilt, zoom, focus, iris or white balance mode
selection is initiated so proceed with the entry operation.
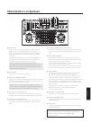
The START/STOP button stops flashing and comes on,
and the lamps of TRACING/PRESET MEMORY buttons
11 through 30 come on to provide a general guideline of
the time for which data can be entered.
Each of the No. 11 through No. 20 buttons indicates a
time of approximately 3 seconds; and each of the No. 21
through No. 30 buttons indicates a time of approximately
30 seconds.
The lamps of buttons No. 20 and above go off
approximately every 3 seconds to indicate the remaining
time during which data can be entered in the memories.
As soon as the lamp in button No. 11 goes off, the
buzzer sounds, and the tracing memory entry is
completed.
Press the START/STOP button to suspend the
tracing memory entry at any time. The operations
performed up until the entry was stopped are
entered as the tracing memory data.
The buzzer sounds when tracing memory entry
is started or suspended and when data entry is
completed.
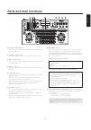
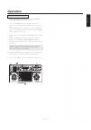
9. If necessary, enter the other operations into TRACING/
PRESET MEMORY buttons 1 through 10 as tracing
memory data.
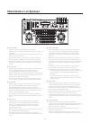
10. Select the next pan/tilt head system using the
CONTROL/PREVIEW MONITOR OUT SEL button,
and continue setting the tracing memory data for each
system concerned.
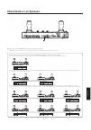
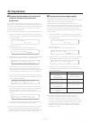
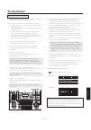
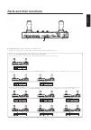
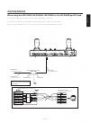
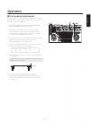
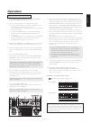
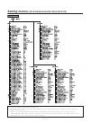
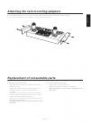
Example of remaining time display
: Indicates that a button’s lamp is lit.
Entering the tracing memory data
Operation
45 seconds
21 seconds
When data has been entered into the tracing memories,
the data will also be saved in the pan/tilt head’s memories.
Therefore, when the pan/tilt head has been replaced with
another head, enter the data into the tracing memories of
the head now in use.