B-10
B-10
|
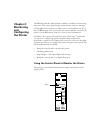
Using EPSON Drivers and Utilities for Macintosh
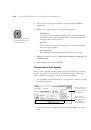
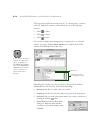
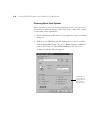
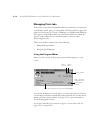
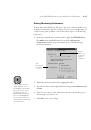
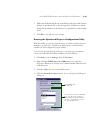
5. Choose any of the following:
•
Super MicroWeave
The
MicroWeave
and
Super MicroWeave
settings eliminate
unwanted banding effects. These settings are automatically selected
for all media types except plain paper.
•
High Speed
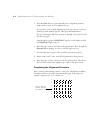
For fast, bidirectional printing at lower quality. If vertical lines in
your printout are misaligned when you use the
High Speed
setting,
you may need to turn it off or align the print head.
•
Flip Horizontal
For printing a mirror image of your file. Use with backlight film.
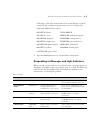
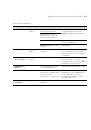
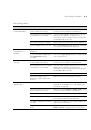
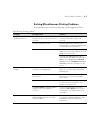
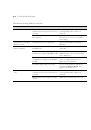
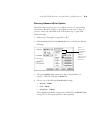
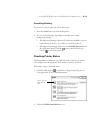
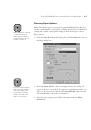
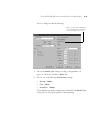
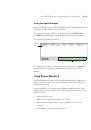
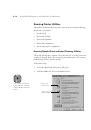
6. Choose one of the following Color Management configurations:
•
Color Adjustment
This configuration lets you specify individual values for adjusting
brightness, contrast, saturation, and CMY inks, or choose from the
four Color Adjustment modes, as shown in the table on page B-11.
When you print on EPSON backlight film, choose
Vivid
mode and
+10 Saturation
.
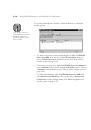
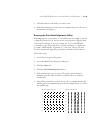
•
PhotoEnhance3
When you choose this configuration, you see a sample image that
reflects the settings you choose. See page B-11 for a description of
the available settings.
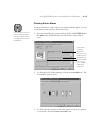
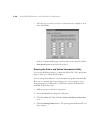
•
ColorSync
This configuration lets you select the
Epson Standard
profile,
created specifically for your printer. Don’t select any other printer
profile you may have on your system. Then choose from three
Rendering Intent settings for mapping colors to your printer’s
profile. See page B-11 for more information.
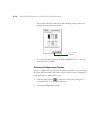
7. Click
Save Settings
if you want to have your advanced settings
available for reuse. Then type a name for the group of settings and click
Save
. The name is added to your list of custom settings.
8. When you’re finished setting advanced printer options, click
OK
.
 1
1
 2
2
 3
3
 4
4
 5
5
 6
6
 7
7
 8
8
 9
9
 10
10
 11
11
 12
12
 13
13
 14
14
 15
15
 16
16
 17
17
 18
18
 19
19
 20
20
 21
21
 22
22
 23
23
 24
24
 25
25
 26
26
 27
27
 28
28
 29
29
 30
30
 31
31
 32
32
 33
33
 34
34
 35
35
 36
36
 37
37
 38
38
 39
39
 40
40
 41
41
 42
42
 43
43
 44
44
 45
45
 46
46
 47
47
 48
48
 49
49
 50
50
 51
51
 52
52
 53
53
 54
54
 55
55
 56
56
 57
57
 58
58
 59
59
 60
60
 61
61
 62
62
 63
63
 64
64
 65
65
 66
66
 67
67
 68
68
 69
69
 70
70
 71
71
 72
72
 73
73
 74
74
 75
75
 76
76
 77
77
 78
78
 79
79
 80
80
 81
81
 82
82
 83
83
 84
84
 85
85
 86
86
 87
87
 88
88
 89
89
 90
90
 91
91
 92
92
 93
93
 94
94
 95
95
 96
96
 97
97
 98
98
 99
99
 100
100
 101
101
 102
102
 103
103
 104
104
 105
105
 106
106
 107
107
 108
108
 109
109
 110
110
 111
111
 112
112
 113
113
 114
114
 115
115
 116
116
 117
117
 118
118
 119
119
 120
120
 121
121
 122
122
 123
123
 124
124
 125
125
 126
126
 127
127
 128
128
 129
129
 130
130
 131
131
 132
132
 133
133
 134
134
 135
135
 136
136
 137
137
 138
138
 139
139
 140
140
 141
141
 142
142
 143
143