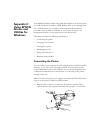
1-13
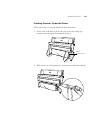
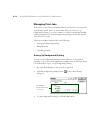
Handling Paper
|
1-13
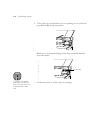
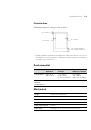
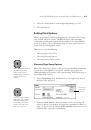
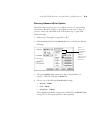
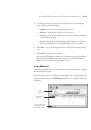
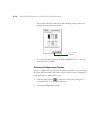
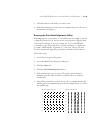
Printing Trim Lines
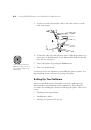
You can have trim lines printed on the right edge of your images or pages (if
you’re using auto cut) or on the right and bottom edge (if you’re not using
auto cut). Follow these steps:
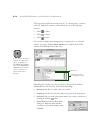
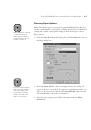
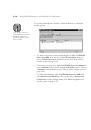
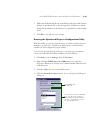
1. Press the
SelecType
button.
PRINTER SETTING MENU
appears on
the display.
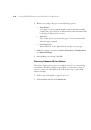
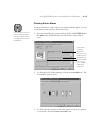
2. Press the
Item
button until
PAGE LINE=OFF
appears on the display.
3. Press the
+
button.
PAGE LINE=ON
appears on the display.
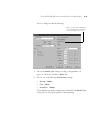
4. Press the
Enter
button to save the new setting.
5. Press the
SelecType
button to exit the Printer Setting menu.
If you’re using the RIP Station 5100 or the EPSON printer driver, you can
also specify trim lines through your print options. See the RIP Station 5100
User Guide
or Appendix B or C in this manual for more information.
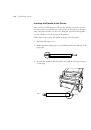
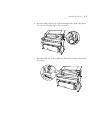
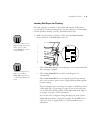
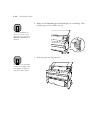
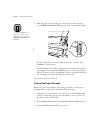
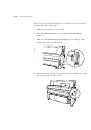
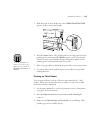
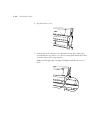
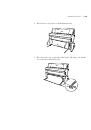
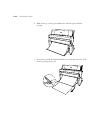
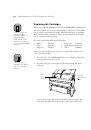
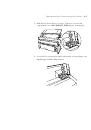
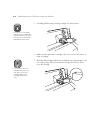
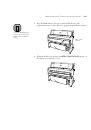
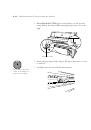
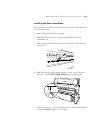
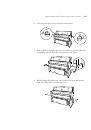
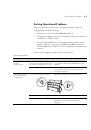
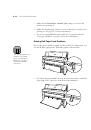
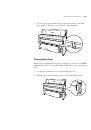
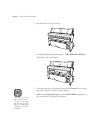
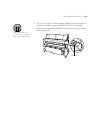
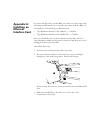
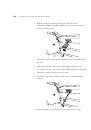
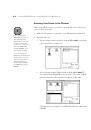
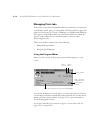
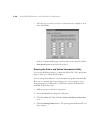
Using Cut Sheet Paper
You can print on many types of cut sheet paper and other media. If you’re
using stock more than 0.5 mm thick, see page 1-15 for additional
instructions.
The printer accepts sheets ranging from 11 × 17 inches to 44 × 62.2 inches.
You can leave your roll paper in the printer when you print on cut sheets;
make sure it is rolled up and fastened with the roll paper belt(s), as described
on page 1-8.
 1
1
 2
2
 3
3
 4
4
 5
5
 6
6
 7
7
 8
8
 9
9
 10
10
 11
11
 12
12
 13
13
 14
14
 15
15
 16
16
 17
17
 18
18
 19
19
 20
20
 21
21
 22
22
 23
23
 24
24
 25
25
 26
26
 27
27
 28
28
 29
29
 30
30
 31
31
 32
32
 33
33
 34
34
 35
35
 36
36
 37
37
 38
38
 39
39
 40
40
 41
41
 42
42
 43
43
 44
44
 45
45
 46
46
 47
47
 48
48
 49
49
 50
50
 51
51
 52
52
 53
53
 54
54
 55
55
 56
56
 57
57
 58
58
 59
59
 60
60
 61
61
 62
62
 63
63
 64
64
 65
65
 66
66
 67
67
 68
68
 69
69
 70
70
 71
71
 72
72
 73
73
 74
74
 75
75
 76
76
 77
77
 78
78
 79
79
 80
80
 81
81
 82
82
 83
83
 84
84
 85
85
 86
86
 87
87
 88
88
 89
89
 90
90
 91
91
 92
92
 93
93
 94
94
 95
95
 96
96
 97
97
 98
98
 99
99
 100
100
 101
101
 102
102
 103
103
 104
104
 105
105
 106
106
 107
107
 108
108
 109
109
 110
110
 111
111
 112
112
 113
113
 114
114
 115
115
 116
116
 117
117
 118
118
 119
119
 120
120
 121
121
 122
122
 123
123
 124
124
 125
125
 126
126
 127
127
 128
128
 129
129
 130
130
 131
131
 132
132
 133
133
 134
134
 135
135
 136
136
 137
137
 138
138
 139
139
 140
140
 141
141
 142
142
 143
143