C-11
Using EPSON Drivers and Utilities for Windows
|
C-11
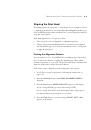
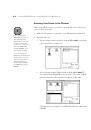
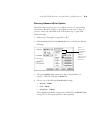
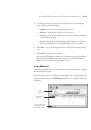
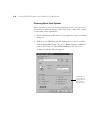
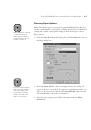
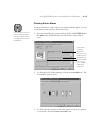
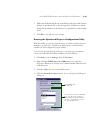
7. Click
Save Settings
if you want to have your advanced settings
available for reuse. Then type a name for the group of settings and click
Save
. The name is added to your list of custom settings.
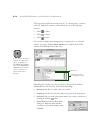
8. When you’re finished setting advanced printer options, click
OK
.
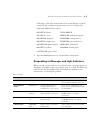
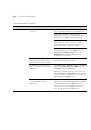
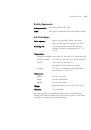
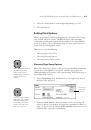
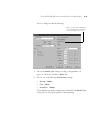
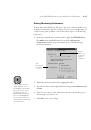
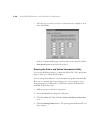
Color Management Settings
The following tables list the color management settings available when you
choose either Color Adjustment or Photo Enhance3.
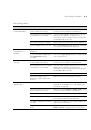
Color adjustment modes
Automatic
Analyzes the color information in your image and optimizes
color correction accordingly.
Photo-realistic
Produces sharper images and more vivid colors by
automatically adjusting the contrast, saturation, and
brightness. Corrects for overall under- or over-exposure of
the original image.
Vivid
Intensifies colors and lightens the midtones and highlights.
Best for print jobs with non-photographic images.
No Color
adjustment
Disables color management in the printer driver.
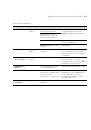
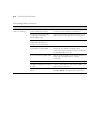
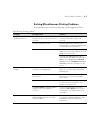
PhotoEnhance3 settings
Tone
Lets you choose from
Normal
for standard images,
Hard
for high contrast, and
Sepia
for an old-fashioned look.
Digital Camera
Correction
Corrects noise and other flaws common to digital camera
images.
Sharpness
Sharpens the focus of your image.
 1
1
 2
2
 3
3
 4
4
 5
5
 6
6
 7
7
 8
8
 9
9
 10
10
 11
11
 12
12
 13
13
 14
14
 15
15
 16
16
 17
17
 18
18
 19
19
 20
20
 21
21
 22
22
 23
23
 24
24
 25
25
 26
26
 27
27
 28
28
 29
29
 30
30
 31
31
 32
32
 33
33
 34
34
 35
35
 36
36
 37
37
 38
38
 39
39
 40
40
 41
41
 42
42
 43
43
 44
44
 45
45
 46
46
 47
47
 48
48
 49
49
 50
50
 51
51
 52
52
 53
53
 54
54
 55
55
 56
56
 57
57
 58
58
 59
59
 60
60
 61
61
 62
62
 63
63
 64
64
 65
65
 66
66
 67
67
 68
68
 69
69
 70
70
 71
71
 72
72
 73
73
 74
74
 75
75
 76
76
 77
77
 78
78
 79
79
 80
80
 81
81
 82
82
 83
83
 84
84
 85
85
 86
86
 87
87
 88
88
 89
89
 90
90
 91
91
 92
92
 93
93
 94
94
 95
95
 96
96
 97
97
 98
98
 99
99
 100
100
 101
101
 102
102
 103
103
 104
104
 105
105
 106
106
 107
107
 108
108
 109
109
 110
110
 111
111
 112
112
 113
113
 114
114
 115
115
 116
116
 117
117
 118
118
 119
119
 120
120
 121
121
 122
122
 123
123
 124
124
 125
125
 126
126
 127
127
 128
128
 129
129
 130
130
 131
131
 132
132
 133
133
 134
134
 135
135
 136
136
 137
137
 138
138
 139
139
 140
140
 141
141
 142
142
 143
143