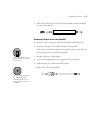
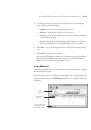
B-19
Using EPSON Drivers and Utilities for Macintosh
|
B-19
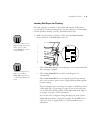
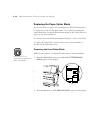
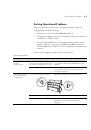
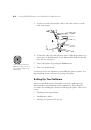
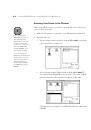
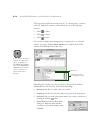
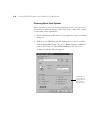
Running the Print Head Alignment Utility
If banding appears on your prints, or vertical lines are not straight, you need
to align the print head. You can also use the control panel to align the head
(as described in Chapter 3).
For best results, use 13
×
19-inch EPSON coated ink jet paper (short edge
first). You’ll need 4 sheets to complete the procedure, which includes
12 patterns of 7 rows each. The process takes about 15 minutes and aligns
the print head for all modes and resolutions.
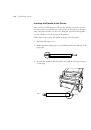
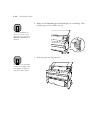
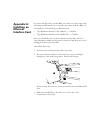
Follow these steps:
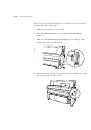
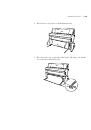
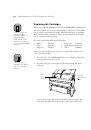
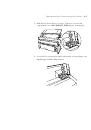
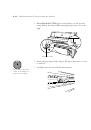
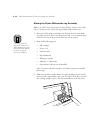
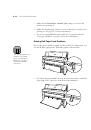
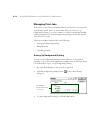
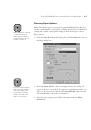
1. Load a sheet of paper in the printer.
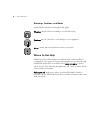
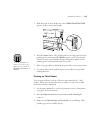
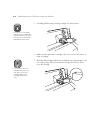
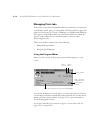
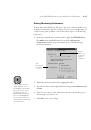
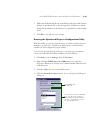
2. Click the utility button
in the Print or Page Setup dialog box of your
application.
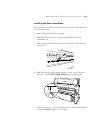
3. Click the
Print Head Alignment
button.
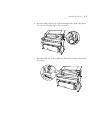
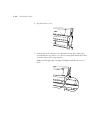
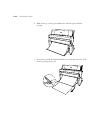
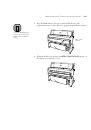
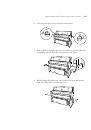
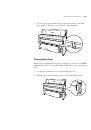
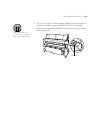
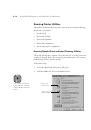
4. Follow the messages on your screen. The printer prints the head
alignment patterns. After each sheet is printed, remove it and load
another sheet.
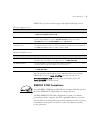
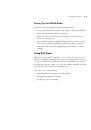
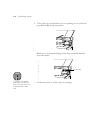
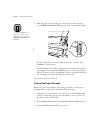
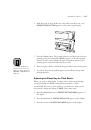
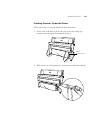
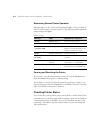
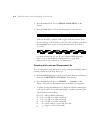
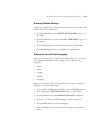
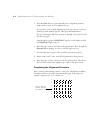
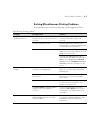
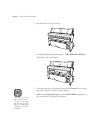
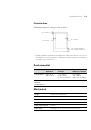
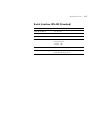
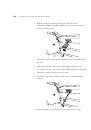
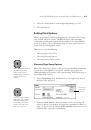
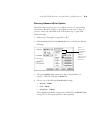
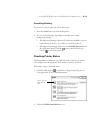
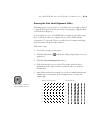
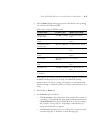
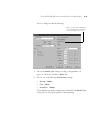
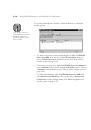
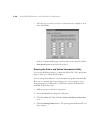
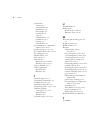
5. After all the patterns have printed, choose the row number that has the
smallest gap in each pattern. In the example below, row 4 has the
smallest gaps.
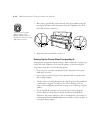
Note
Each pattern consists of
seven numbered rows.
1
2
3
4
5
6
7
1
2
3
4
5
6
7
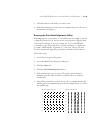
patterns #1-5, #7, #9-12
patterns #6, #8
 1
1
 2
2
 3
3
 4
4
 5
5
 6
6
 7
7
 8
8
 9
9
 10
10
 11
11
 12
12
 13
13
 14
14
 15
15
 16
16
 17
17
 18
18
 19
19
 20
20
 21
21
 22
22
 23
23
 24
24
 25
25
 26
26
 27
27
 28
28
 29
29
 30
30
 31
31
 32
32
 33
33
 34
34
 35
35
 36
36
 37
37
 38
38
 39
39
 40
40
 41
41
 42
42
 43
43
 44
44
 45
45
 46
46
 47
47
 48
48
 49
49
 50
50
 51
51
 52
52
 53
53
 54
54
 55
55
 56
56
 57
57
 58
58
 59
59
 60
60
 61
61
 62
62
 63
63
 64
64
 65
65
 66
66
 67
67
 68
68
 69
69
 70
70
 71
71
 72
72
 73
73
 74
74
 75
75
 76
76
 77
77
 78
78
 79
79
 80
80
 81
81
 82
82
 83
83
 84
84
 85
85
 86
86
 87
87
 88
88
 89
89
 90
90
 91
91
 92
92
 93
93
 94
94
 95
95
 96
96
 97
97
 98
98
 99
99
 100
100
 101
101
 102
102
 103
103
 104
104
 105
105
 106
106
 107
107
 108
108
 109
109
 110
110
 111
111
 112
112
 113
113
 114
114
 115
115
 116
116
 117
117
 118
118
 119
119
 120
120
 121
121
 122
122
 123
123
 124
124
 125
125
 126
126
 127
127
 128
128
 129
129
 130
130
 131
131
 132
132
 133
133
 134
134
 135
135
 136
136
 137
137
 138
138
 139
139
 140
140
 141
141
 142
142
 143
143