1-23
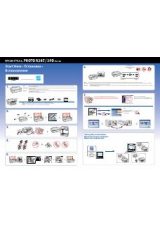
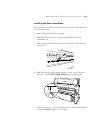
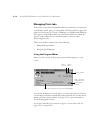
Handling Paper
|
1-23
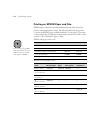
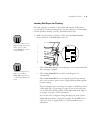
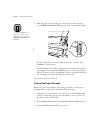
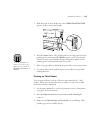
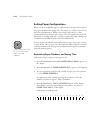
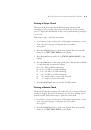
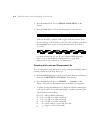
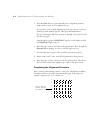
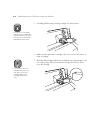
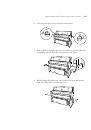
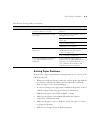
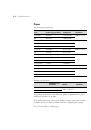
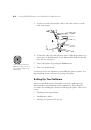
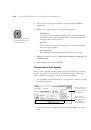
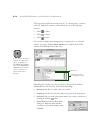
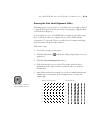
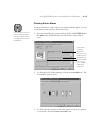
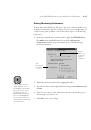
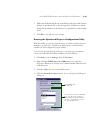
5. Examine the printed pattern to determine which set of lines is the
straightest (shows the smallest gap), and note the corresponding
number.
In the sample pattern, the lines under number 4 are the straightest.
6. Press the
+
or
-
button to select the number noted in step 5. Then press
the
Enter
button.
7. Press the
Item
button.
DRYING TIME=0 MIN
appears on the display.
Press the
+
or
-
button to select the time in minutes. Start with one
minute. If ink still smears, increase the drying time.
This is how long the print head will pause between passes to allow for
ink drying.
8. Press the
Pause
or
SelecType
button to exit the Paper Configuration
menu.
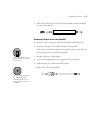
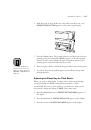
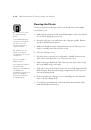
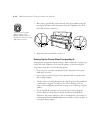
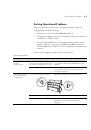
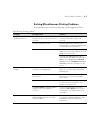
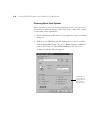
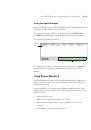
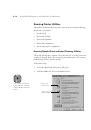
Selecting Registered Paper Settings
Once you have registered the drying time (and thickness) for a type of paper
or other media, you can select it whenever you print on that paper.
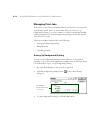
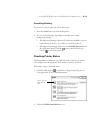
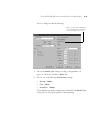
1. Press the
SelecType
button until
PAPER CONFIG. MENU
appears on
the display.
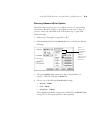
2. Press the
Item
button. You see
PAPER NUMBER=1.
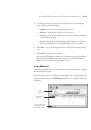
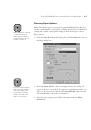
3. Press the
+
or
-
button to select the registered number you want to use.
Then press the
Enter
button.
4. Press the
Pause
or
SelecType
button to exit the Paper Configuration
menu.
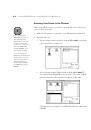
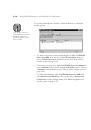
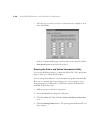
When you change media, make sure you select the correct setting.
If you are not sure what media setting is in effect, you can print a status
sheet, which shows the current settings. See page 2-3 for instructions.
 1
1
 2
2
 3
3
 4
4
 5
5
 6
6
 7
7
 8
8
 9
9
 10
10
 11
11
 12
12
 13
13
 14
14
 15
15
 16
16
 17
17
 18
18
 19
19
 20
20
 21
21
 22
22
 23
23
 24
24
 25
25
 26
26
 27
27
 28
28
 29
29
 30
30
 31
31
 32
32
 33
33
 34
34
 35
35
 36
36
 37
37
 38
38
 39
39
 40
40
 41
41
 42
42
 43
43
 44
44
 45
45
 46
46
 47
47
 48
48
 49
49
 50
50
 51
51
 52
52
 53
53
 54
54
 55
55
 56
56
 57
57
 58
58
 59
59
 60
60
 61
61
 62
62
 63
63
 64
64
 65
65
 66
66
 67
67
 68
68
 69
69
 70
70
 71
71
 72
72
 73
73
 74
74
 75
75
 76
76
 77
77
 78
78
 79
79
 80
80
 81
81
 82
82
 83
83
 84
84
 85
85
 86
86
 87
87
 88
88
 89
89
 90
90
 91
91
 92
92
 93
93
 94
94
 95
95
 96
96
 97
97
 98
98
 99
99
 100
100
 101
101
 102
102
 103
103
 104
104
 105
105
 106
106
 107
107
 108
108
 109
109
 110
110
 111
111
 112
112
 113
113
 114
114
 115
115
 116
116
 117
117
 118
118
 119
119
 120
120
 121
121
 122
122
 123
123
 124
124
 125
125
 126
126
 127
127
 128
128
 129
129
 130
130
 131
131
 132
132
 133
133
 134
134
 135
135
 136
136
 137
137
 138
138
 139
139
 140
140
 141
141
 142
142
 143
143