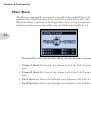
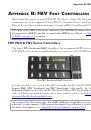
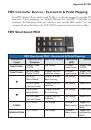
Appendix B: FBV Foot Controllers
B•2
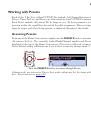
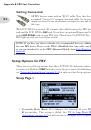
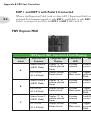
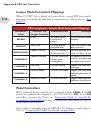
Getting Connected
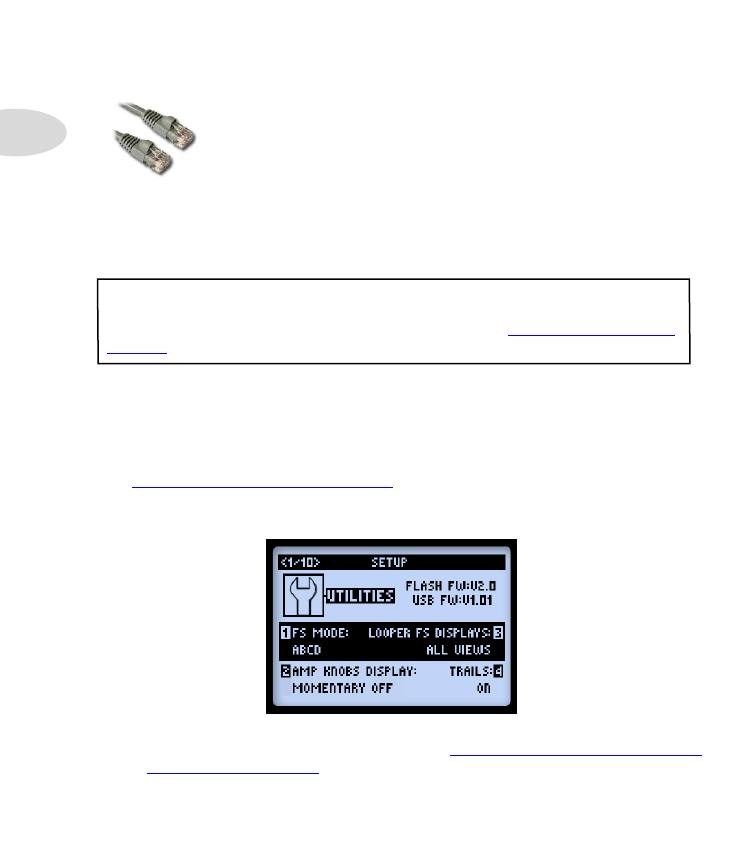
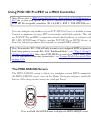
All FBV devices come with an “RJ-45” cable. Note that this cable is indeed
a standard “Category 5” computer network cable. So, in case you lost yours,
simply run down to any electronics or computer store and ask for a cable of
this type.
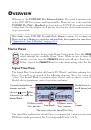
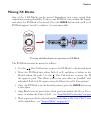
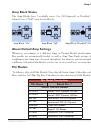
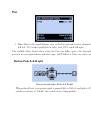
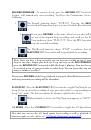
With POD HD Pro powered Off, connect this cable between the FBV device’s
TO AMP
jack and the POD HD Pro
FBV
jack. If you have an optional Expression Pedal, connect it
to the
EXP. PEDAL
jack on your FBV now. Then Power On POD HD Pro - You’ll see your
FBV light up, and you’re ready for action!
NOTE: If you have not done so already, it is recommended that you calibrate the Pedal
for your FBV device. Please see the
Pilot’s Handbook
that came with your FBV device,
or you can download it, or the
FBV Advanced Guide
, from
http://line6.com/support/
manuals/
.
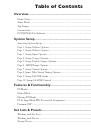
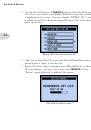
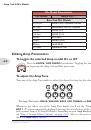
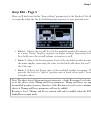
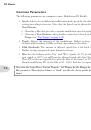
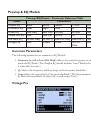
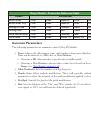
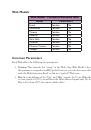
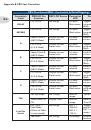
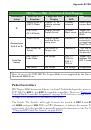
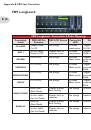
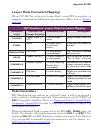
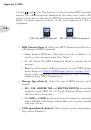
Setup Options for FBV
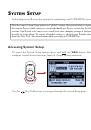
There are several Setup options that affect POD HD Pro behaviors when an FBV device
is connected. Hold the
VIEW
button to enter Setup to access the following options. (Also
“Accessing System Setup” on page 2•1
for info on other Setup options.)
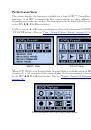
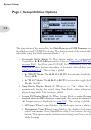
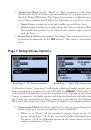
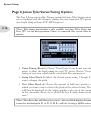
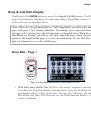
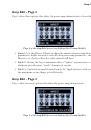
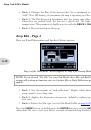
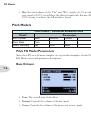
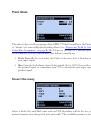
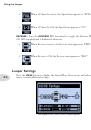
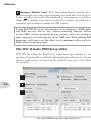
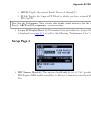
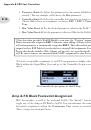
Setup Page 1
•
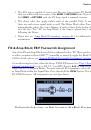
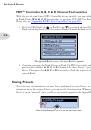
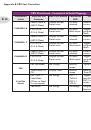
Footswitch Mode (Knob 1):
Configures the function of your FBV
A
,
B
,
C
&
D
footswitches. This setting is global. See
 1
1
 2
2
 3
3
 4
4
 5
5
 6
6
 7
7
 8
8
 9
9
 10
10
 11
11
 12
12
 13
13
 14
14
 15
15
 16
16
 17
17
 18
18
 19
19
 20
20
 21
21
 22
22
 23
23
 24
24
 25
25
 26
26
 27
27
 28
28
 29
29
 30
30
 31
31
 32
32
 33
33
 34
34
 35
35
 36
36
 37
37
 38
38
 39
39
 40
40
 41
41
 42
42
 43
43
 44
44
 45
45
 46
46
 47
47
 48
48
 49
49
 50
50
 51
51
 52
52
 53
53
 54
54
 55
55
 56
56
 57
57
 58
58
 59
59
 60
60
 61
61
 62
62
 63
63
 64
64
 65
65
 66
66
 67
67
 68
68
 69
69
 70
70
 71
71
 72
72
 73
73
 74
74
 75
75
 76
76
 77
77
 78
78
 79
79
 80
80
 81
81
 82
82
 83
83
 84
84
 85
85
 86
86
 87
87
 88
88
 89
89
 90
90
 91
91
 92
92
 93
93
 94
94
 95
95
 96
96
 97
97
 98
98
 99
99
 100
100
 101
101
 102
102
 103
103
 104
104
 105
105
 106
106
 107
107
 108
108
 109
109
 110
110
 111
111
 112
112
 113
113
 114
114
 115
115
 116
116
 117
117
 118
118
 119
119
 120
120
 121
121
 122
122
 123
123
 124
124
 125
125
 126
126
 127
127
 128
128
 129
129
 130
130
 131
131
 132
132
 133
133
 134
134
 135
135