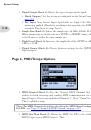
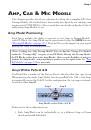
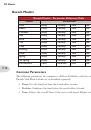
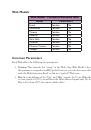
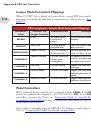
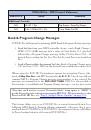
Amp, Cab & Mic Models
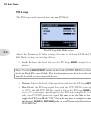
6•2
*Note: Some Amp/Preamp Models utilize more DSP than others. You may find it necessary
to bypass or remove some FX Models to enable two simultaneous Amps - see
for more info.
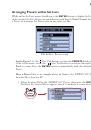
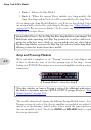
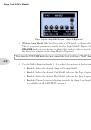
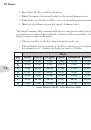
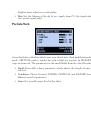
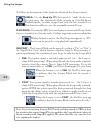
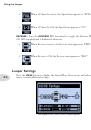
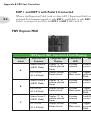
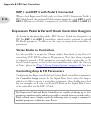
• The Amp Blocks cannot be moved
within the A or B Paths, however, it is possible
to move any FX Blocks before or after the Amps within either Path.
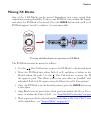
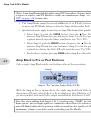
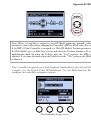
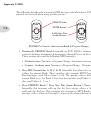
• Specific behaviors apply for moving an Amp Block
out of the parallel Paths A/B:
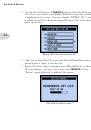
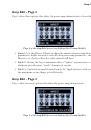
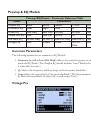
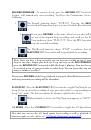
• Select Amp A, push the
MOVE
button, then the Nav. Pad button. This
removes Amp B from the tone and moves Amp A to the Post position, where it
is placed directly after the Mixer (and before any “Post” FX).
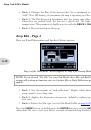
• Select Amp A, push the
MOVE
button, then press the Nav. Pad button. This
removes Amp B from the tone and moves Amp A to the Pre position, where it
is placed just before the Path A/B split (and after any “Pre” FX).
• For the above actions, pressing
MOVE
when Amp B is selected has no function.
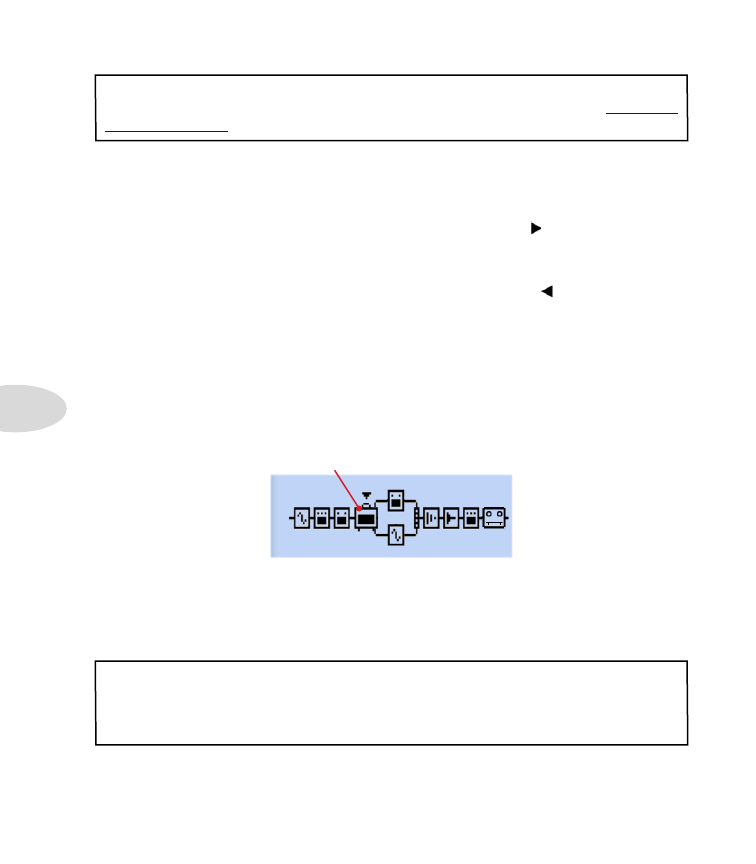
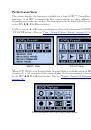
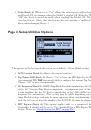
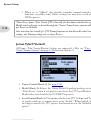
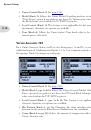
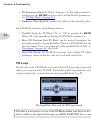
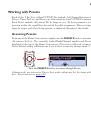
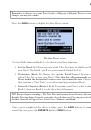
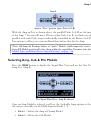
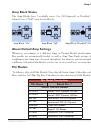
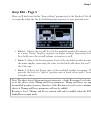
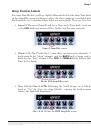
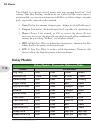
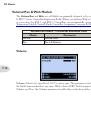
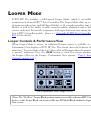
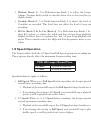
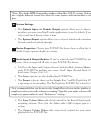
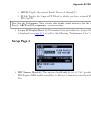
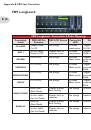
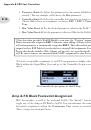
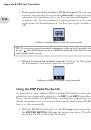
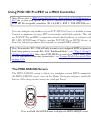
Amp Block in Pre or Post Positions
Only a single Amp Block can be used within either of these positions.
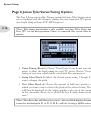
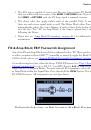
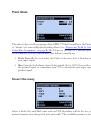
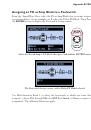
Amp A
Amp in “Pre” position (before Path A & B)
With the Amp in Pre, as shown above, the single amp feeds both Paths A & B. You can
always move FX into either Path A or B, in which case they’ll behave as “Post Amp” FX,
yet be in parallel, with each Path’s output controlled by the Mixer’s A & B Level and Pan.
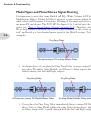
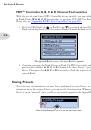
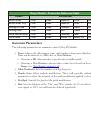
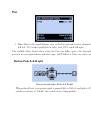
Note that when utilizing both Inputs 1 & 2 (or when using “SAME” for either of these
Input options) the two Input signals are combined to allow them to be fed into any Amp or
mono FX Model within the Pre position, which can result in a hot signal level. Reduce your
instruments’ volume as needed to avoid overloading your Pre Models.
 1
1
 2
2
 3
3
 4
4
 5
5
 6
6
 7
7
 8
8
 9
9
 10
10
 11
11
 12
12
 13
13
 14
14
 15
15
 16
16
 17
17
 18
18
 19
19
 20
20
 21
21
 22
22
 23
23
 24
24
 25
25
 26
26
 27
27
 28
28
 29
29
 30
30
 31
31
 32
32
 33
33
 34
34
 35
35
 36
36
 37
37
 38
38
 39
39
 40
40
 41
41
 42
42
 43
43
 44
44
 45
45
 46
46
 47
47
 48
48
 49
49
 50
50
 51
51
 52
52
 53
53
 54
54
 55
55
 56
56
 57
57
 58
58
 59
59
 60
60
 61
61
 62
62
 63
63
 64
64
 65
65
 66
66
 67
67
 68
68
 69
69
 70
70
 71
71
 72
72
 73
73
 74
74
 75
75
 76
76
 77
77
 78
78
 79
79
 80
80
 81
81
 82
82
 83
83
 84
84
 85
85
 86
86
 87
87
 88
88
 89
89
 90
90
 91
91
 92
92
 93
93
 94
94
 95
95
 96
96
 97
97
 98
98
 99
99
 100
100
 101
101
 102
102
 103
103
 104
104
 105
105
 106
106
 107
107
 108
108
 109
109
 110
110
 111
111
 112
112
 113
113
 114
114
 115
115
 116
116
 117
117
 118
118
 119
119
 120
120
 121
121
 122
122
 123
123
 124
124
 125
125
 126
126
 127
127
 128
128
 129
129
 130
130
 131
131
 132
132
 133
133
 134
134
 135
135