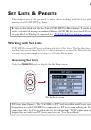
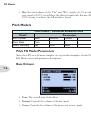
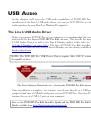
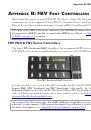
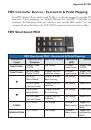
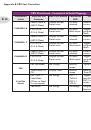
Appendix B: FBV Foot Controllers
B•18
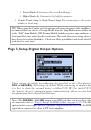
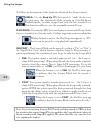
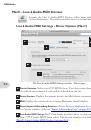
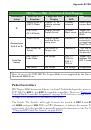
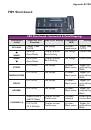
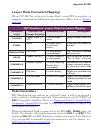
•
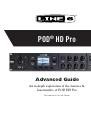
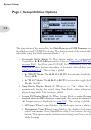
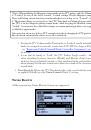
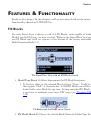
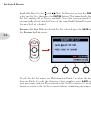
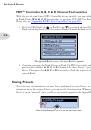
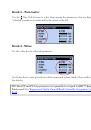
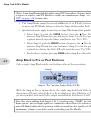
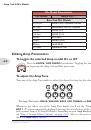
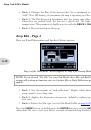
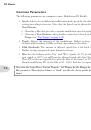
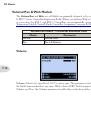
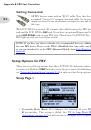
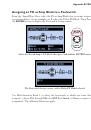
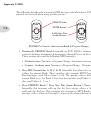
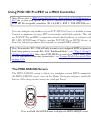
Parameter (Knob 1):
Select the parameter for the current Model that you want to
control.* For our example, we’ll choose the
Mix
parameter.
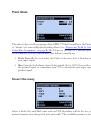
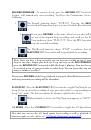
•
Controller (Knob 2):
Select the controller that you want to assign to the parameter.
Choose
Off
to have no assignment, or choose
EXP 1
,
EXP 2
,
Variax Vol
or
Variax
Tone
.
•
Min. Value (Knob 3):
Set the desired parameter value for the Pedal’s “heel” position.
•
Max. Value (Knob 4):
Set the parameter value you’d like for the Pedal’s “toe” position.
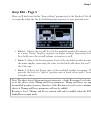
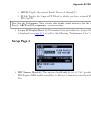
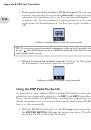
* Note that when you add a Wah FX Model to your tone, the “Position” parameter for the
Wah is automatically assigned to
EXP 1
. Likewise, when adding a Volume or Pan FX Model,
its Position parameter is automatically assigned to
EXP 2
. This will result in multiple items
assigned to these EXP Pedals if you already have existing Pedal assignments. For all Factory
Presets that already include a Wah, Volume or Pan, these are typically already assigned as
well. Be sure to remove any unwanted Model’s EXP assignment for your Preset.
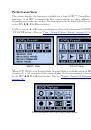
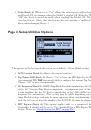
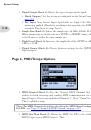
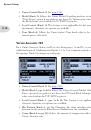
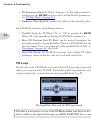
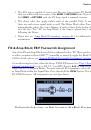
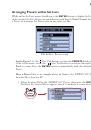
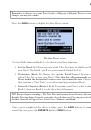
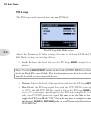
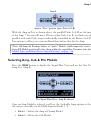
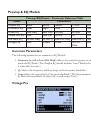
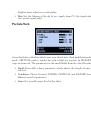
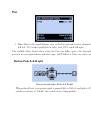
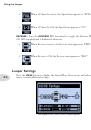
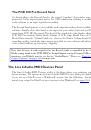
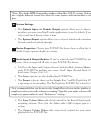
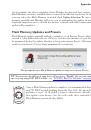
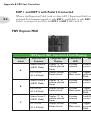
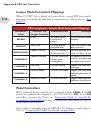
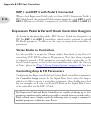
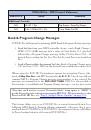
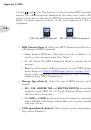
To create a controller assignment to an FX Loop parameter, simply select the FX Loop
Block within the Signal Flow View and go to the Controller Assign screen, as described
above.
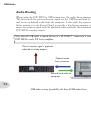
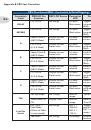
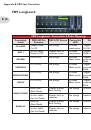
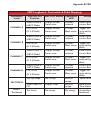
The Controller Assign options for the FX Loop
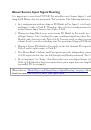
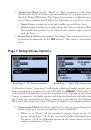
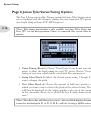
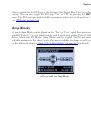
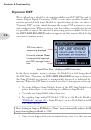
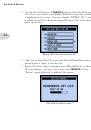
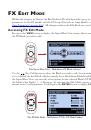
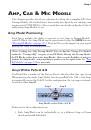
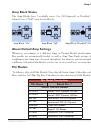
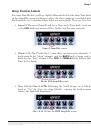
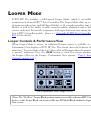
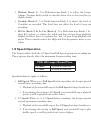
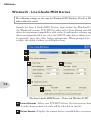
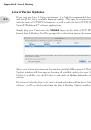
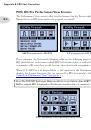
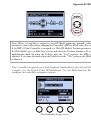
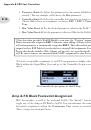
Amp & FX Block Footswitch Assignment
FBV footswitches, as well as the on-board Pedal’s “Toe Switch,” can be configured to
toggle any of the Amp or FX Blocks On/Off. You can reference the current Preset’s FX
footswitch assignments within the
Performance View
These settings are saved per Preset.
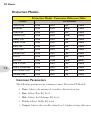
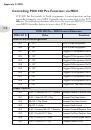
 1
1
 2
2
 3
3
 4
4
 5
5
 6
6
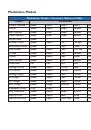
 7
7
 8
8
 9
9
 10
10
 11
11
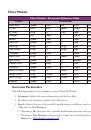
 12
12
 13
13
 14
14
 15
15
 16
16
 17
17
 18
18
 19
19
 20
20
 21
21
 22
22
 23
23
 24
24
 25
25
 26
26
 27
27
 28
28
 29
29
 30
30
 31
31
 32
32
 33
33
 34
34
 35
35
 36
36
 37
37
 38
38
 39
39
 40
40
 41
41
 42
42
 43
43
 44
44
 45
45
 46
46
 47
47
 48
48
 49
49
 50
50
 51
51
 52
52
 53
53
 54
54
 55
55
 56
56
 57
57
 58
58
 59
59
 60
60
 61
61
 62
62
 63
63
 64
64
 65
65
 66
66
 67
67
 68
68
 69
69
 70
70
 71
71
 72
72
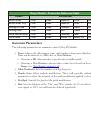 73
73
 74
74
 75
75
 76
76
 77
77
 78
78
 79
79
 80
80
 81
81
 82
82
 83
83
 84
84
 85
85
 86
86
 87
87
 88
88
 89
89
 90
90
 91
91
 92
92
 93
93
 94
94
 95
95
 96
96
 97
97
 98
98
 99
99
 100
100
 101
101
 102
102
 103
103
 104
104
 105
105
 106
106
 107
107
 108
108
 109
109
 110
110
 111
111
 112
112
 113
113
 114
114
 115
115
 116
116
 117
117
 118
118
 119
119
 120
120
 121
121
 122
122
 123
123
 124
124
 125
125
 126
126
 127
127
 128
128
 129
129
 130
130
 131
131
 132
132
 133
133
 134
134
 135
135