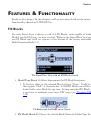
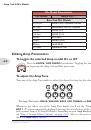
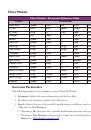
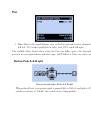
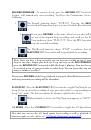
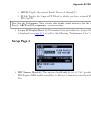
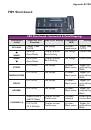
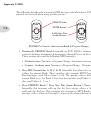
System Setup
2•11
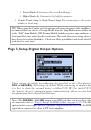
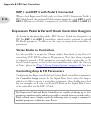
•
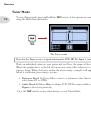
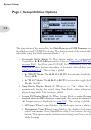
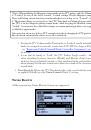
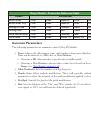
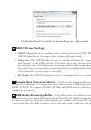
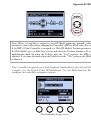
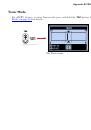
Tempo Sync (Knob 3):
The “Speed” or “Time” parameters of all tempo-based FX
(Modulation, Pitch & Delays) can optionally be set to a note value to follow the
(Knob 4) Tempo BPM value. This Tempo Sync option is a global setting that allows
you to choose whether the FX follow the Tap Tempo as a per-Preset value or globally.
•
Preset:
Tempo settings are saved and recalled on a per Preset basis.
•
Global:
Tempo information stored within any Preset is ignored. When saving a
Preset while this option is set to “Global,” the current tempo value will be saved
with the Preset.
•
Tempo (Knob 4):
Enter in a specific “Tap Tempo” for your current Preset (as opposed
to pressing rhythmically on the
TAP
button). This value is saved individually per
Preset.
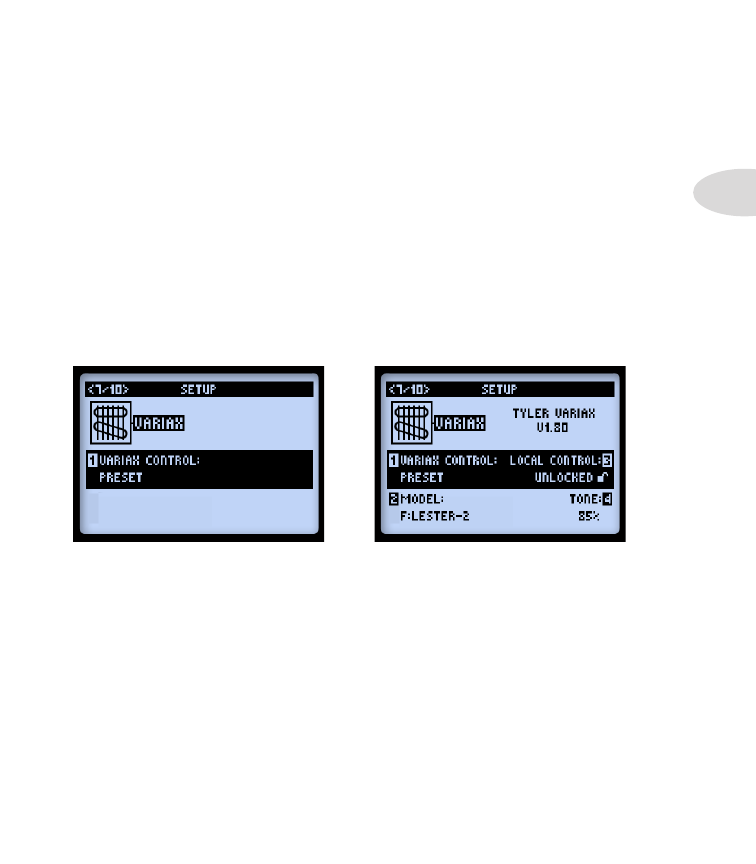
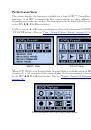
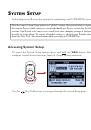
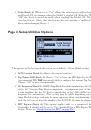
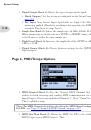
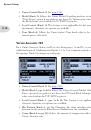
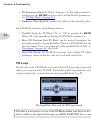
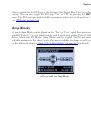
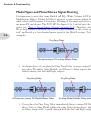
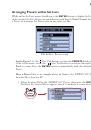
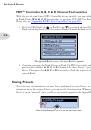
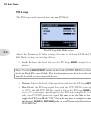
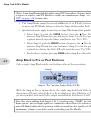
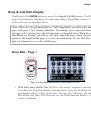
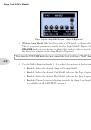
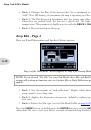
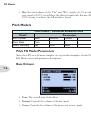
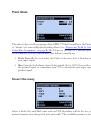
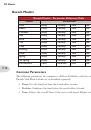
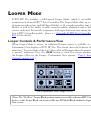
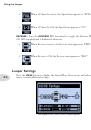
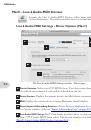
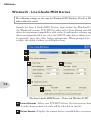
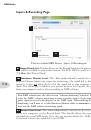
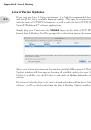
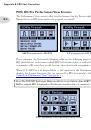
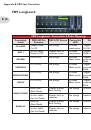
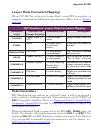
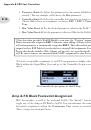
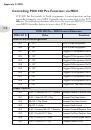
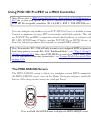
Page 7, Setup: Variax Options
Setup Page 7 - No Variax connected
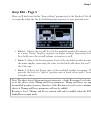
Setup Page 7 - James Tyler Variax connected
As illustrated above, Setup page 7 will display additional, model-specific options when a
Variax instrument is connected to the POD HD Pro
VARIAX
(VDI) input. The specific
Variax family and firmware version are displayed at the top right of the screen when the
Variax is connected. Available options and behaviors displayed will differ depending on
the Variax type and model you have connected, as described in the following sections.
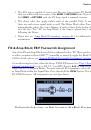
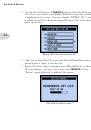
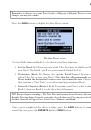
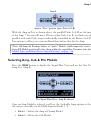
With any Variax connected to the VDI input, the Knob 1 option functionality is as follows.
•
Variax Control (Knob 1):
Choose whether you want to assign all your Variax settings
on this Setup pg 7 screen on a per Preset basis or Globally.*
• When set to “Preset,” all the parameter settings shown on the Variax Setup
screens (Setup pages 7 & 8) are saved and recalled individually per POD HD
Pro preset. You’ll see additional options in the screen when you have a Variax
connected and choose “Preset.”
 1
1
 2
2
 3
3
 4
4
 5
5
 6
6
 7
7
 8
8
 9
9
 10
10
 11
11
 12
12
 13
13
 14
14
 15
15
 16
16
 17
17
 18
18
 19
19
 20
20
 21
21
 22
22
 23
23
 24
24
 25
25
 26
26
 27
27
 28
28
 29
29
 30
30
 31
31
 32
32
 33
33
 34
34
 35
35
 36
36
 37
37
 38
38
 39
39
 40
40
 41
41
 42
42
 43
43
 44
44
 45
45
 46
46
 47
47
 48
48
 49
49
 50
50
 51
51
 52
52
 53
53
 54
54
 55
55
 56
56
 57
57
 58
58
 59
59
 60
60
 61
61
 62
62
 63
63
 64
64
 65
65
 66
66
 67
67
 68
68
 69
69
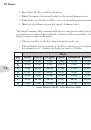 70
70
 71
71
 72
72
 73
73
 74
74
 75
75
 76
76
 77
77
 78
78
 79
79
 80
80
 81
81
 82
82
 83
83
 84
84
 85
85
 86
86
 87
87
 88
88
 89
89
 90
90
 91
91
 92
92
 93
93
 94
94
 95
95
 96
96
 97
97
 98
98
 99
99
 100
100
 101
101
 102
102
 103
103
 104
104
 105
105
 106
106
 107
107
 108
108
 109
109
 110
110
 111
111
 112
112
 113
113
 114
114
 115
115
 116
116
 117
117
 118
118
 119
119
 120
120
 121
121
 122
122
 123
123
 124
124
 125
125
 126
126
 127
127
 128
128
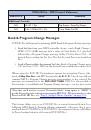 129
129
 130
130
 131
131
 132
132
 133
133
 134
134
 135
135