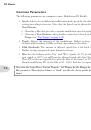
Features & Functionality
3•8
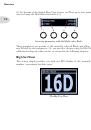
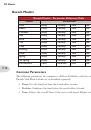
Dynamic DSP
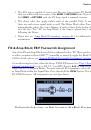
We’ve offered up a whole lot of sound possibilities in POD HD Pro and it can take some
serious Digital Signal Processing (DSP) to run these goodies. Rather than limit your
creative potential with fewer Models or signal routing options, we chose to implement a
“Dynamic DSP” system, which dynamically assigns DSP resources to accommodate your
tone configurations. When creating a tone that utilizes several heavy-hitting DSP Models,
it is possible to surpass the amount of processing power available. In these cases, you’ll see
the
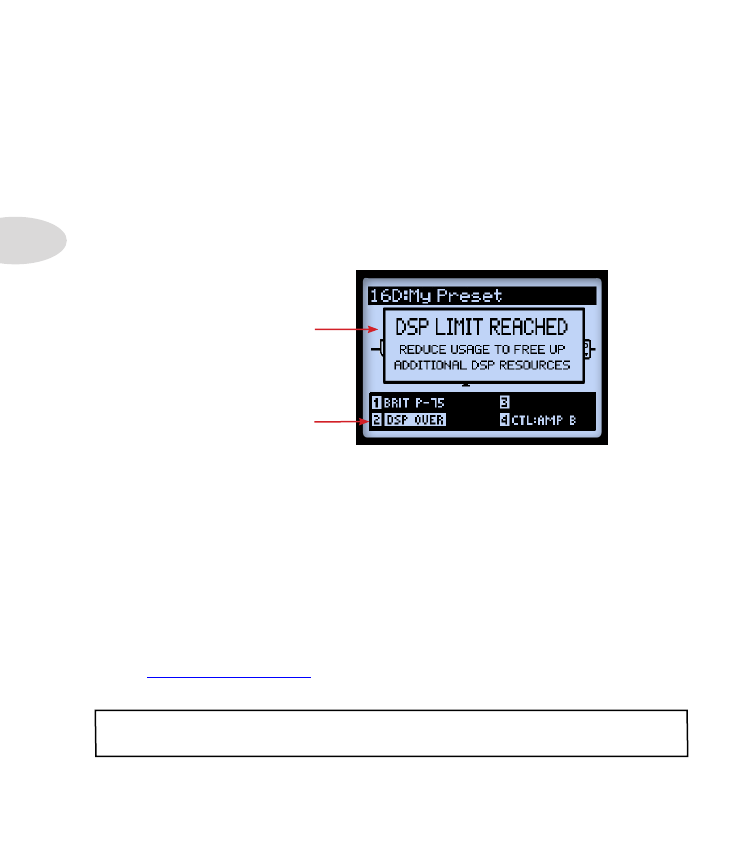
DSP LIMIT REACHED
indicator appear, and the current Model is bypassed to allow
your tone to remain active.
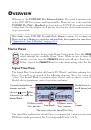
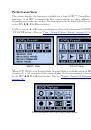
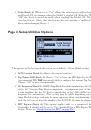
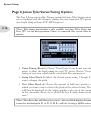
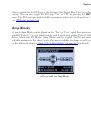
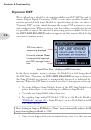
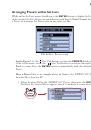
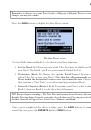
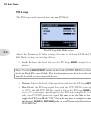
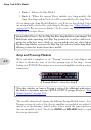
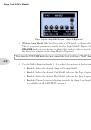
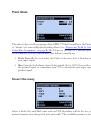
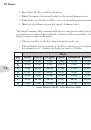
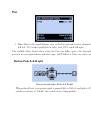
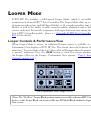
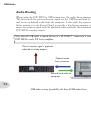
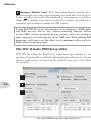
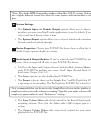
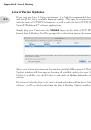
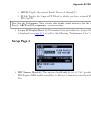
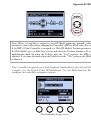
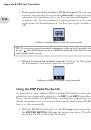
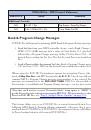
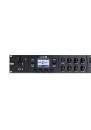
Currently selected Model
is automatically bypassed,
with DSP message shown
here
DSP Limit alert is
temporarily displayed
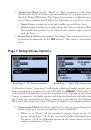
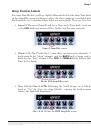
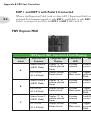
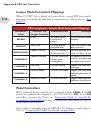
Signal Flow View - displaying DSP Limit alert
In the above example, trying to change the Model for a 2nd Amp placed our tone over
the DSP limit. Therefore, the
DSP LIMIT REACHED
message is shown temporarily, and
the Amp B Model we selected is automatically bypassed, as indicated by the
DSP Over
message. When the DSP Limit is reached, you have a few options to free up DSP resources.
• Try using different Amp Models. Some of the HD Amp Models require more DSP
power than others, so try switching to a different Amp Model.
• Use only one Amp Model rather than two.
• Try toggling Amp and/or FX Models “Off” or set the Block’s Model to “None,” (see
). Some FX types, such as Pitch Shifters and Reverbs, utilize
DSP more heavily.
Note: Setting an Amp or FX Block to “None” more substantially reduces the Block’s DSP
usage than toggling its Model to “Off.”
• Once you’re happy with your customized tone, save it so that you can recall it later.
 1
1
 2
2
 3
3
 4
4
 5
5
 6
6
 7
7
 8
8
 9
9
 10
10
 11
11
 12
12
 13
13
 14
14
 15
15
 16
16
 17
17
 18
18
 19
19
 20
20
 21
21
 22
22
 23
23
 24
24
 25
25
 26
26
 27
27
 28
28
 29
29
 30
30
 31
31
 32
32
 33
33
 34
34
 35
35
 36
36
 37
37
 38
38
 39
39
 40
40
 41
41
 42
42
 43
43
 44
44
 45
45
 46
46
 47
47
 48
48
 49
49
 50
50
 51
51
 52
52
 53
53
 54
54
 55
55
 56
56
 57
57
 58
58
 59
59
 60
60
 61
61
 62
62
 63
63
 64
64
 65
65
 66
66
 67
67
 68
68
 69
69
 70
70
 71
71
 72
72
 73
73
 74
74
 75
75
 76
76
 77
77
 78
78
 79
79
 80
80
 81
81
 82
82
 83
83
 84
84
 85
85
 86
86
 87
87
 88
88
 89
89
 90
90
 91
91
 92
92
 93
93
 94
94
 95
95
 96
96
 97
97
 98
98
 99
99
 100
100
 101
101
 102
102
 103
103
 104
104
 105
105
 106
106
 107
107
 108
108
 109
109
 110
110
 111
111
 112
112
 113
113
 114
114
 115
115
 116
116
 117
117
 118
118
 119
119
 120
120
 121
121
 122
122
 123
123
 124
124
 125
125
 126
126
 127
127
 128
128
 129
129
 130
130
 131
131
 132
132
 133
133
 134
134
 135
135