119
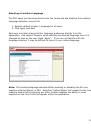
Configuring the PSV Agent
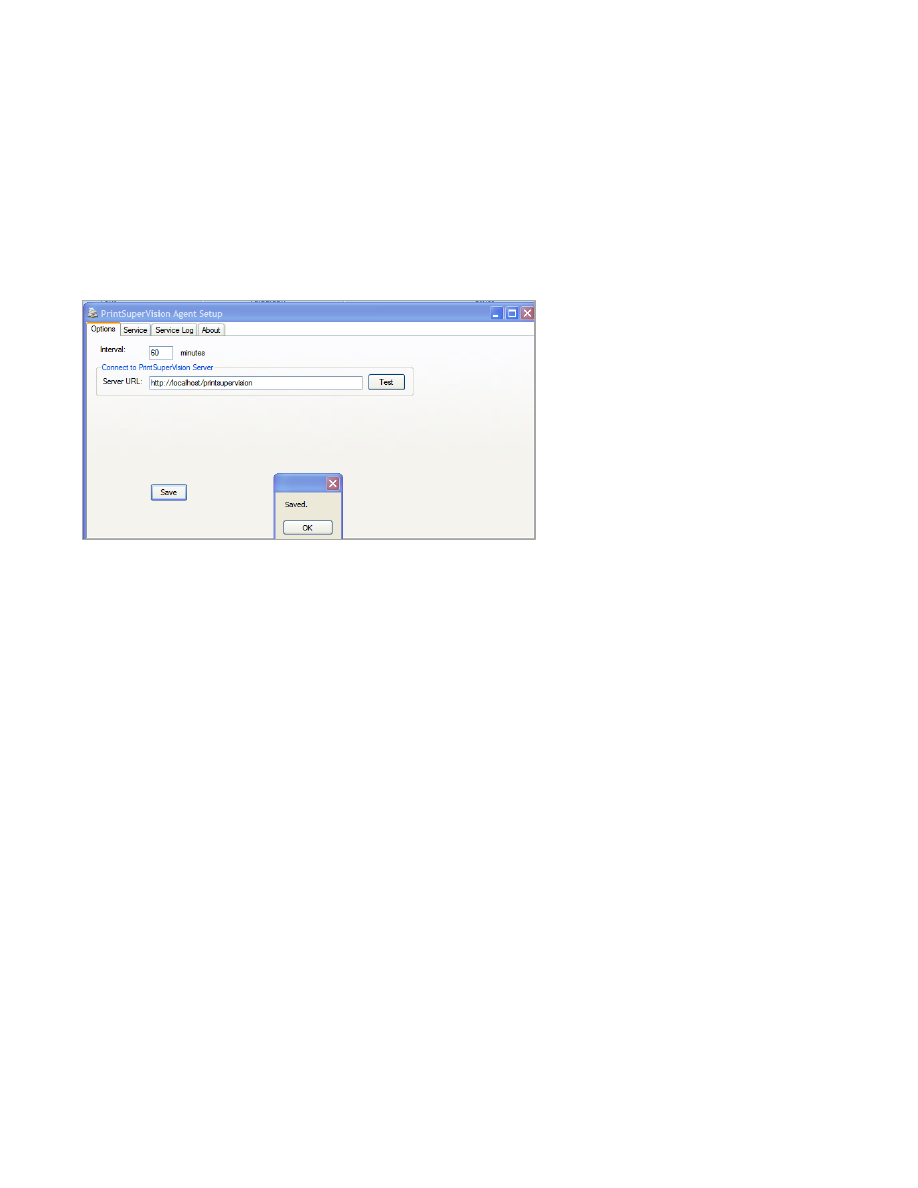
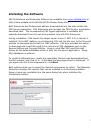
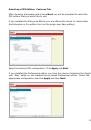
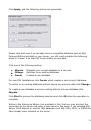
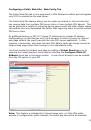
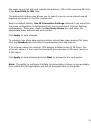
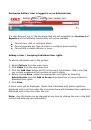
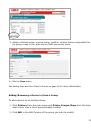
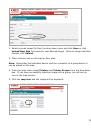
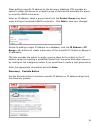
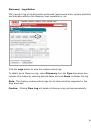
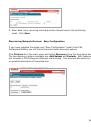
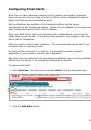
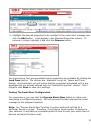
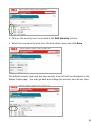
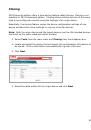
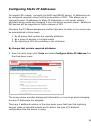
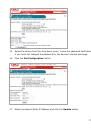
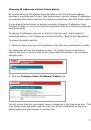
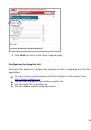
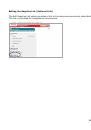
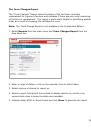
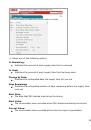
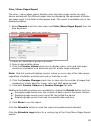
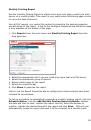
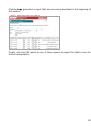
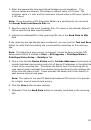
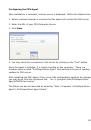
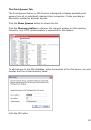
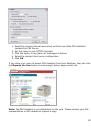
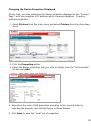
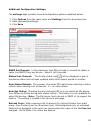
After installation is complete, a setup screen is displayed. Within the Options tab:
1.
Select a desired interval in minutes that the agent will contact the PSV server
2.
Enter the URL of your PSV Enterprise Server
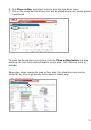
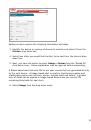
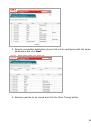
3.
Click
Save
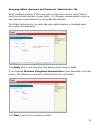
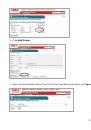
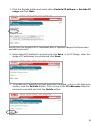
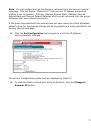
4.
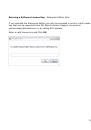
You may check the
connection to the server by clicking on the “Test” button.
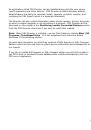
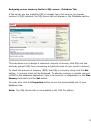
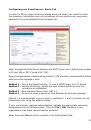
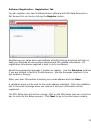
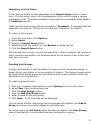
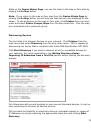
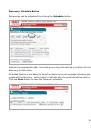
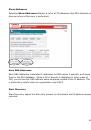
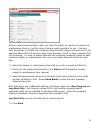
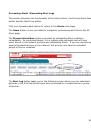
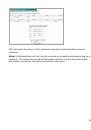
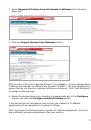
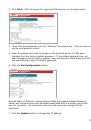
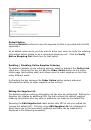
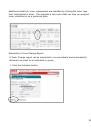
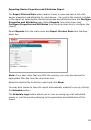
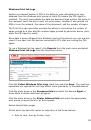
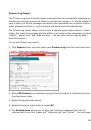
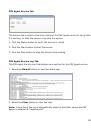
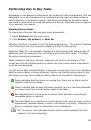
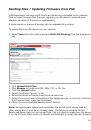
Once the Agent is installed, it is mostly invisible on the computer. There is a
windows service called "PrintSuperVision Agent" that performs the job of sending
updates to PSV server.
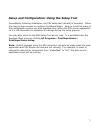
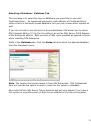
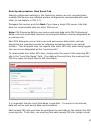
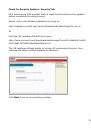
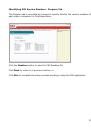
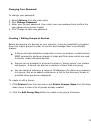
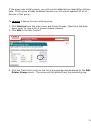
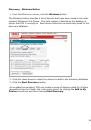
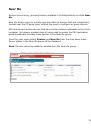
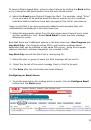
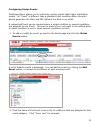
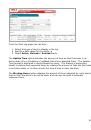
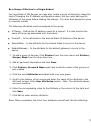
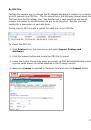
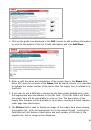
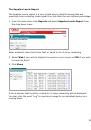
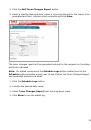
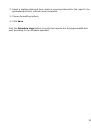
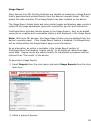
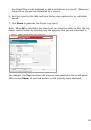
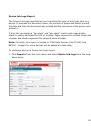
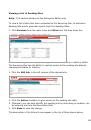
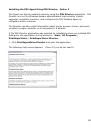
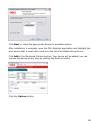
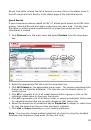
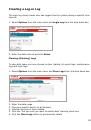
After installing the PSV Agent, if the server URL configuration needs to be changed,
you may do so from the command line: run “c:
\program files\PrintSuperVision
Agent\
PSVDA3.exe setup”
.
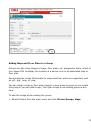
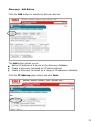
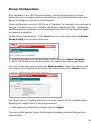
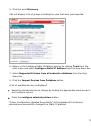
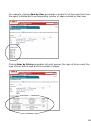
The Setup can also be launched by selecting
“Start | Programs | PrintSuperVision
Agent | PrintSuperVision Agent Setup”.
 1
1
 2
2
 3
3
 4
4
 5
5
 6
6
 7
7
 8
8
 9
9
 10
10
 11
11
 12
12
 13
13
 14
14
 15
15
 16
16
 17
17
 18
18
 19
19
 20
20
 21
21
 22
22
 23
23
 24
24
 25
25
 26
26
 27
27
 28
28
 29
29
 30
30
 31
31
 32
32
 33
33
 34
34
 35
35
 36
36
 37
37
 38
38
 39
39
 40
40
 41
41
 42
42
 43
43
 44
44
 45
45
 46
46
 47
47
 48
48
 49
49
 50
50
 51
51
 52
52
 53
53
 54
54
 55
55
 56
56
 57
57
 58
58
 59
59
 60
60
 61
61
 62
62
 63
63
 64
64
 65
65
 66
66
 67
67
 68
68
 69
69
 70
70
 71
71
 72
72
 73
73
 74
74
 75
75
 76
76
 77
77
 78
78
 79
79
 80
80
 81
81
 82
82
 83
83
 84
84
 85
85
 86
86
 87
87
 88
88
 89
89
 90
90
 91
91
 92
92
 93
93
 94
94
 95
95
 96
96
 97
97
 98
98
 99
99
 100
100
 101
101
 102
102
 103
103
 104
104
 105
105
 106
106
 107
107
 108
108
 109
109
 110
110
 111
111
 112
112
 113
113
 114
114
 115
115
 116
116
 117
117
 118
118
 119
119
 120
120
 121
121
 122
122
 123
123
 124
124
 125
125
 126
126
 127
127
 128
128
 129
129
 130
130
 131
131
 132
132
 133
133
 134
134
 135
135
 136
136
 137
137
 138
138
 139
139
 140
140