30
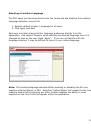
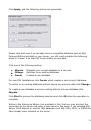
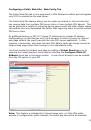
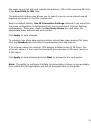
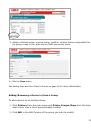
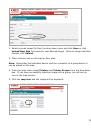
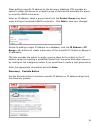
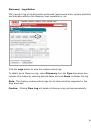
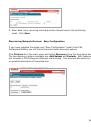
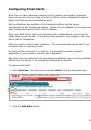
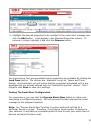
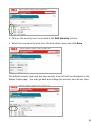
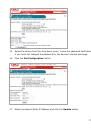
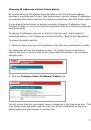
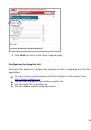
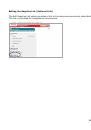
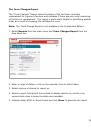
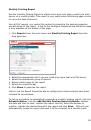
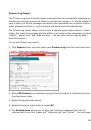
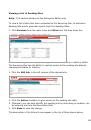
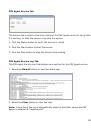
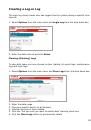
Importing a List of Users
It may also be helpful to take advantage of the
Import Users
feature to save
time. You can import users into the application from a text file using a comma
separated format. The fields available for data import are the same fields listed in
the
Add User
section.
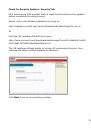
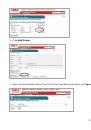
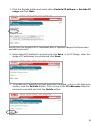
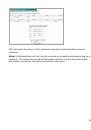
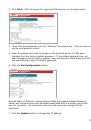
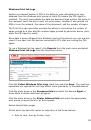
Fields cannot be left empty with the exception of
Password
. If passwords are not
supplied in the text file
, PSV will set it to the word “
password
” by default.
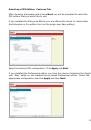
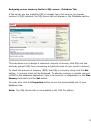
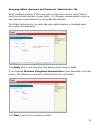
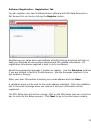
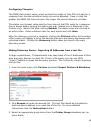
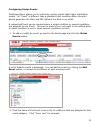
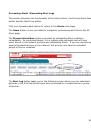
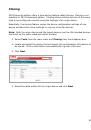
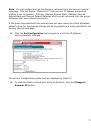
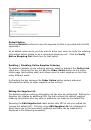
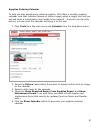
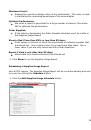
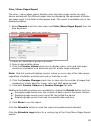
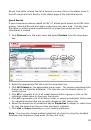
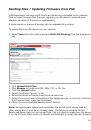
To import a list of users:
1.
From the main menu click
Options
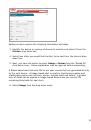
2.
Select
Users
3.
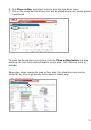
Select the
Import Users
button
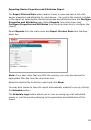
4.
Specify the text file location or click
Browse
to locate the file
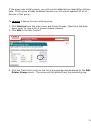
5.
Click the
Import Users
button.
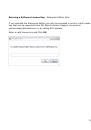
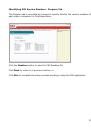
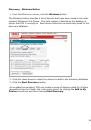
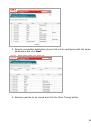
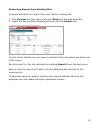
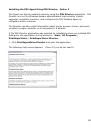
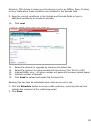
PSV will add users one by one into the application. When complete, the number of
users imported successfully will be displayed as well as details of any errors that
may have occurred.
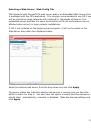
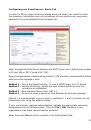
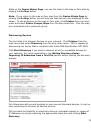
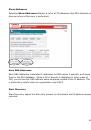
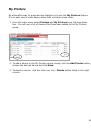
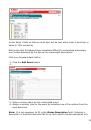
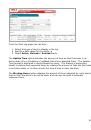
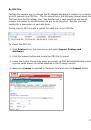
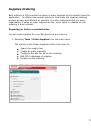
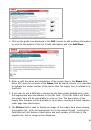
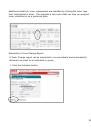
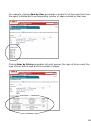
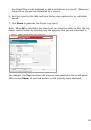
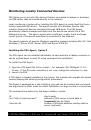
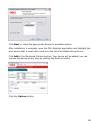
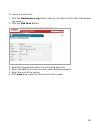
Creating User Groups
In large organizations it may be helpful to organize users into groups based on
admin status, user status or by any number of criteria. This feature should not be
confused with creating groups of print devices which is also possible in PSV and
described in the next section.
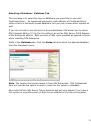
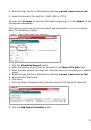
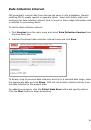
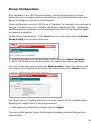
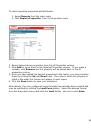
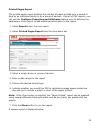
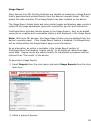
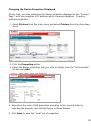
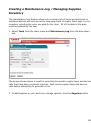
To create a group of users:
1.
C
lick your browser’s back button or select
Options
from the main menu
2.
Select
User
from the drop down box.
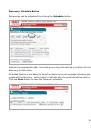
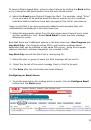
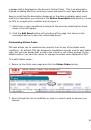
3.
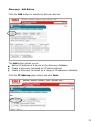
Click the
User Groups
button
4.
Click the
Add User Group
button
5.
Enter a name for the user group
6.
Click
Save.
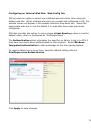
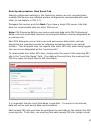
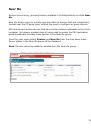
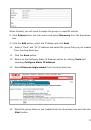
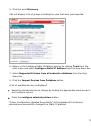
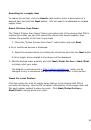
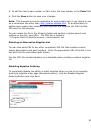
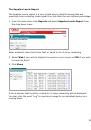
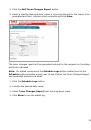
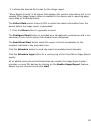
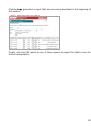
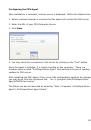
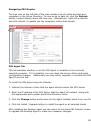
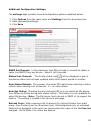
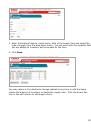
A list of groups will be displayed.
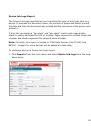
You will notice that the new group name is automatically added to the
Add to
Group
drop down menu when adding an individual user.
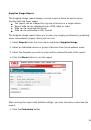
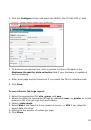
For convenience, the
All Users
button has been provided in the
User Groups
area to help identify if an individual has been assigned to a group.
 1
1
 2
2
 3
3
 4
4
 5
5
 6
6
 7
7
 8
8
 9
9
 10
10
 11
11
 12
12
 13
13
 14
14
 15
15
 16
16
 17
17
 18
18
 19
19
 20
20
 21
21
 22
22
 23
23
 24
24
 25
25
 26
26
 27
27
 28
28
 29
29
 30
30
 31
31
 32
32
 33
33
 34
34
 35
35
 36
36
 37
37
 38
38
 39
39
 40
40
 41
41
 42
42
 43
43
 44
44
 45
45
 46
46
 47
47
 48
48
 49
49
 50
50
 51
51
 52
52
 53
53
 54
54
 55
55
 56
56
 57
57
 58
58
 59
59
 60
60
 61
61
 62
62
 63
63
 64
64
 65
65
 66
66
 67
67
 68
68
 69
69
 70
70
 71
71
 72
72
 73
73
 74
74
 75
75
 76
76
 77
77
 78
78
 79
79
 80
80
 81
81
 82
82
 83
83
 84
84
 85
85
 86
86
 87
87
 88
88
 89
89
 90
90
 91
91
 92
92
 93
93
 94
94
 95
95
 96
96
 97
97
 98
98
 99
99
 100
100
 101
101
 102
102
 103
103
 104
104
 105
105
 106
106
 107
107
 108
108
 109
109
 110
110
 111
111
 112
112
 113
113
 114
114
 115
115
 116
116
 117
117
 118
118
 119
119
 120
120
 121
121
 122
122
 123
123
 124
124
 125
125
 126
126
 127
127
 128
128
 129
129
 130
130
 131
131
 132
132
 133
133
 134
134
 135
135
 136
136
 137
137
 138
138
 139
139
 140
140